Work Order Management User Manual
| Document Version | Content Revision | Compiled By | Revision Date |
|---|---|---|---|
| V1 | Draft | Shengfei | 2025-08-19 |
Table of Contents
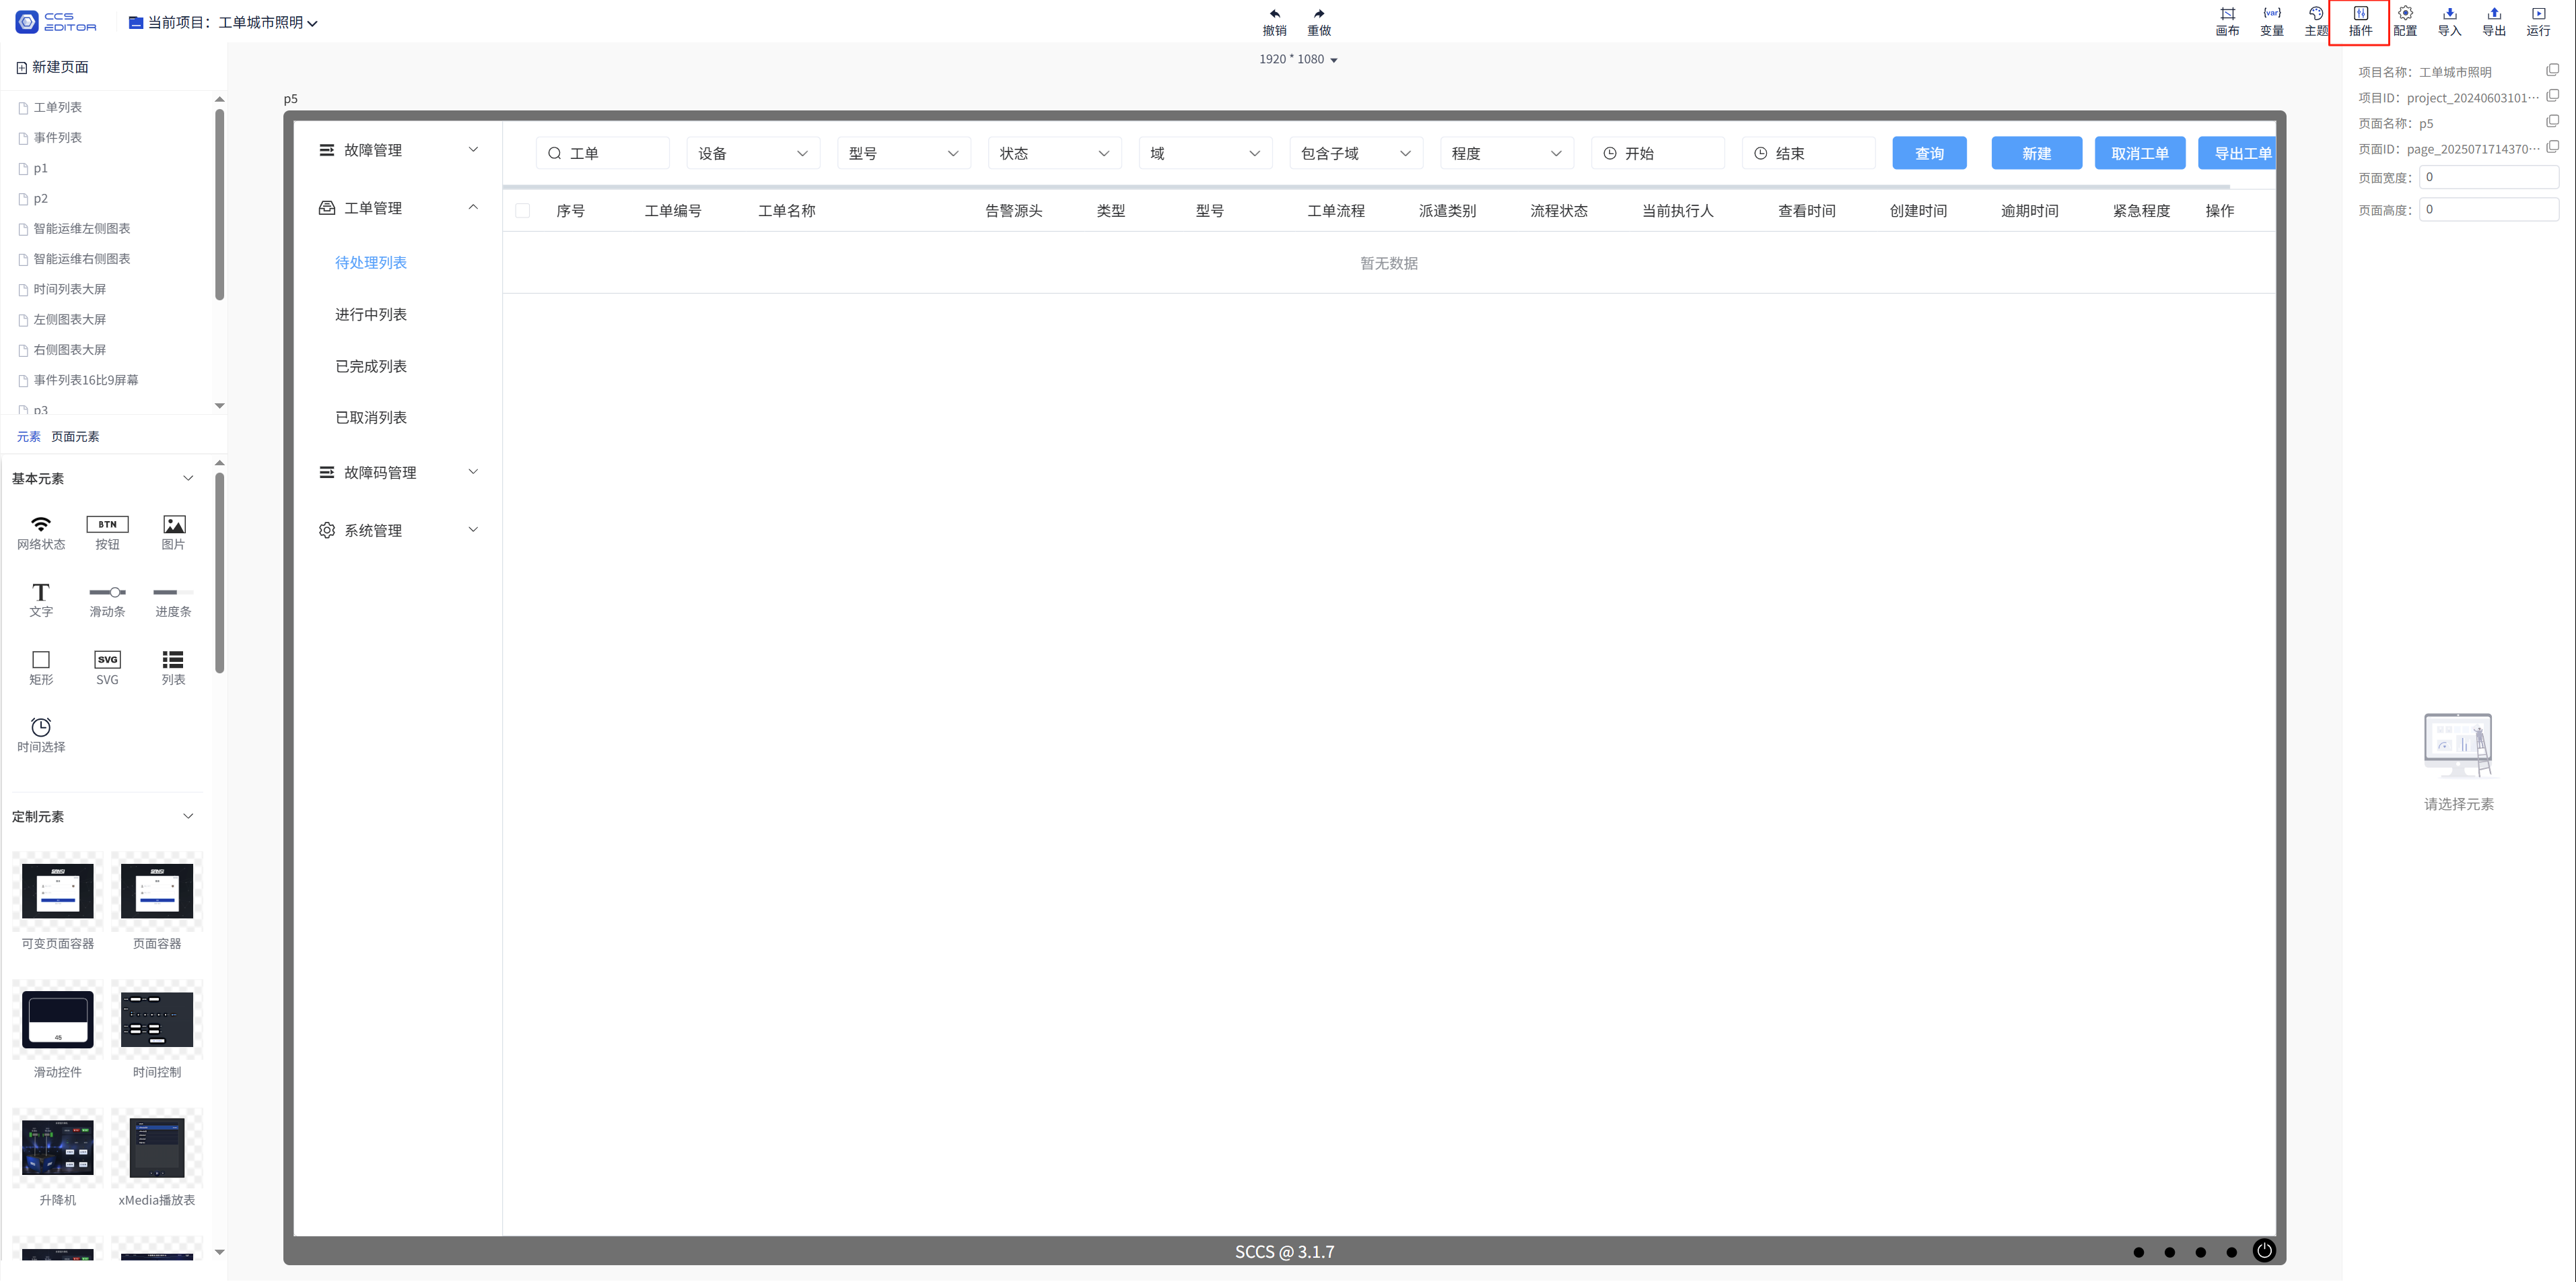
1: Install the ticket management plug-in
1. Click on Plugins
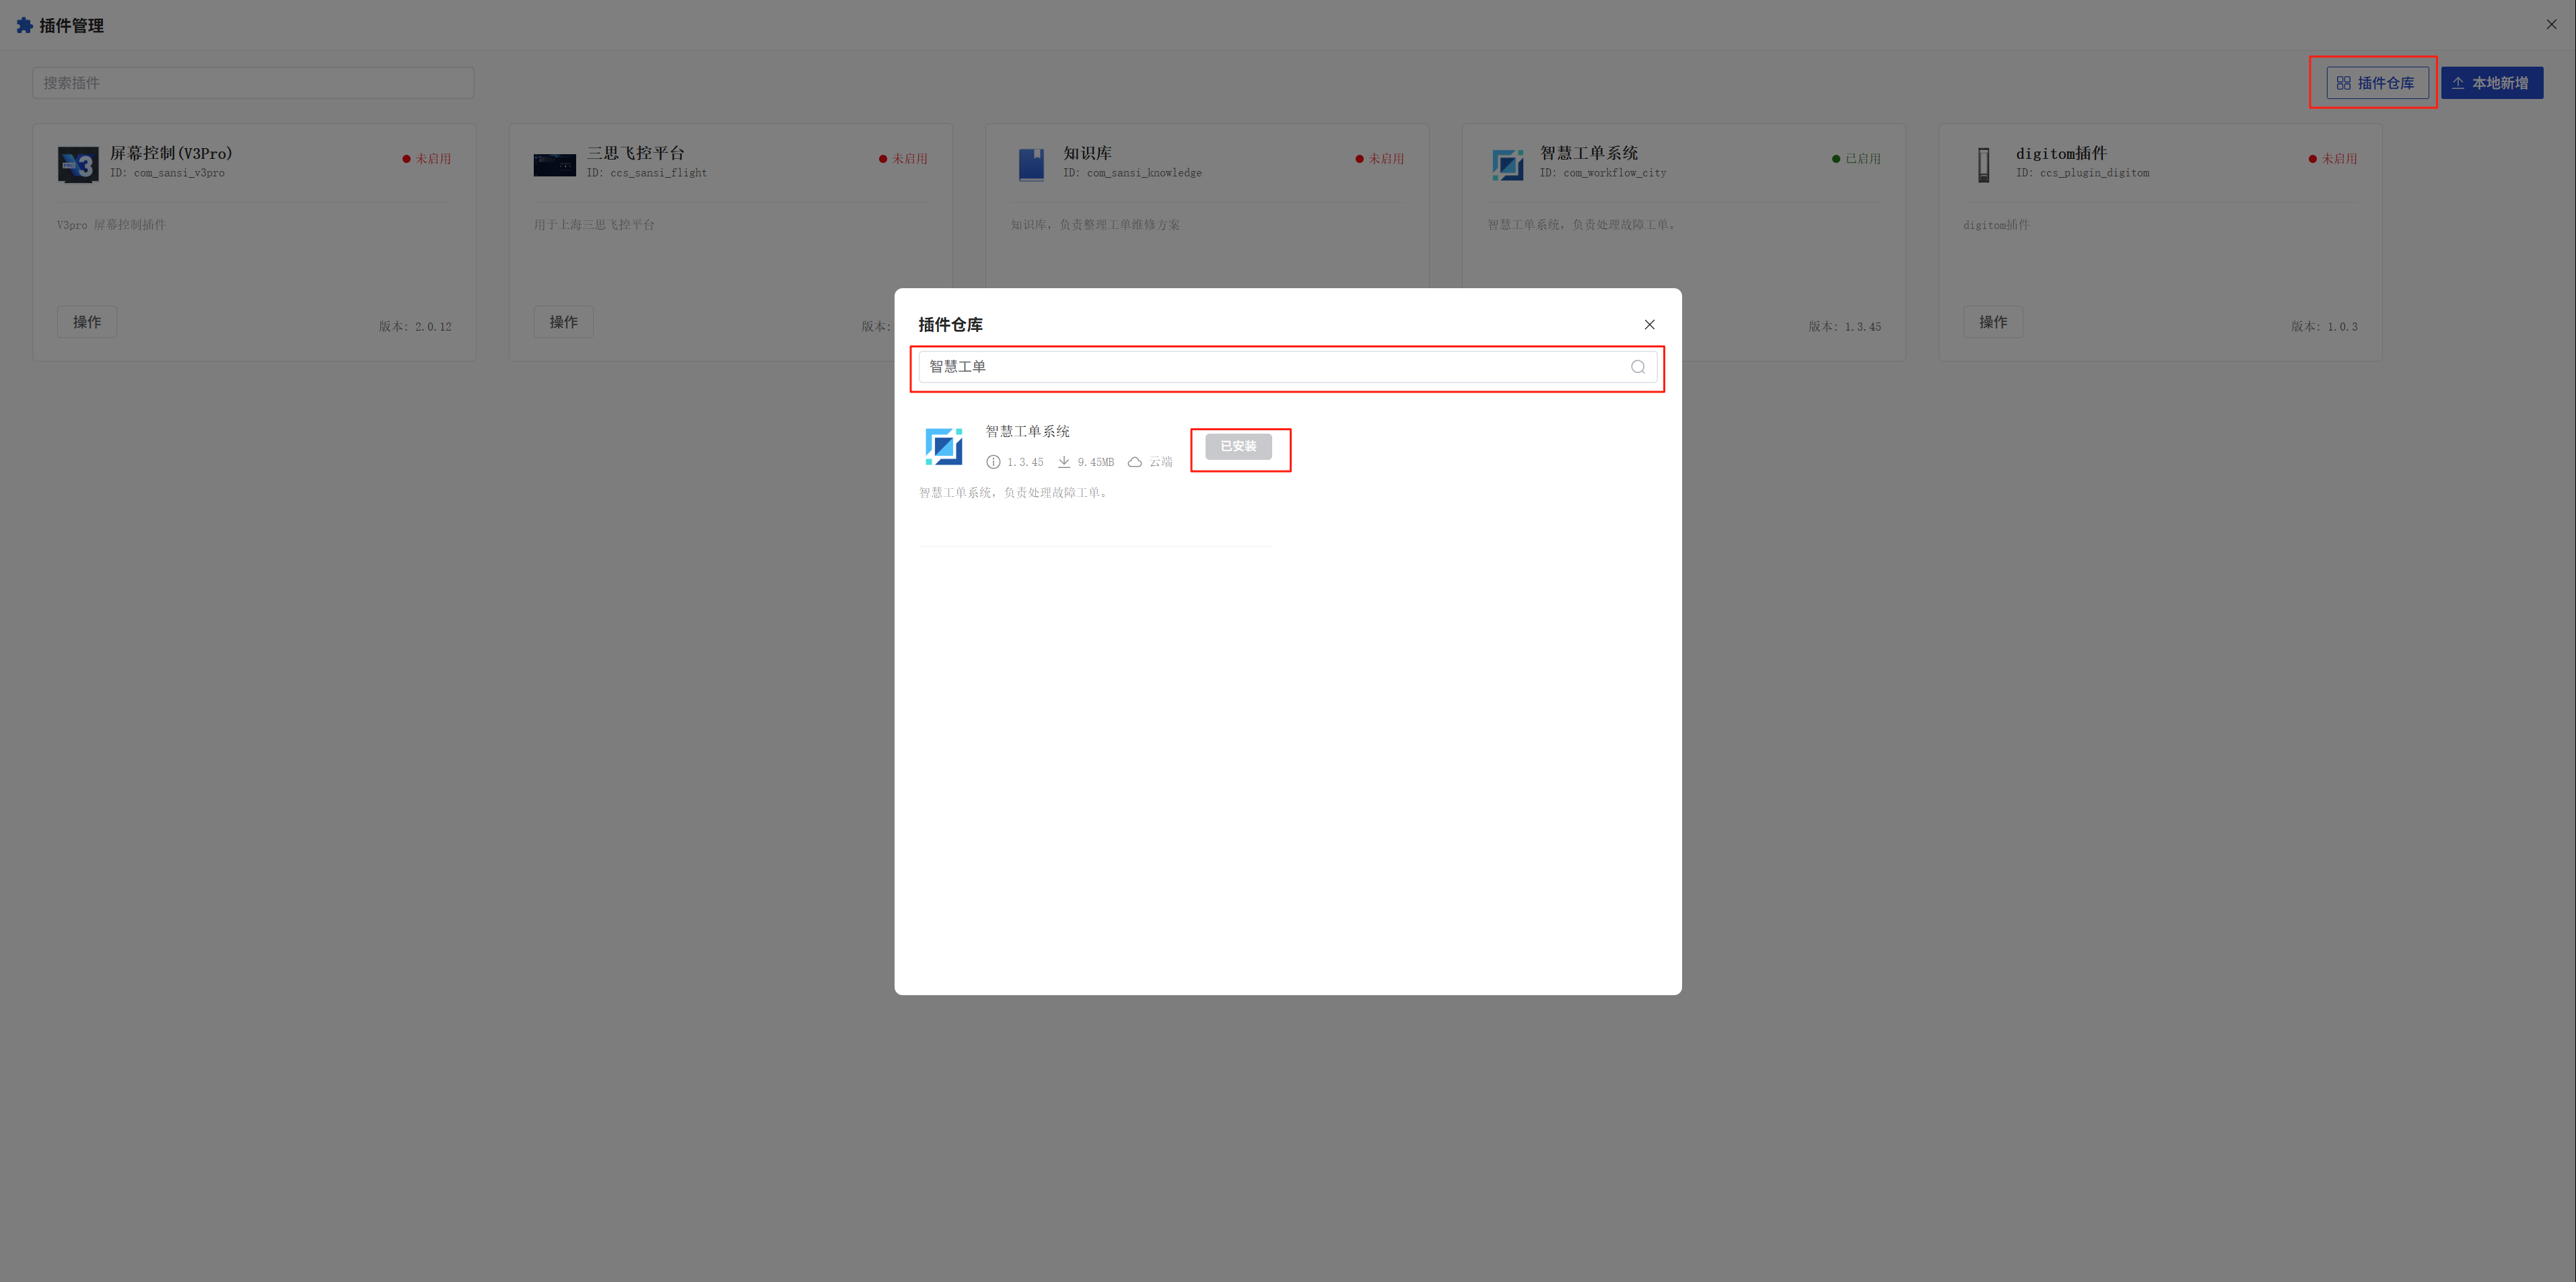
2. Click Plugin Repository - Search for Smart Ticket System - Install Plugin
2: Back-end configuration of the ticket management plug-in
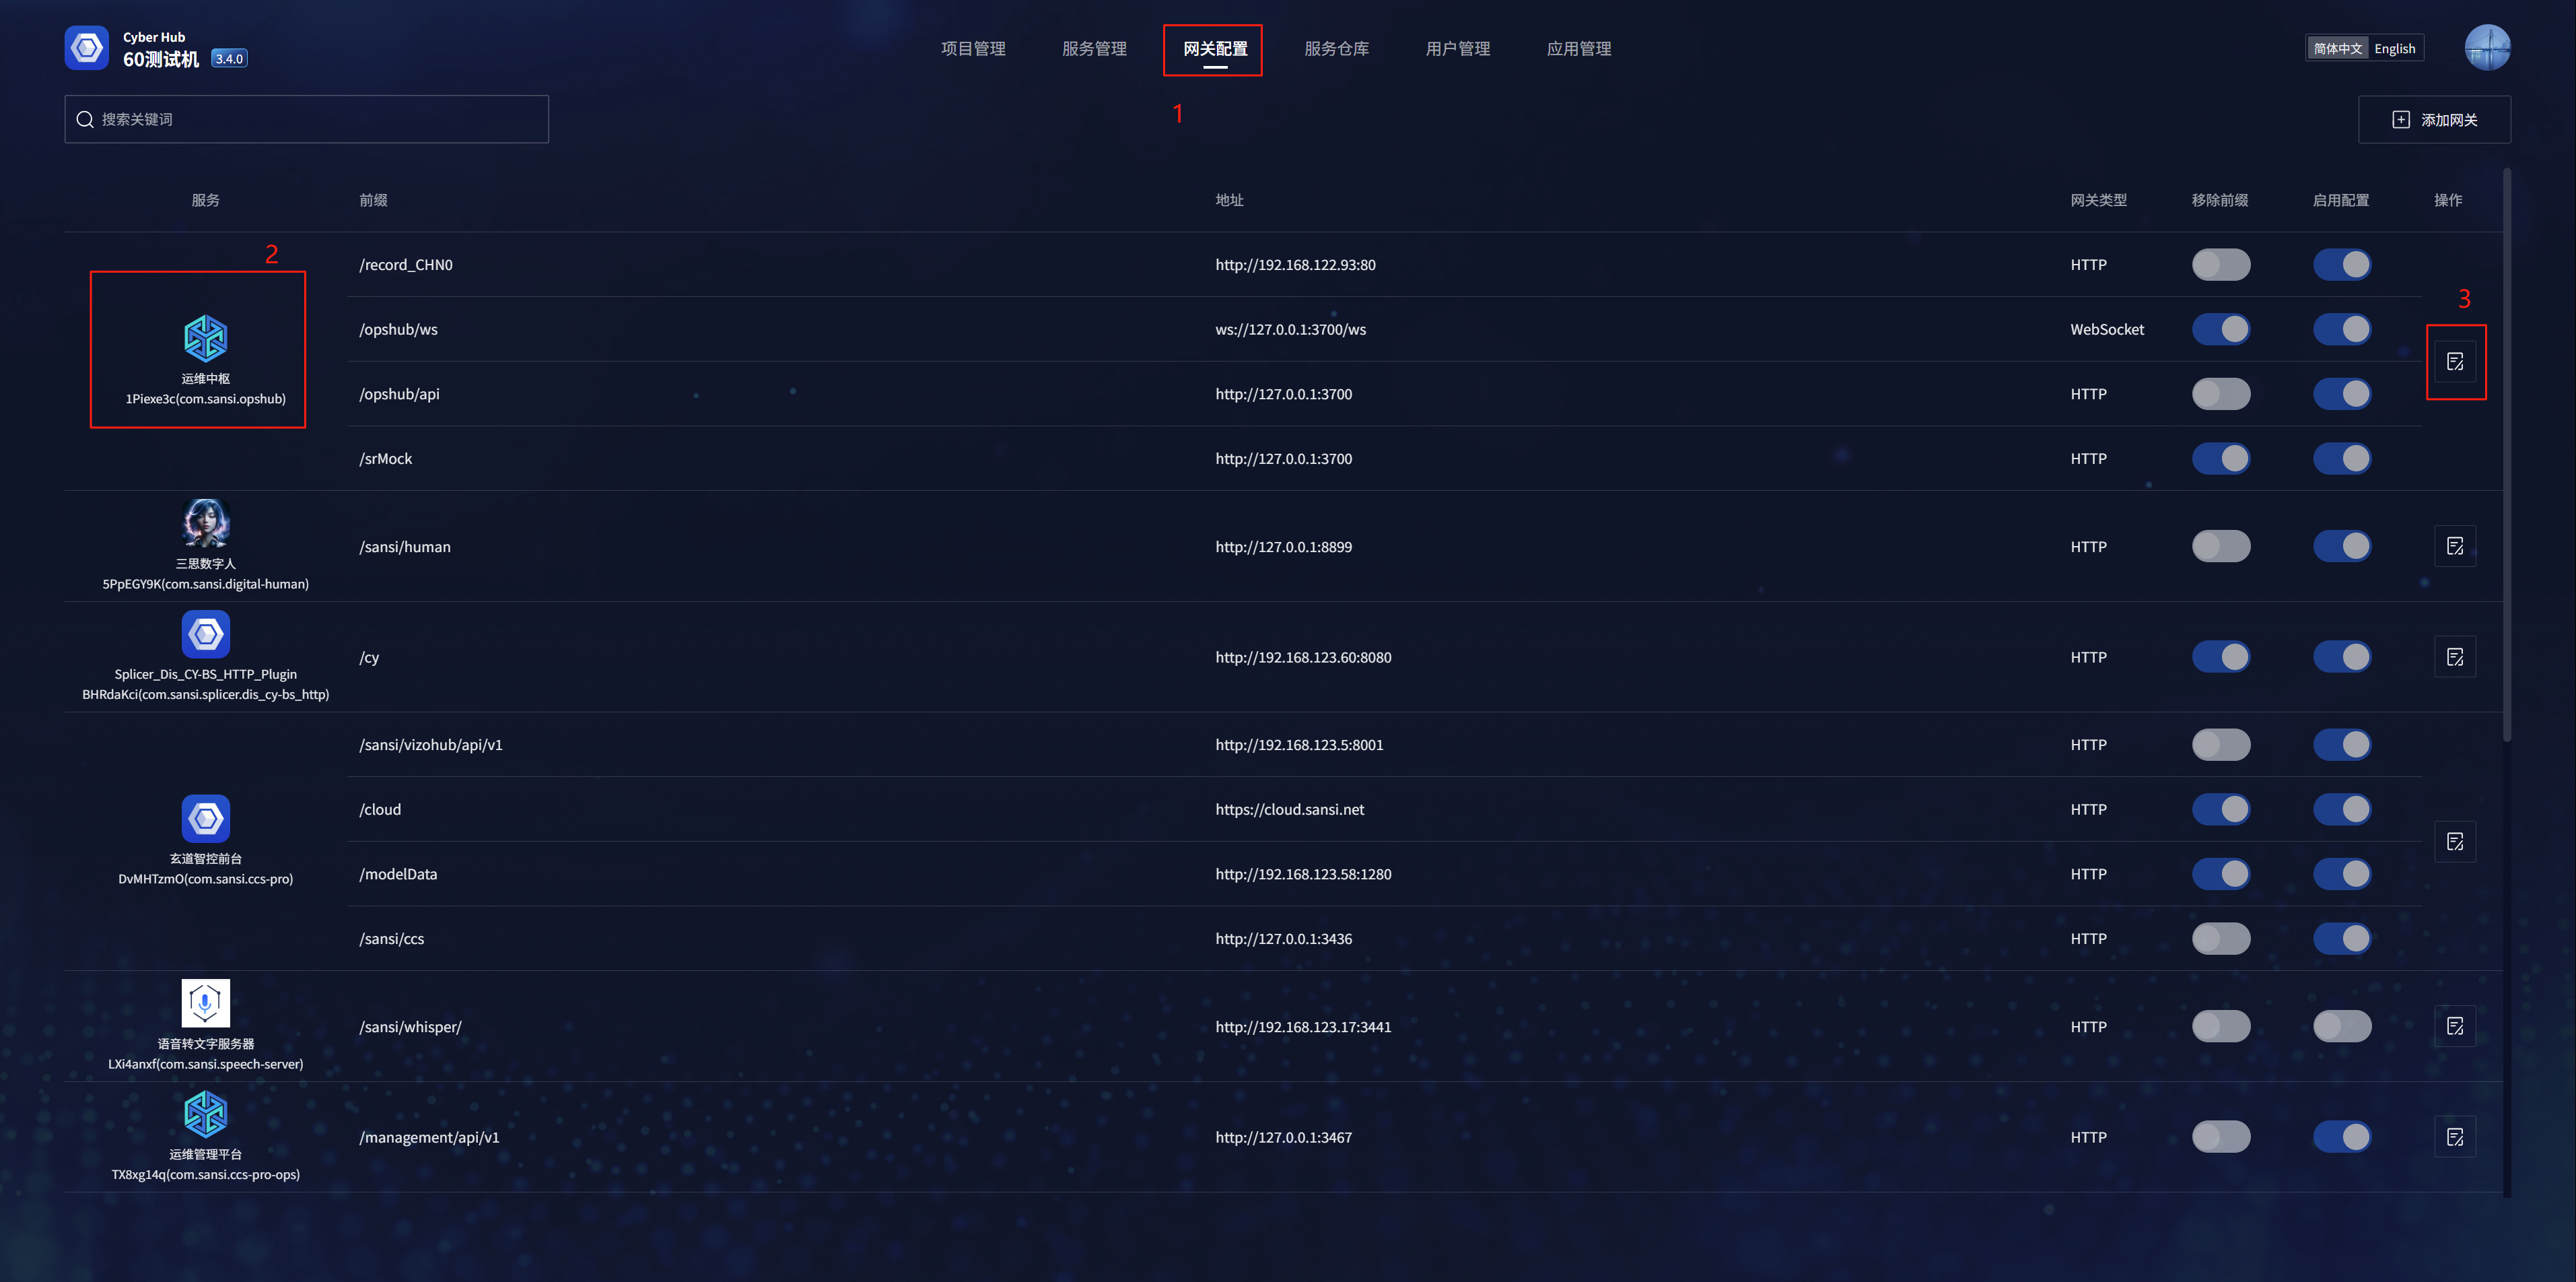
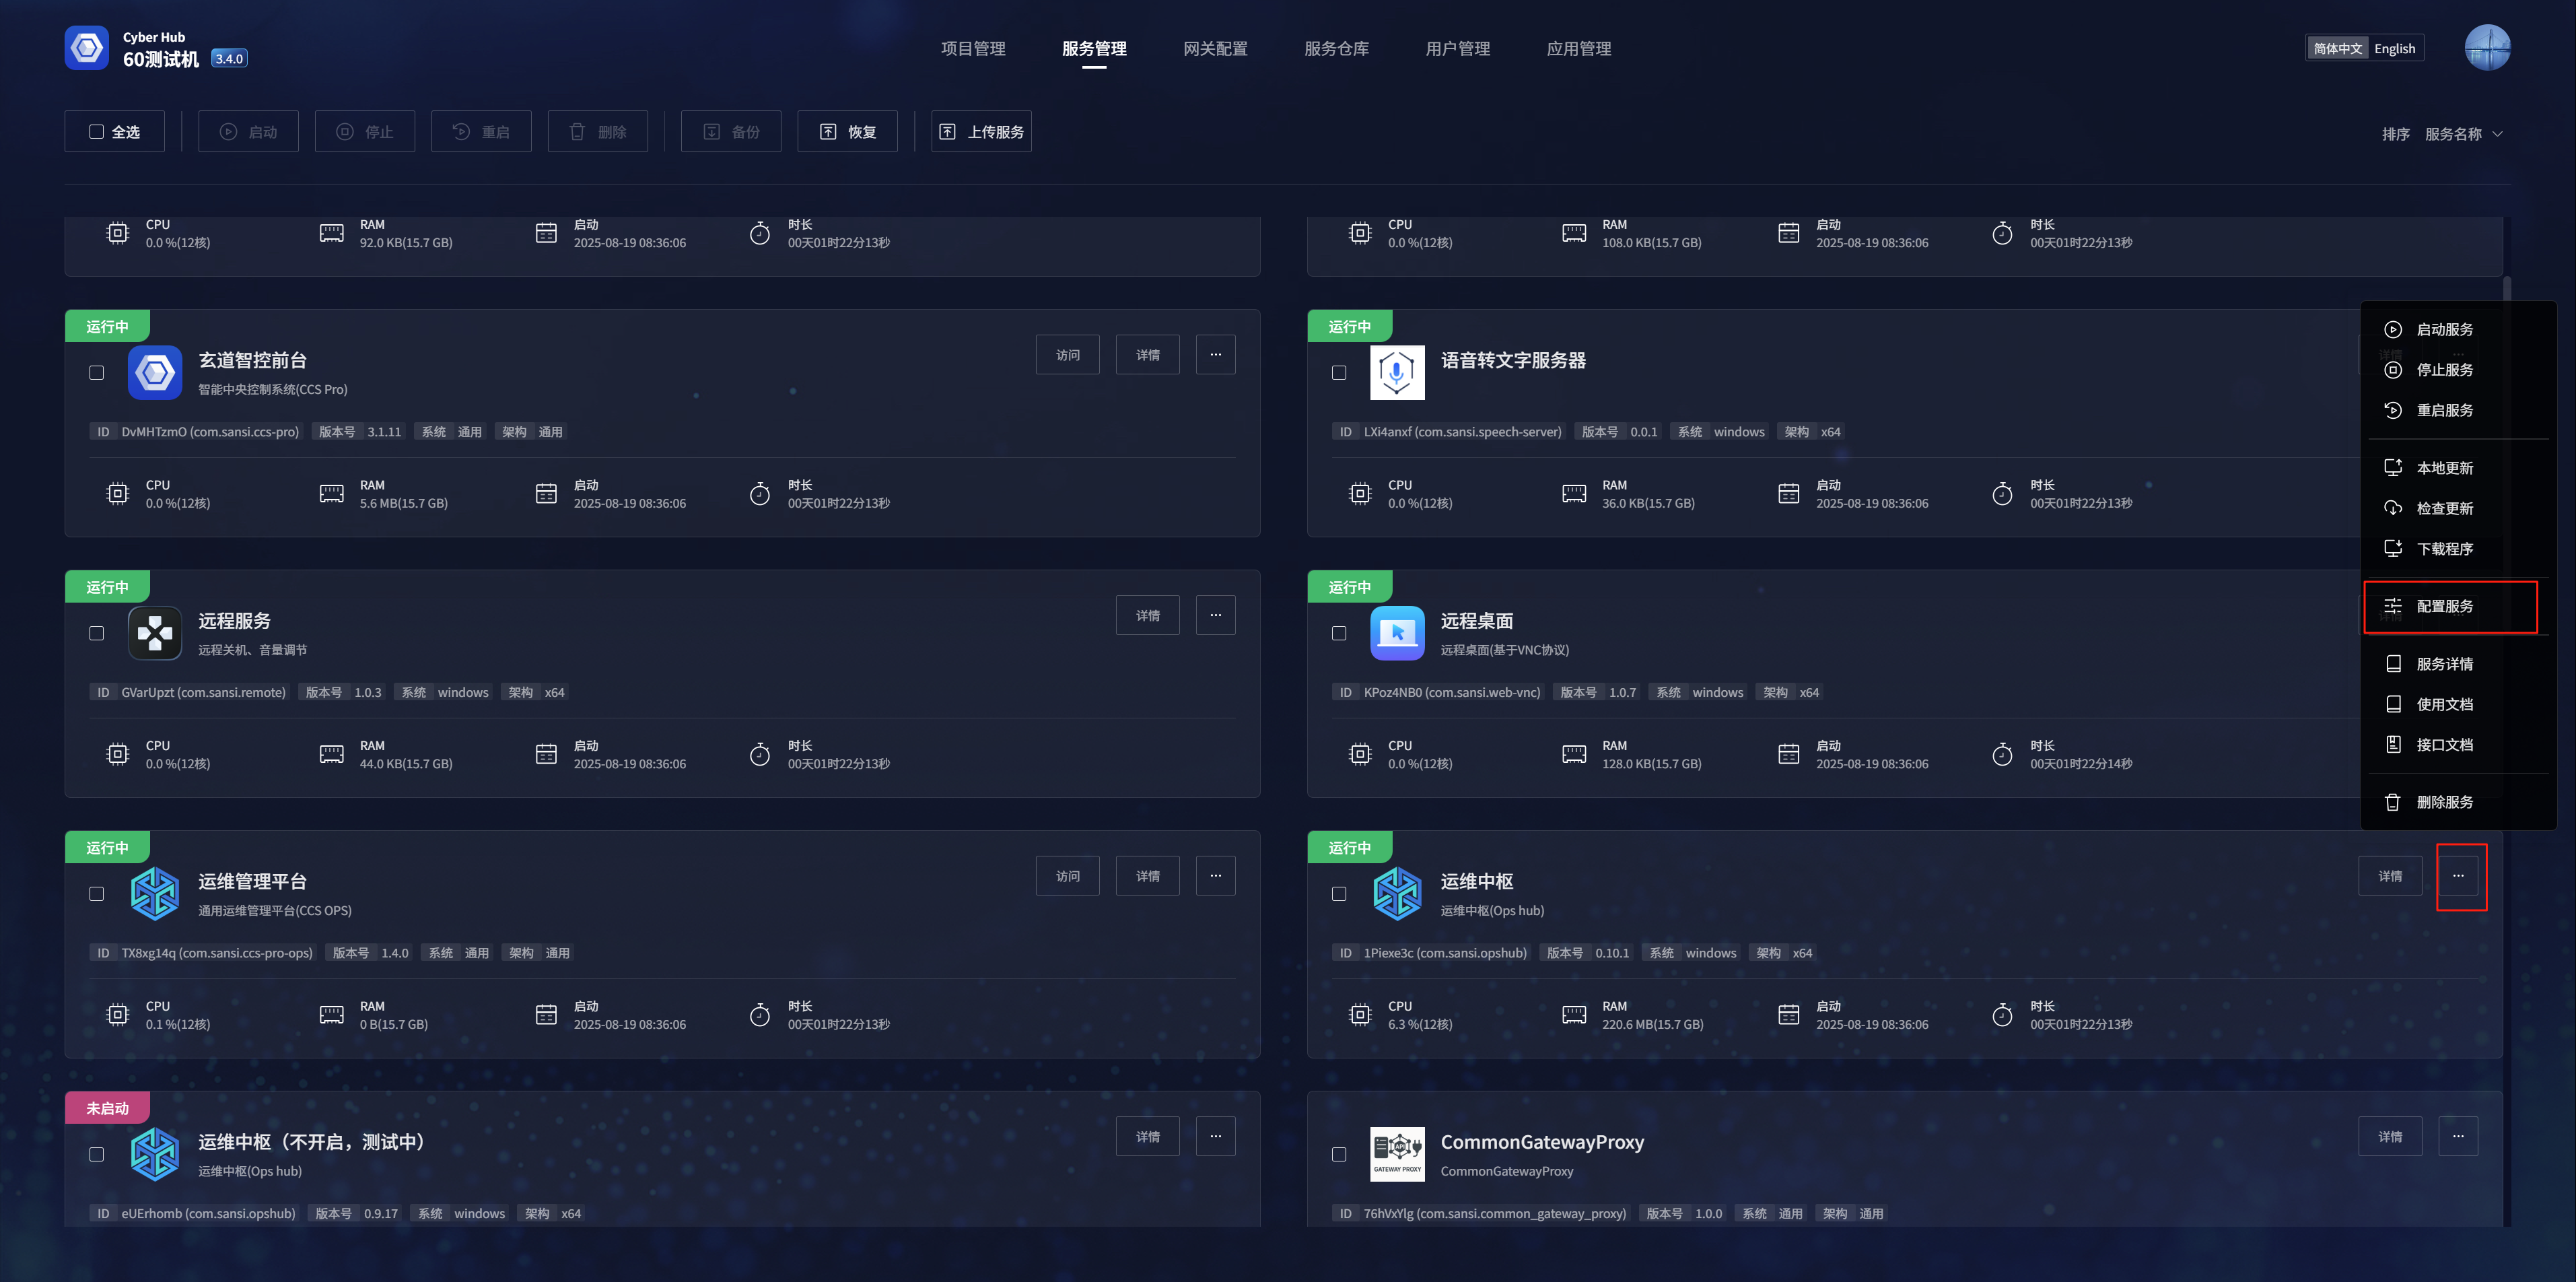
1. Go to Gateway Configuration - Select O&M Hub - Click Operations
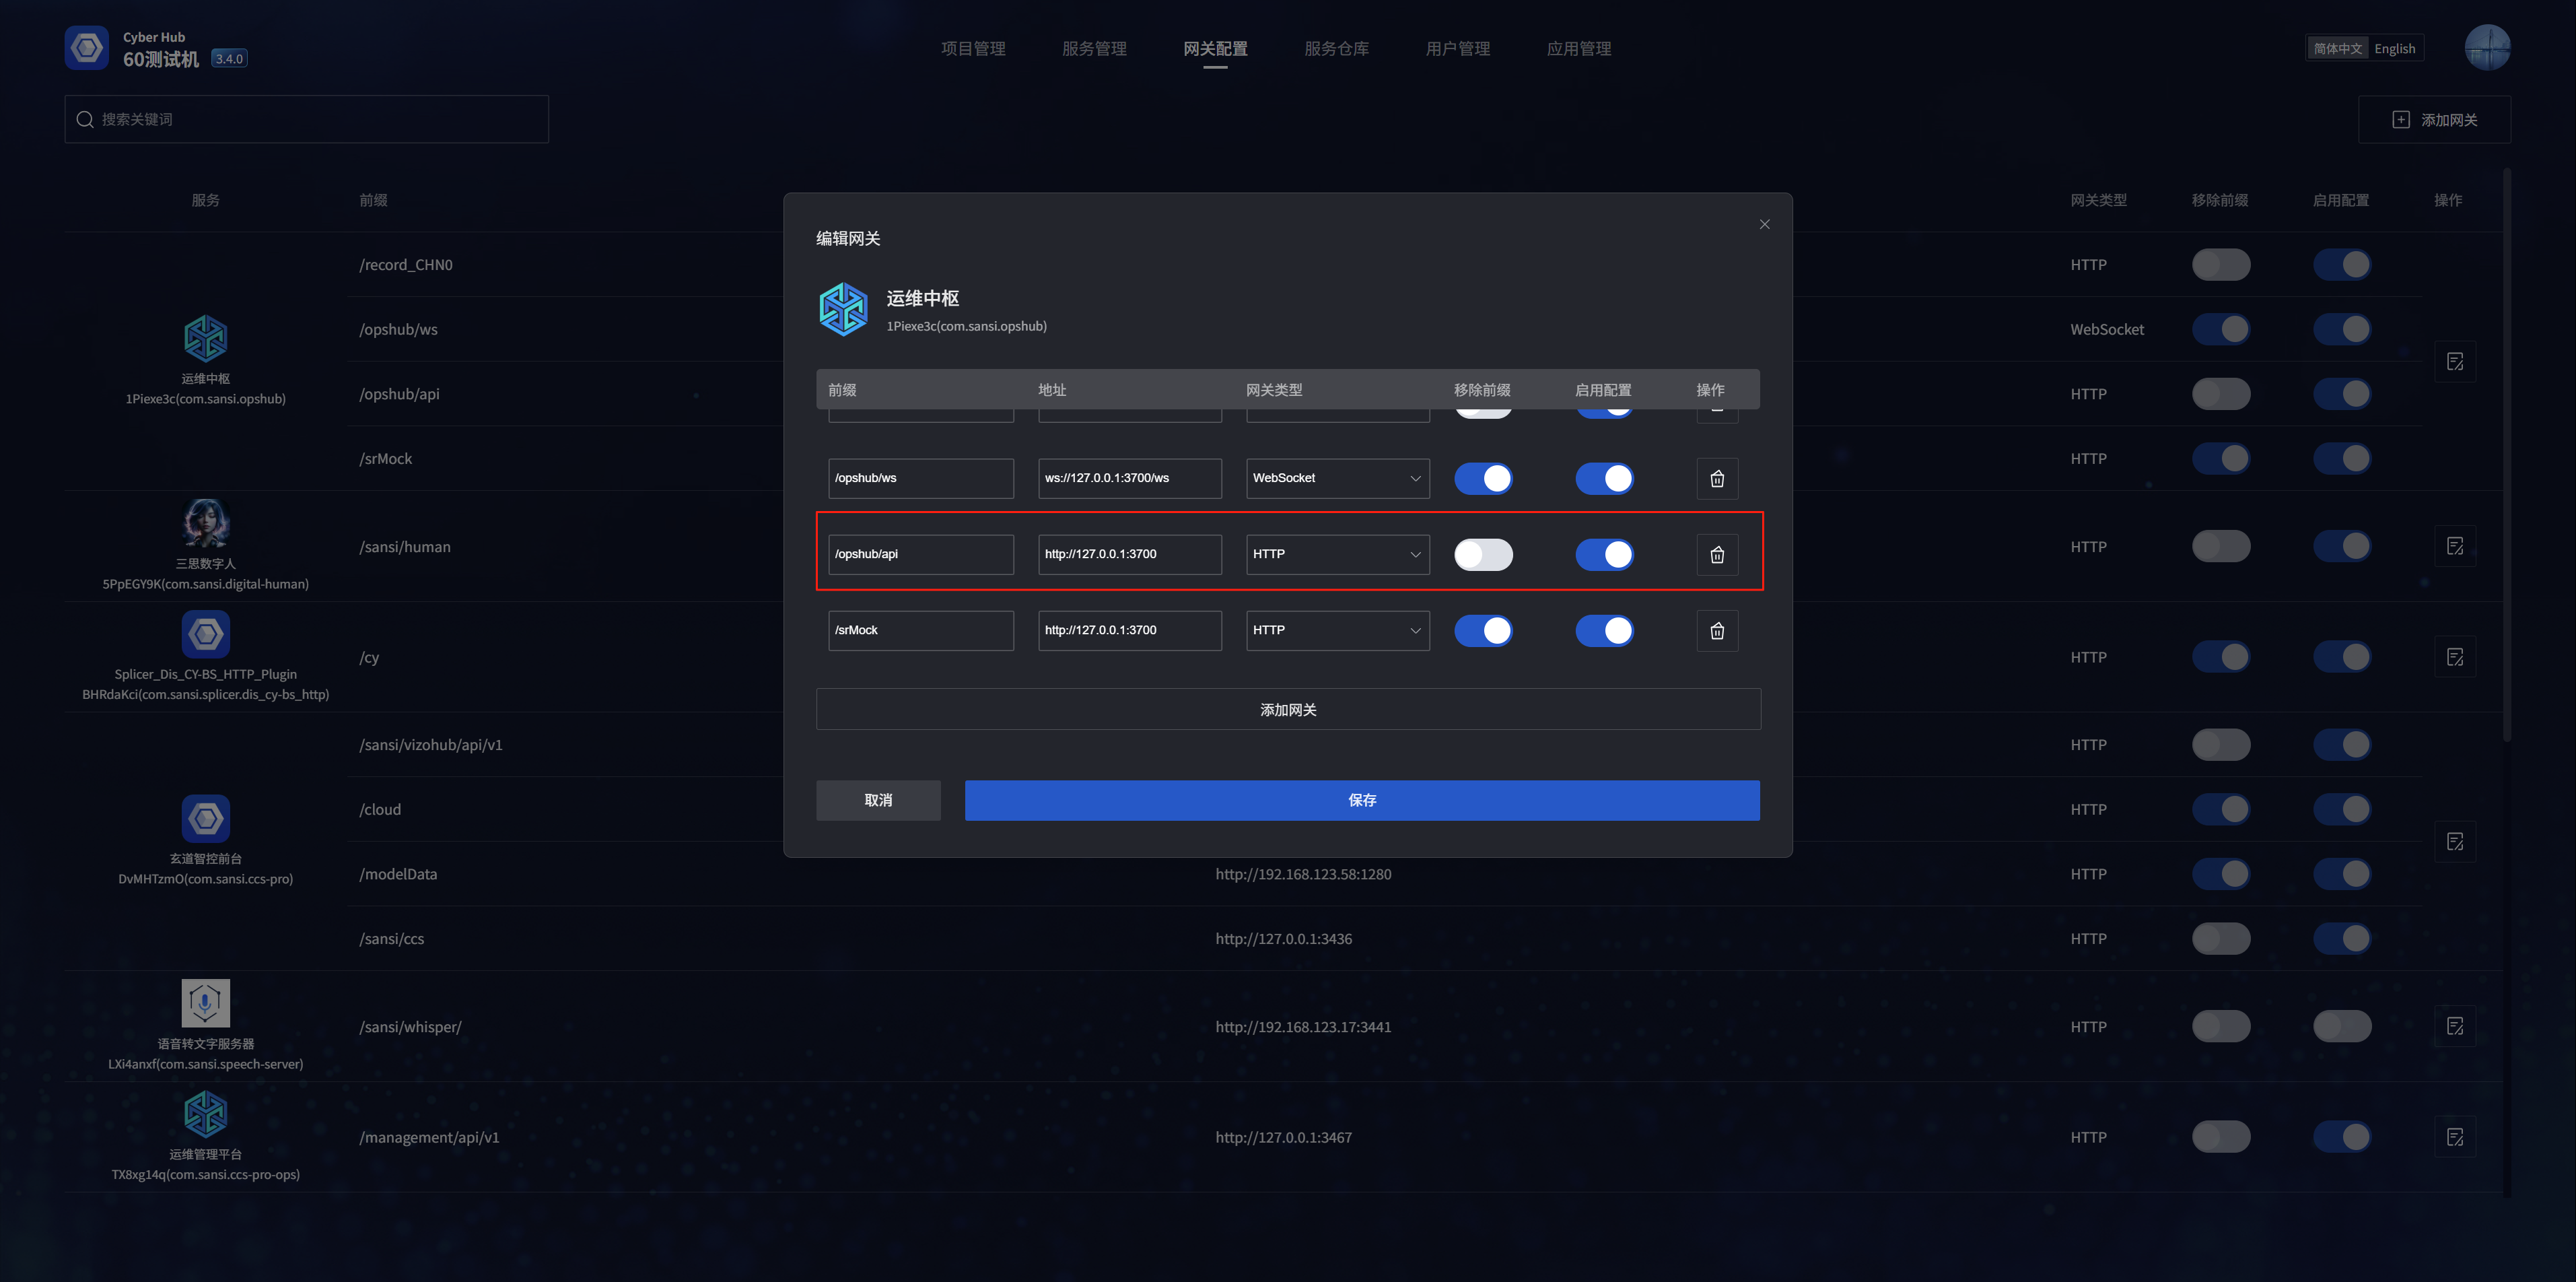
2. Configure the gateway information in the pop-up window
3. It can also be configured within Service Management
3: Work order management - pending list
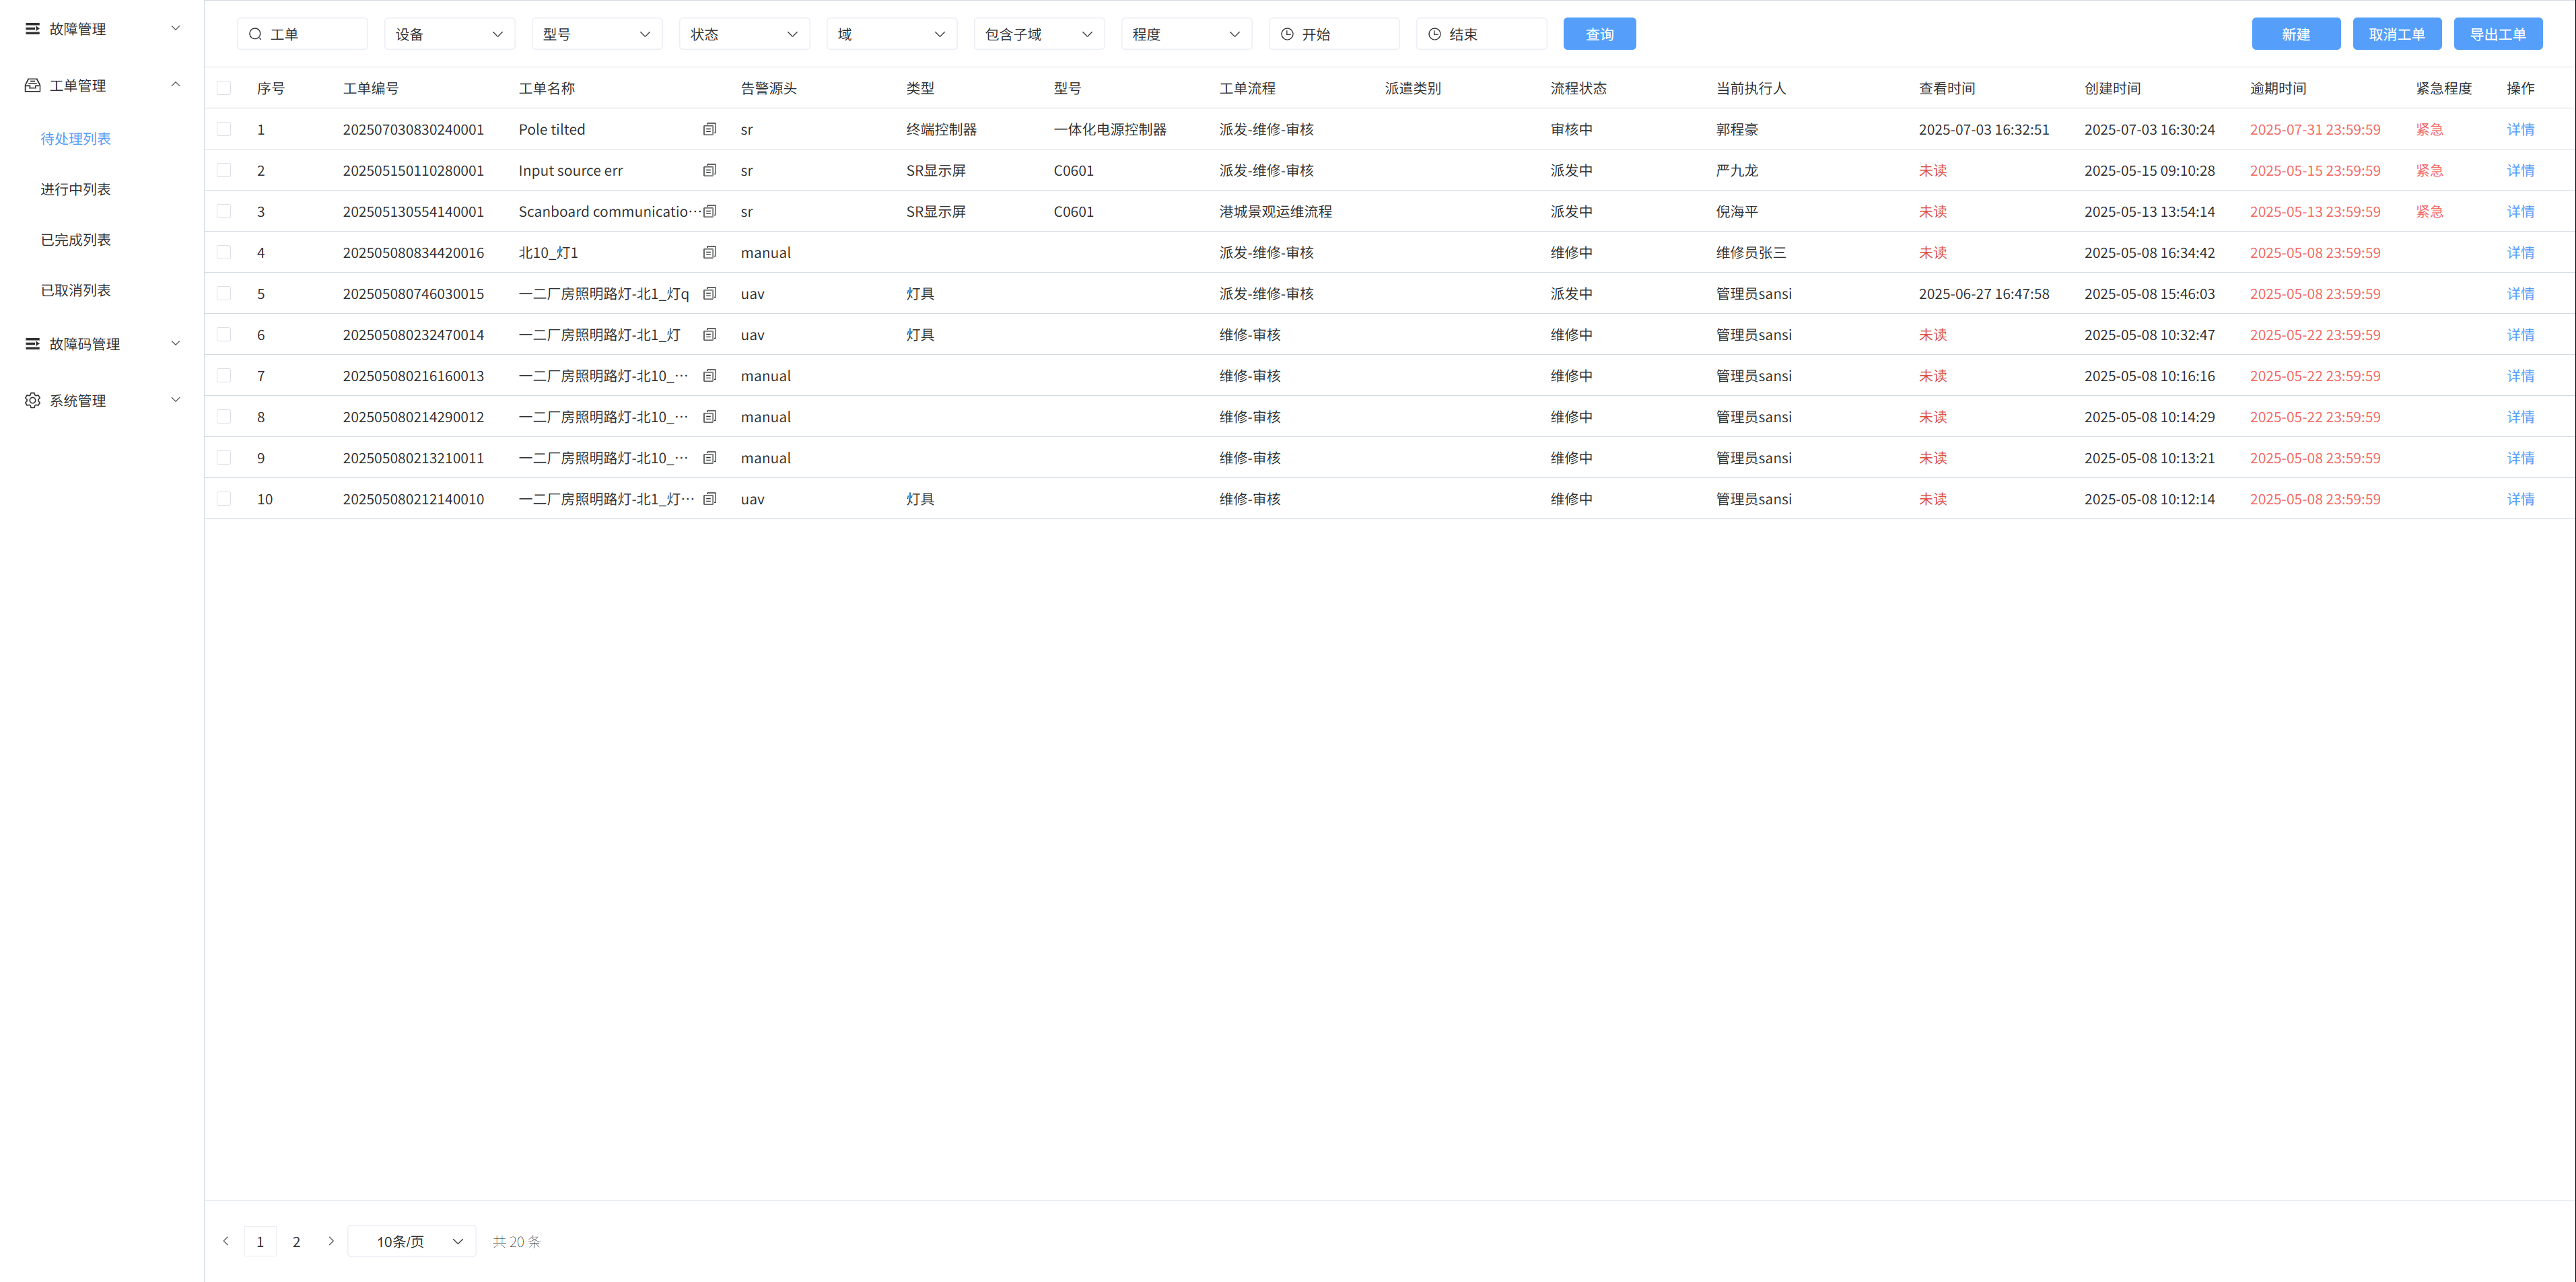
1. Pending list
The work orders that need to be processed are displayed in the pending list
2. Create a new work order
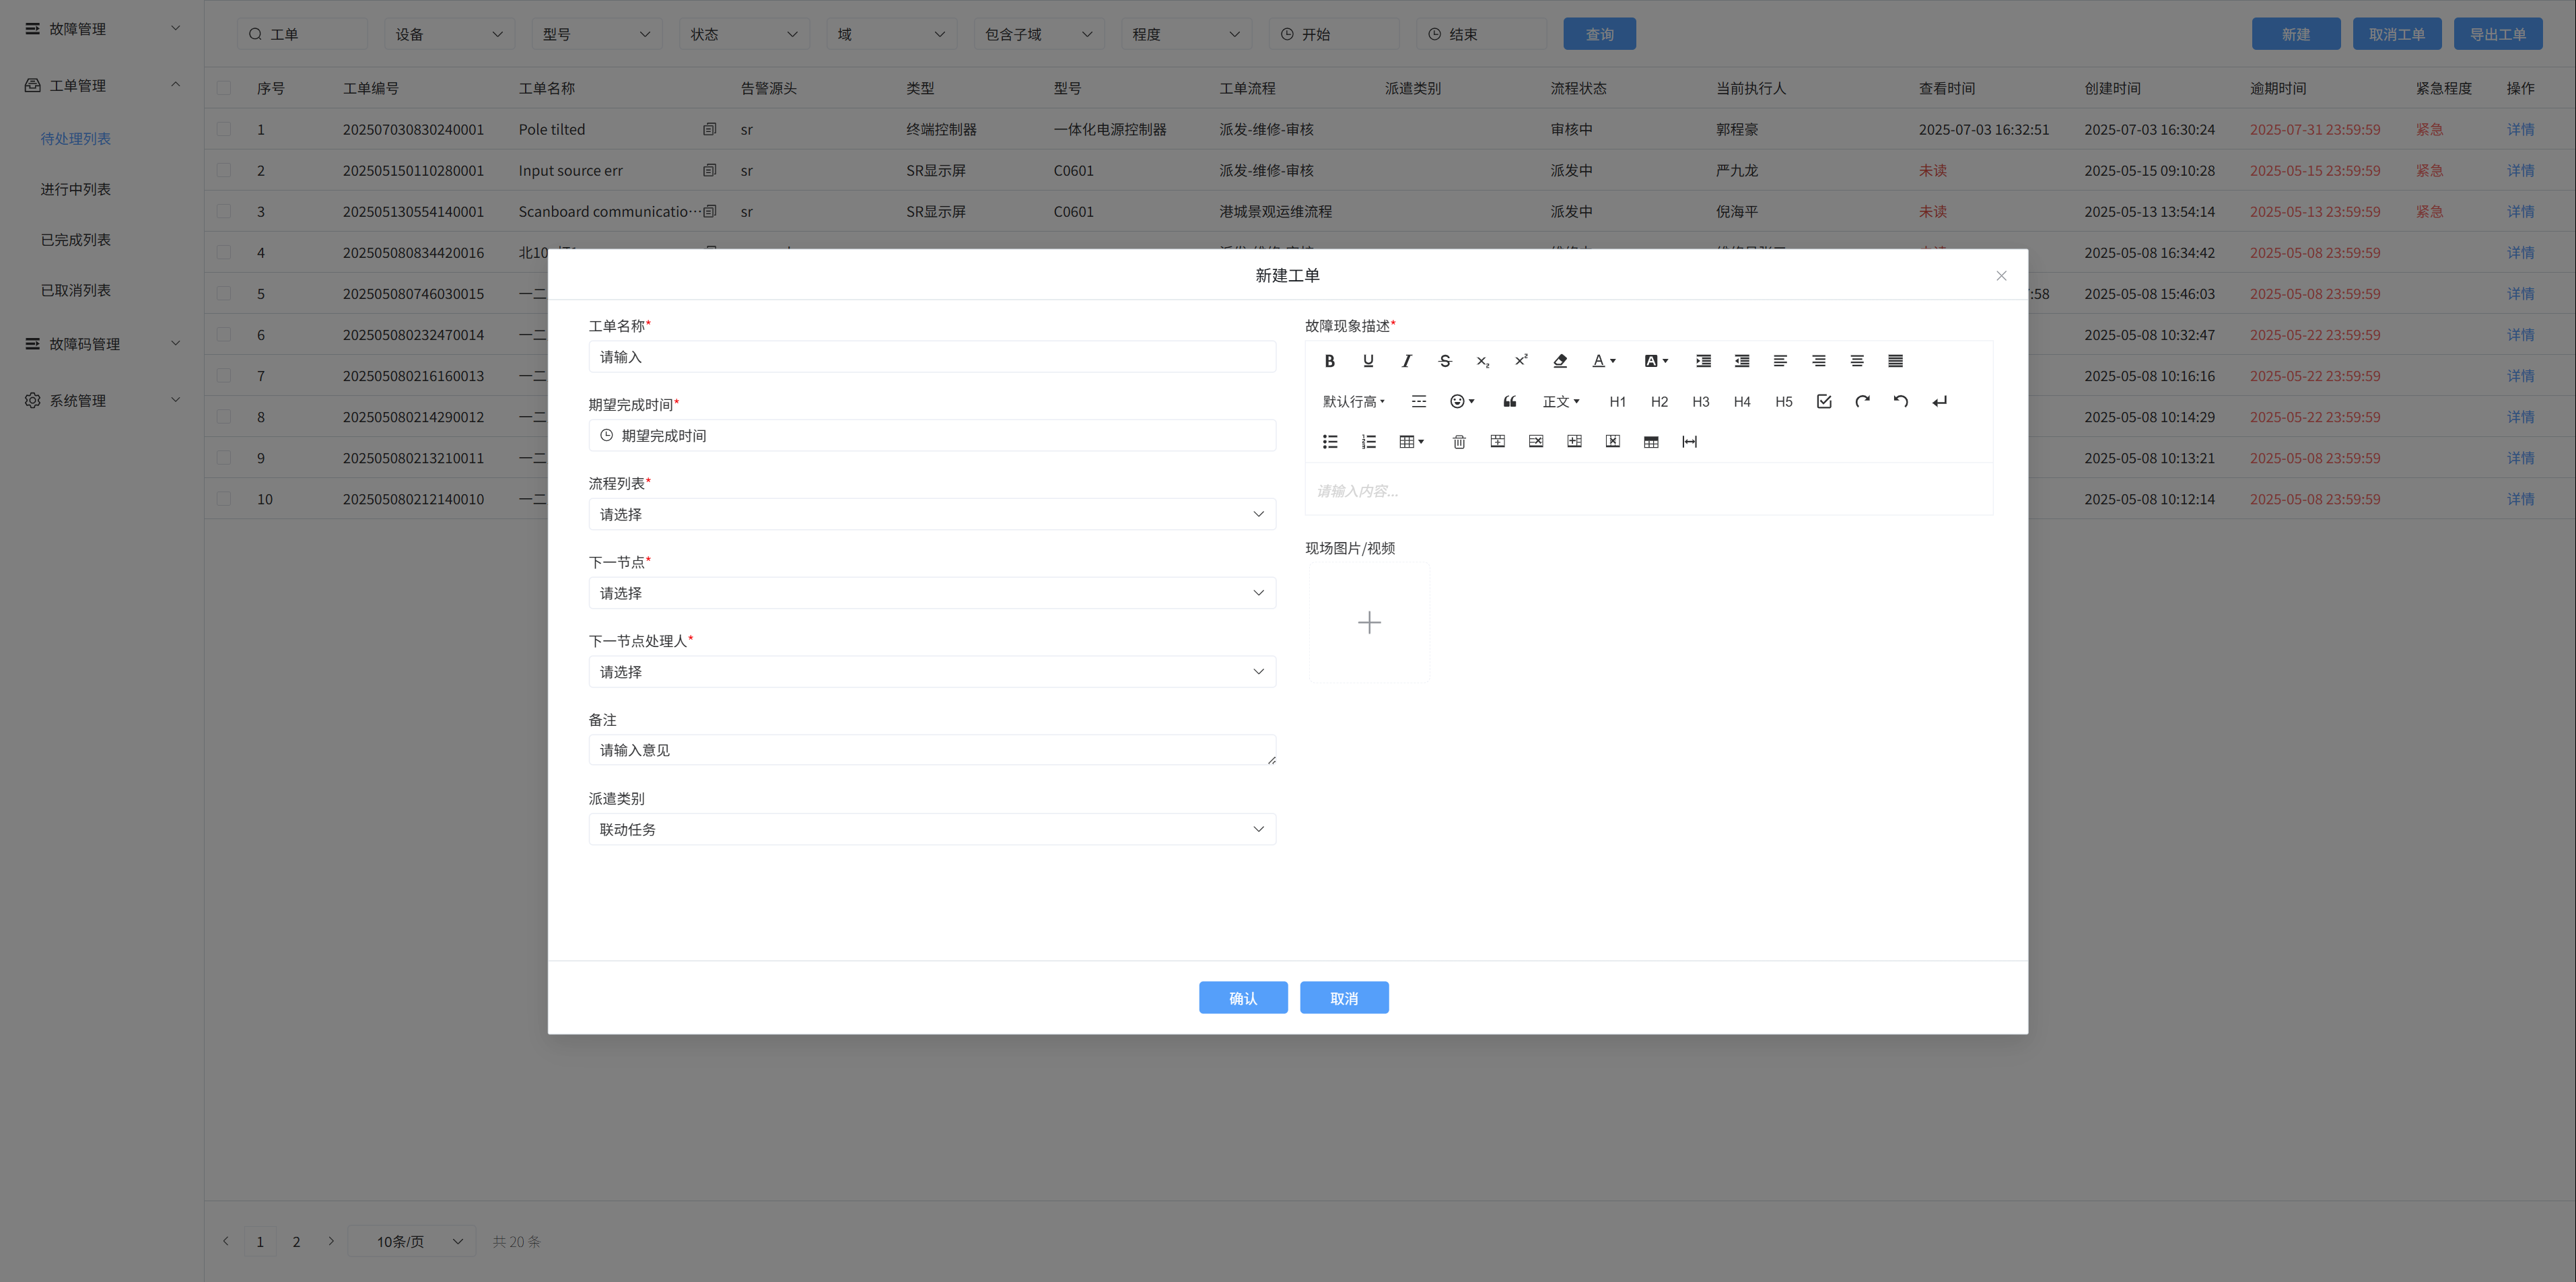
In the pending list, click the [New] button, a pop-up window will appear, enter the name of the work order, the description of the fault phenomenon, and the on-site picture/video in the pop-up box, and then click Confirm to create a new work order
Notes:
There are two ways to create a ticket
- Users create tickets manually
- Automatically create work orders through health management alarm information
- If you create a ticket manually, the default fault is [General Fault], which can be modified in the details
3. Ticket search
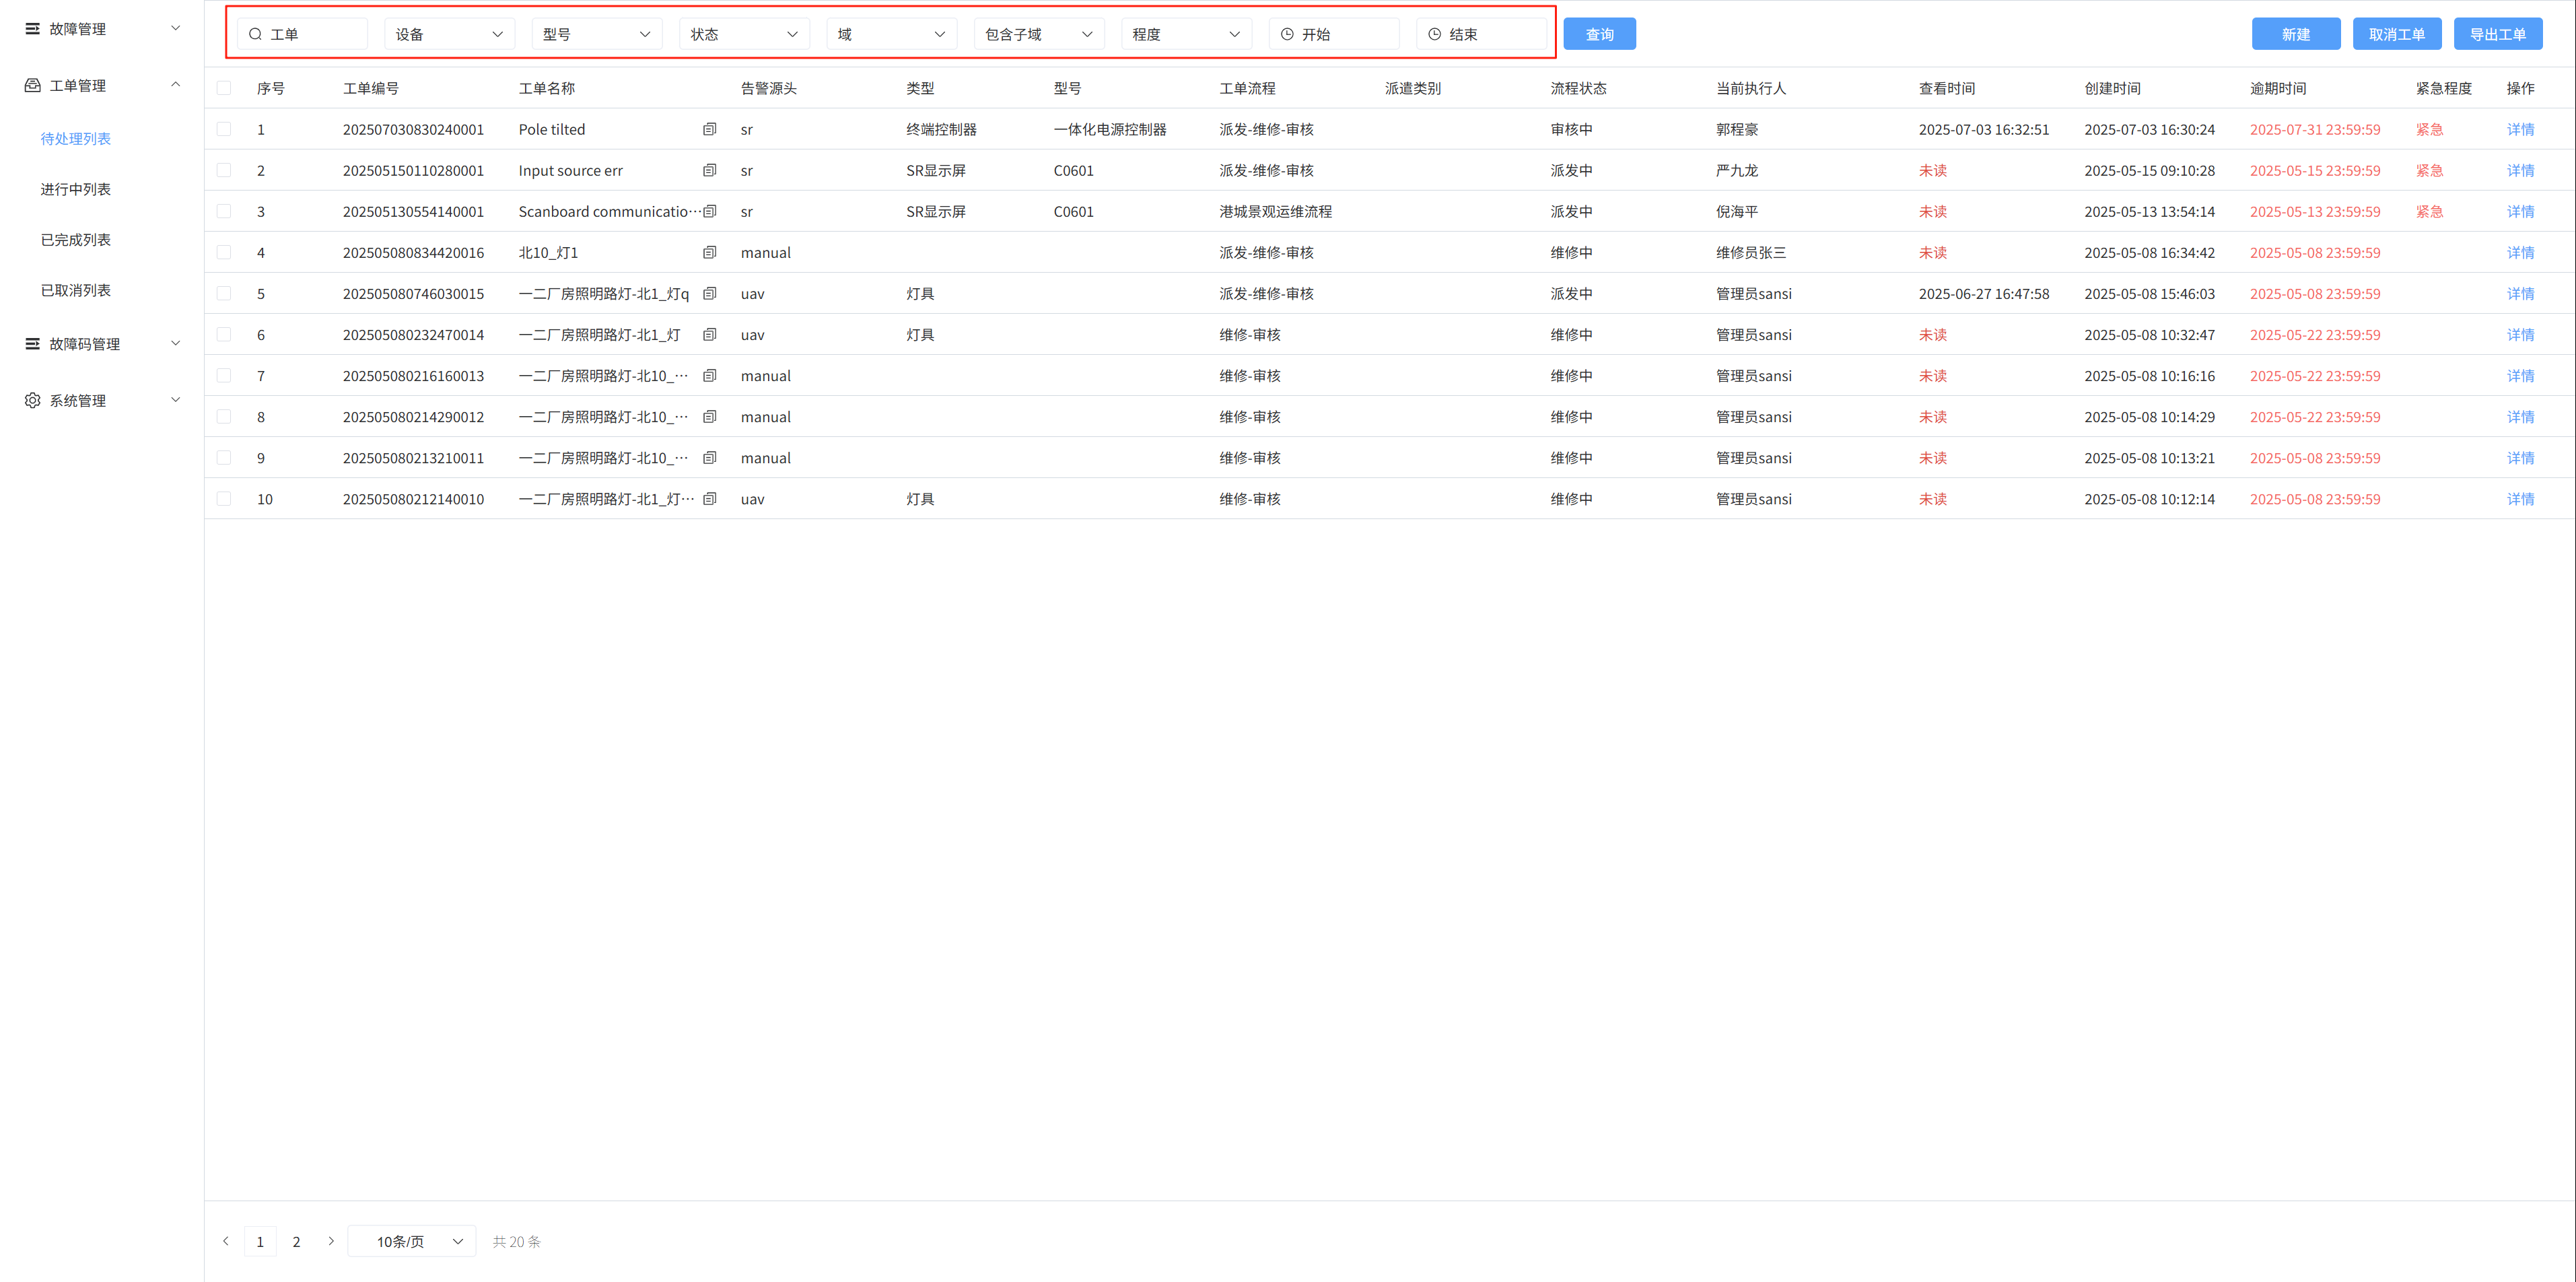
Fuzzy search based on ticket name, device, model, status, domain, and urgency
Search based on ticket start time and end time
4. Cancel the ticket
Select the check box on the left and click the Cancel ticket button to cancel the ticket
5. To-do details
Click Details on the to-do list to go to the ticket details page
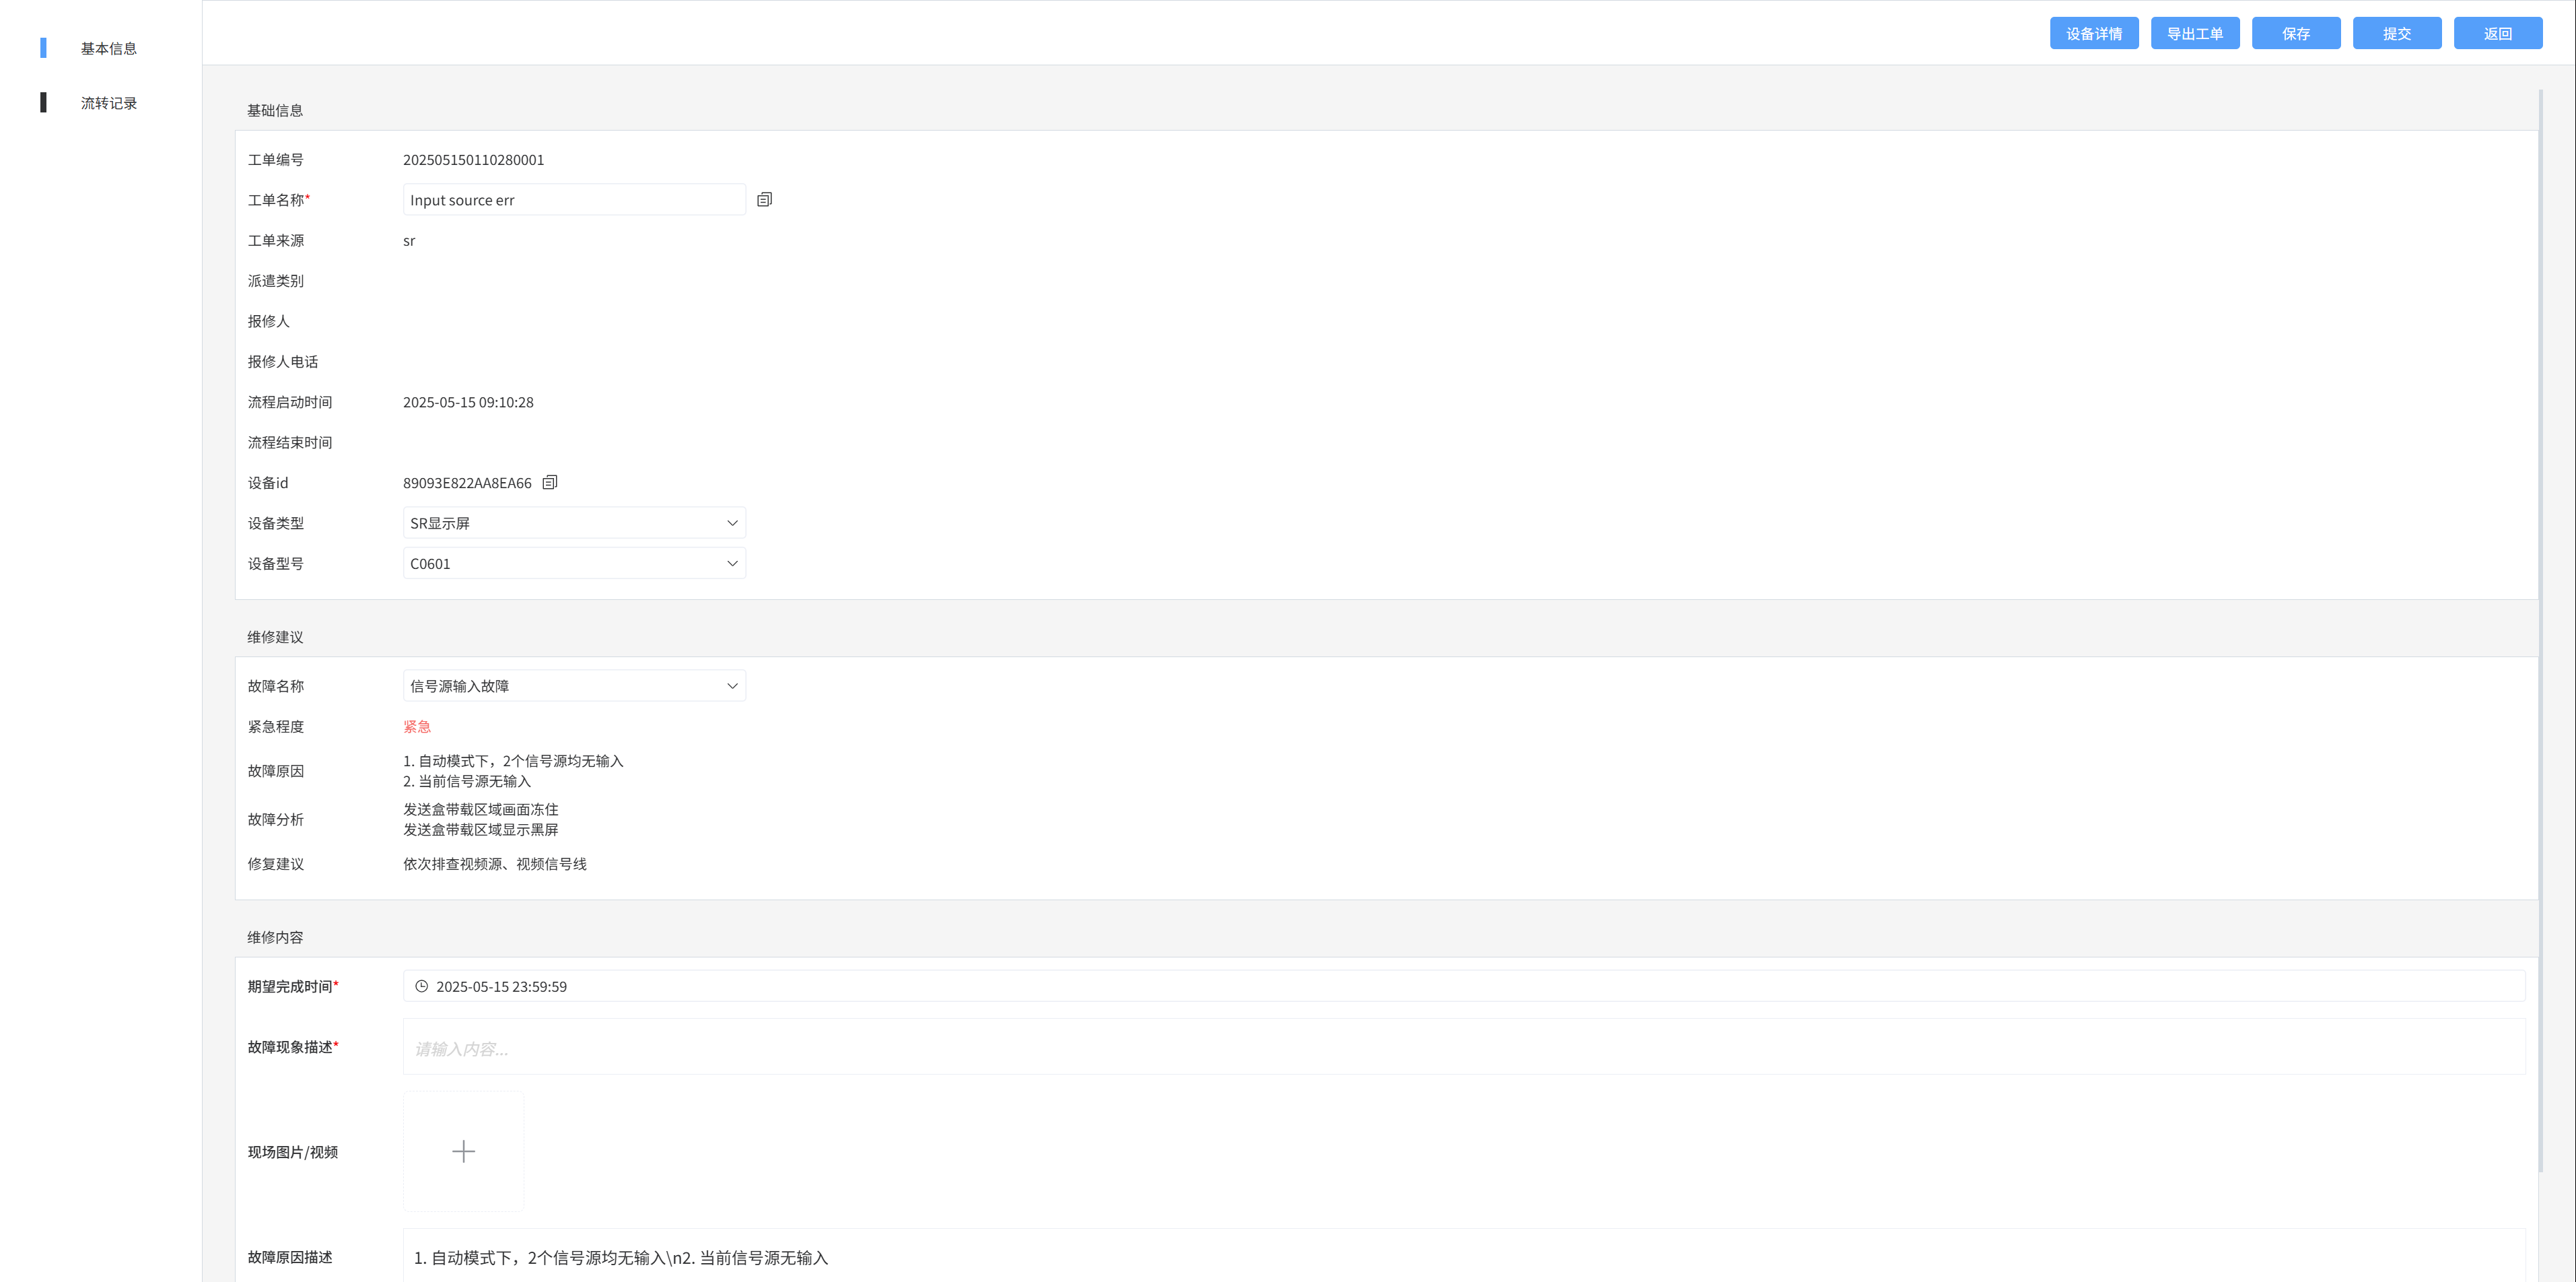
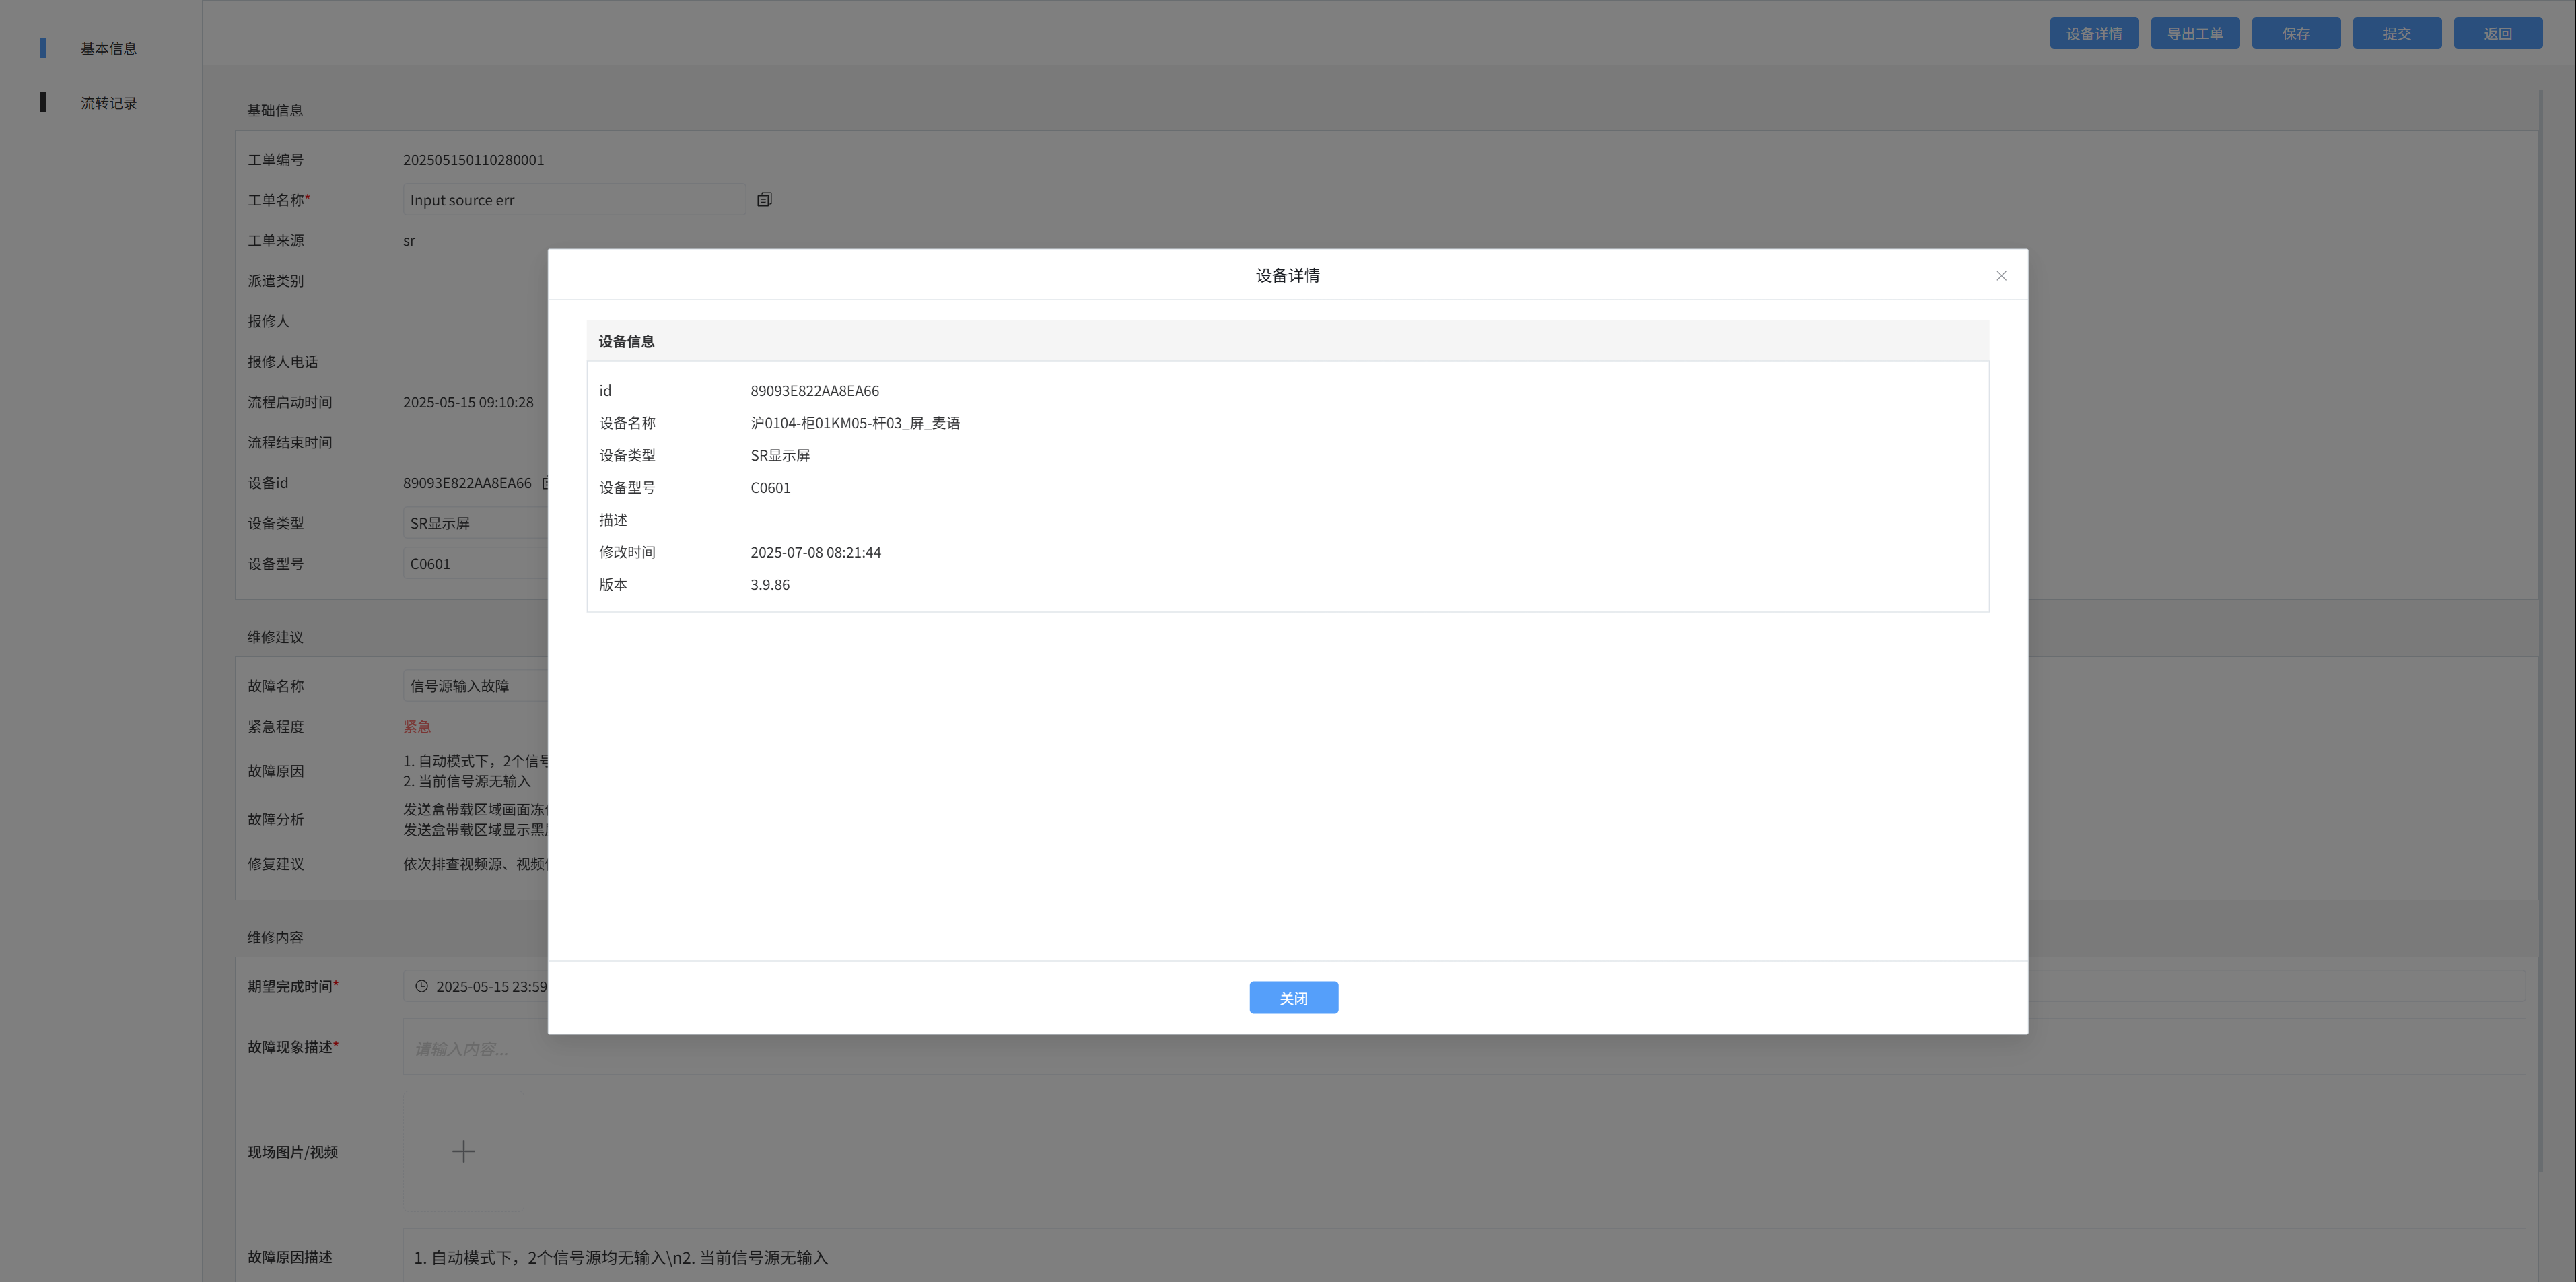
Click the [Device Details] button to display relevant information
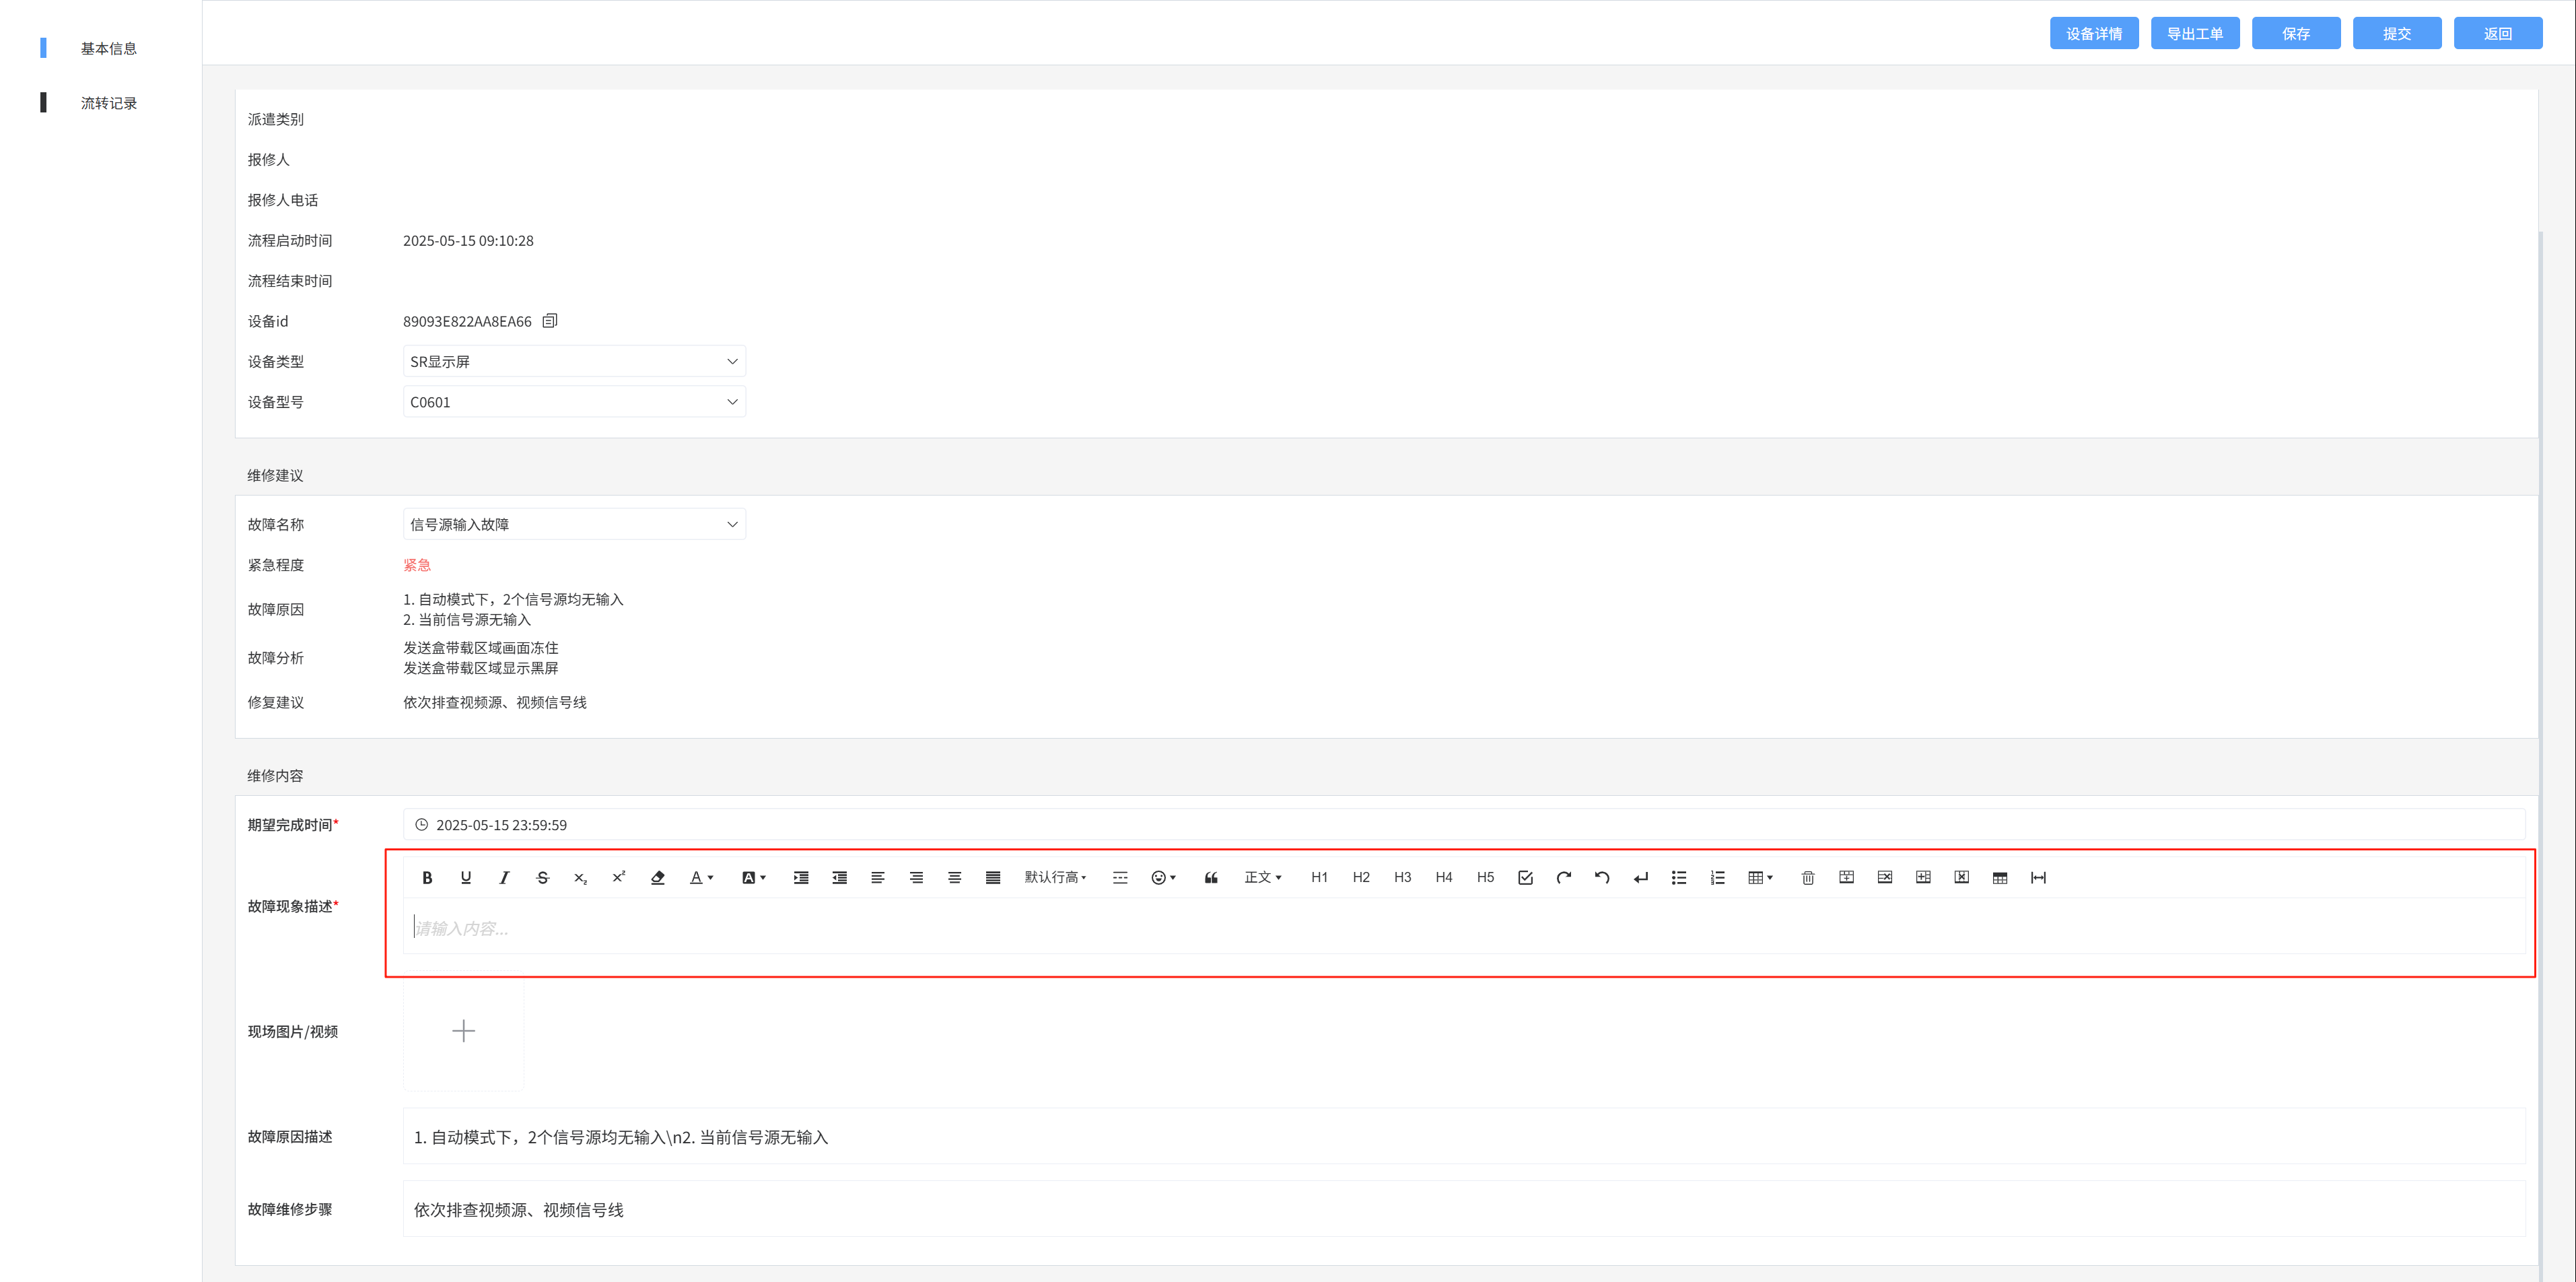
Fault site description, fault cause description, fault step maintenance text box,
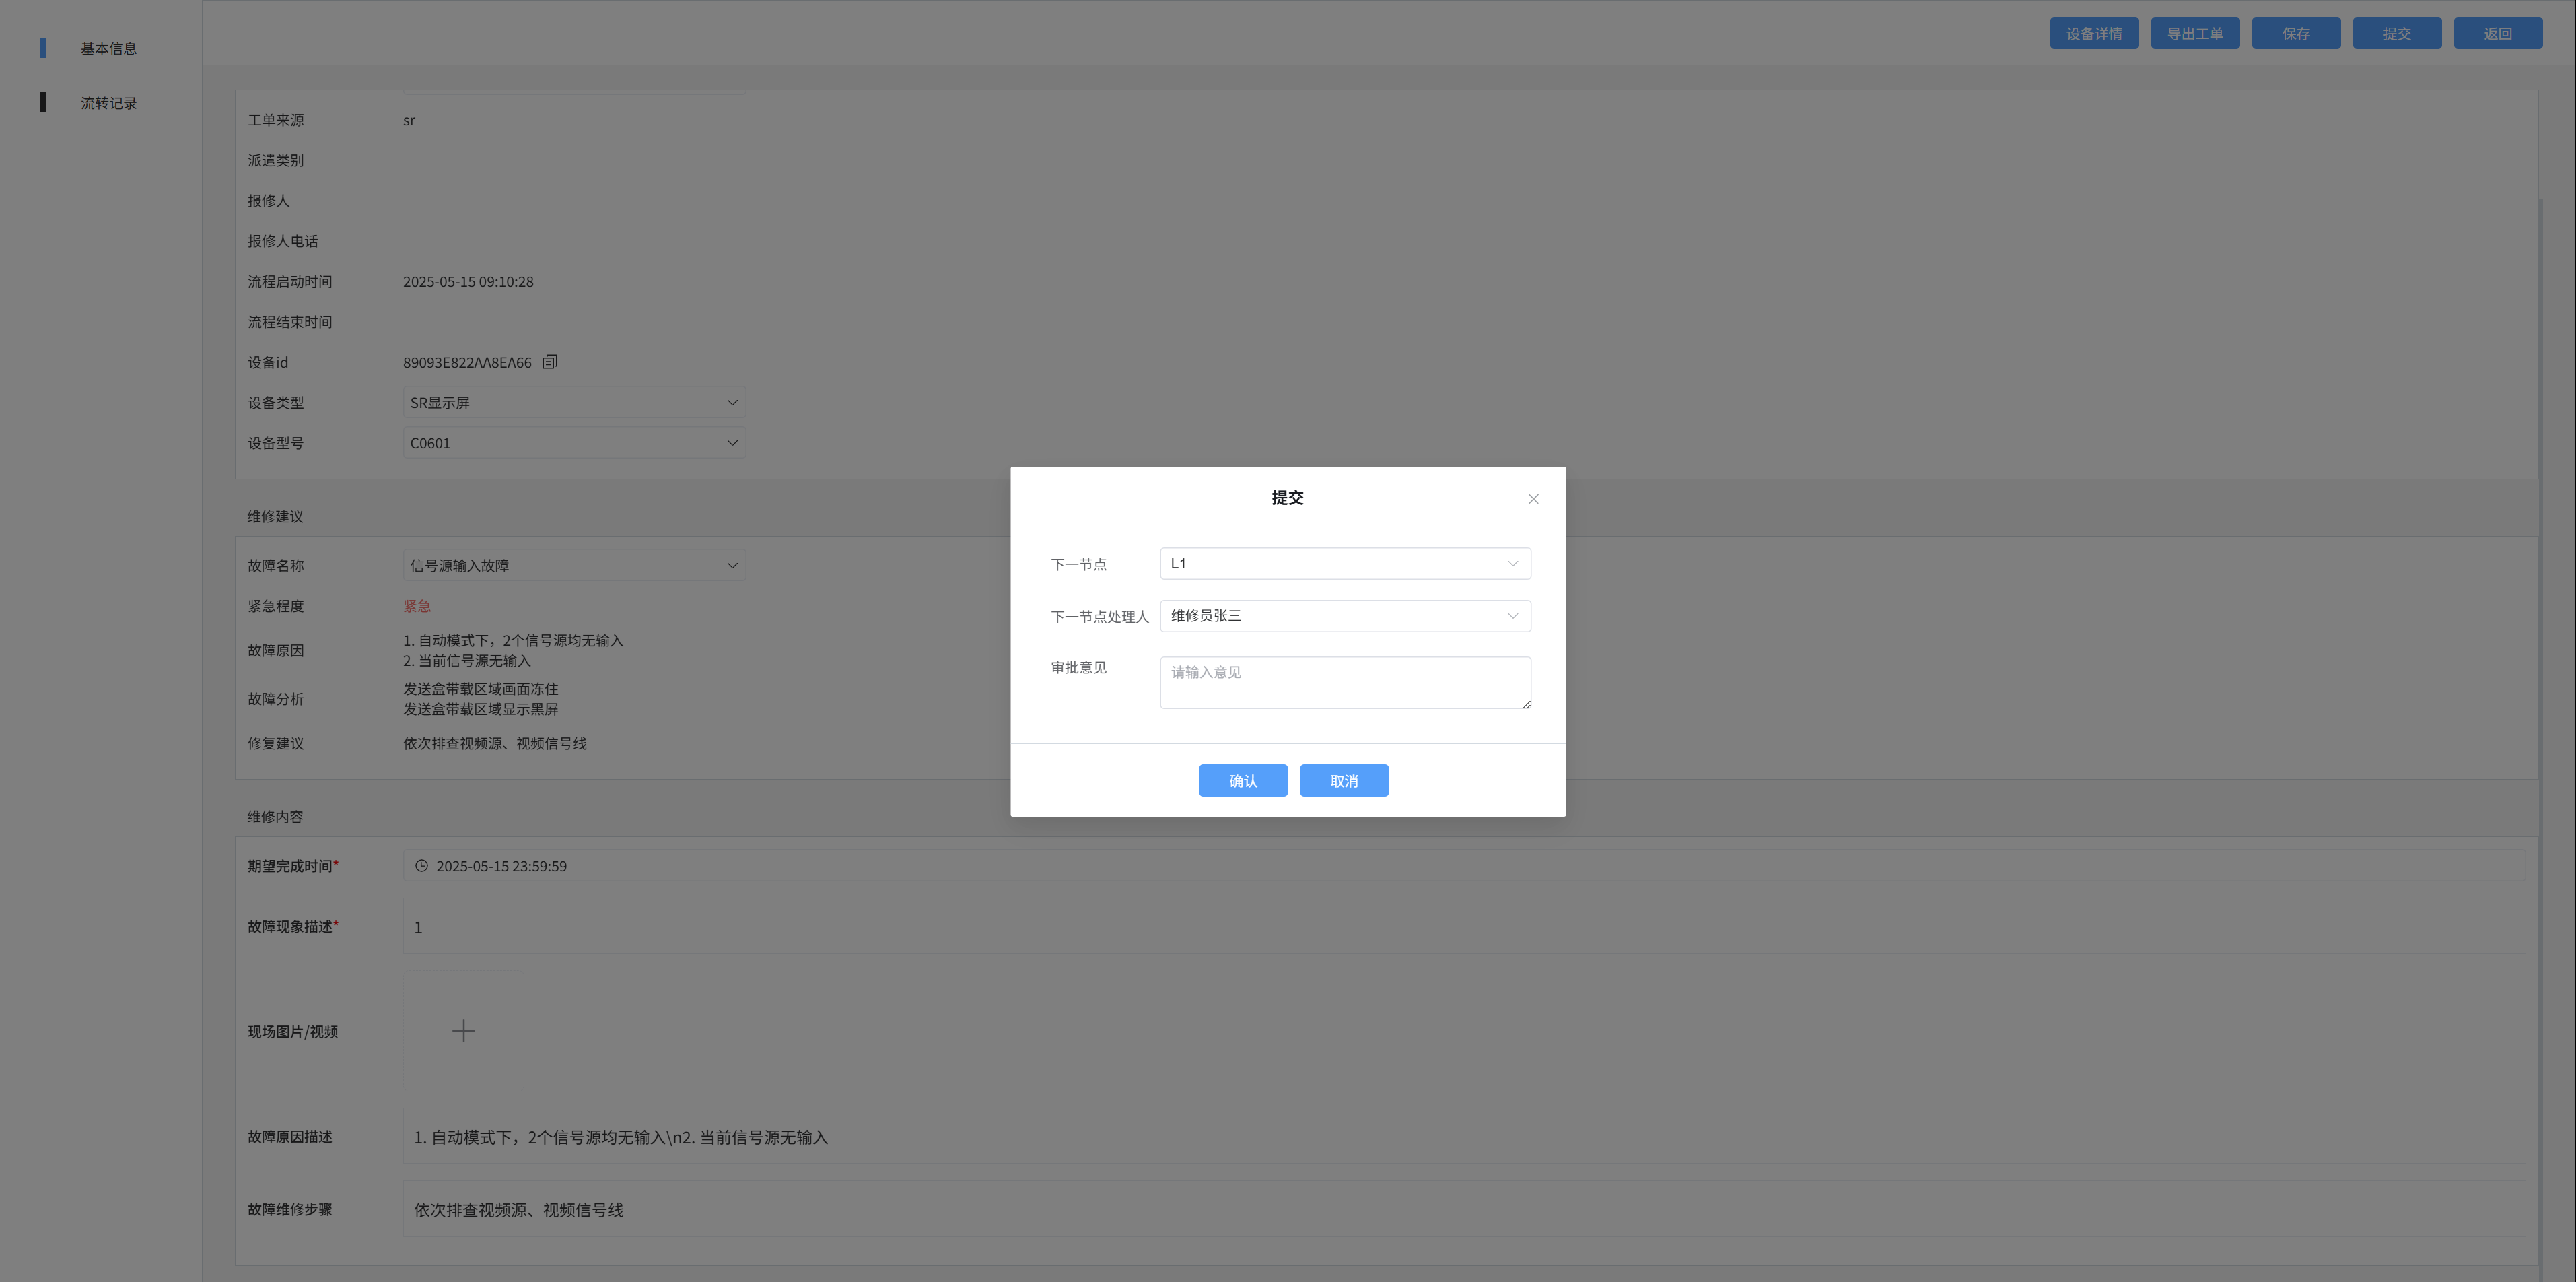
Submit a ticket
Select the next node
Select the next node handler
Circulation history - See where the current flow is going
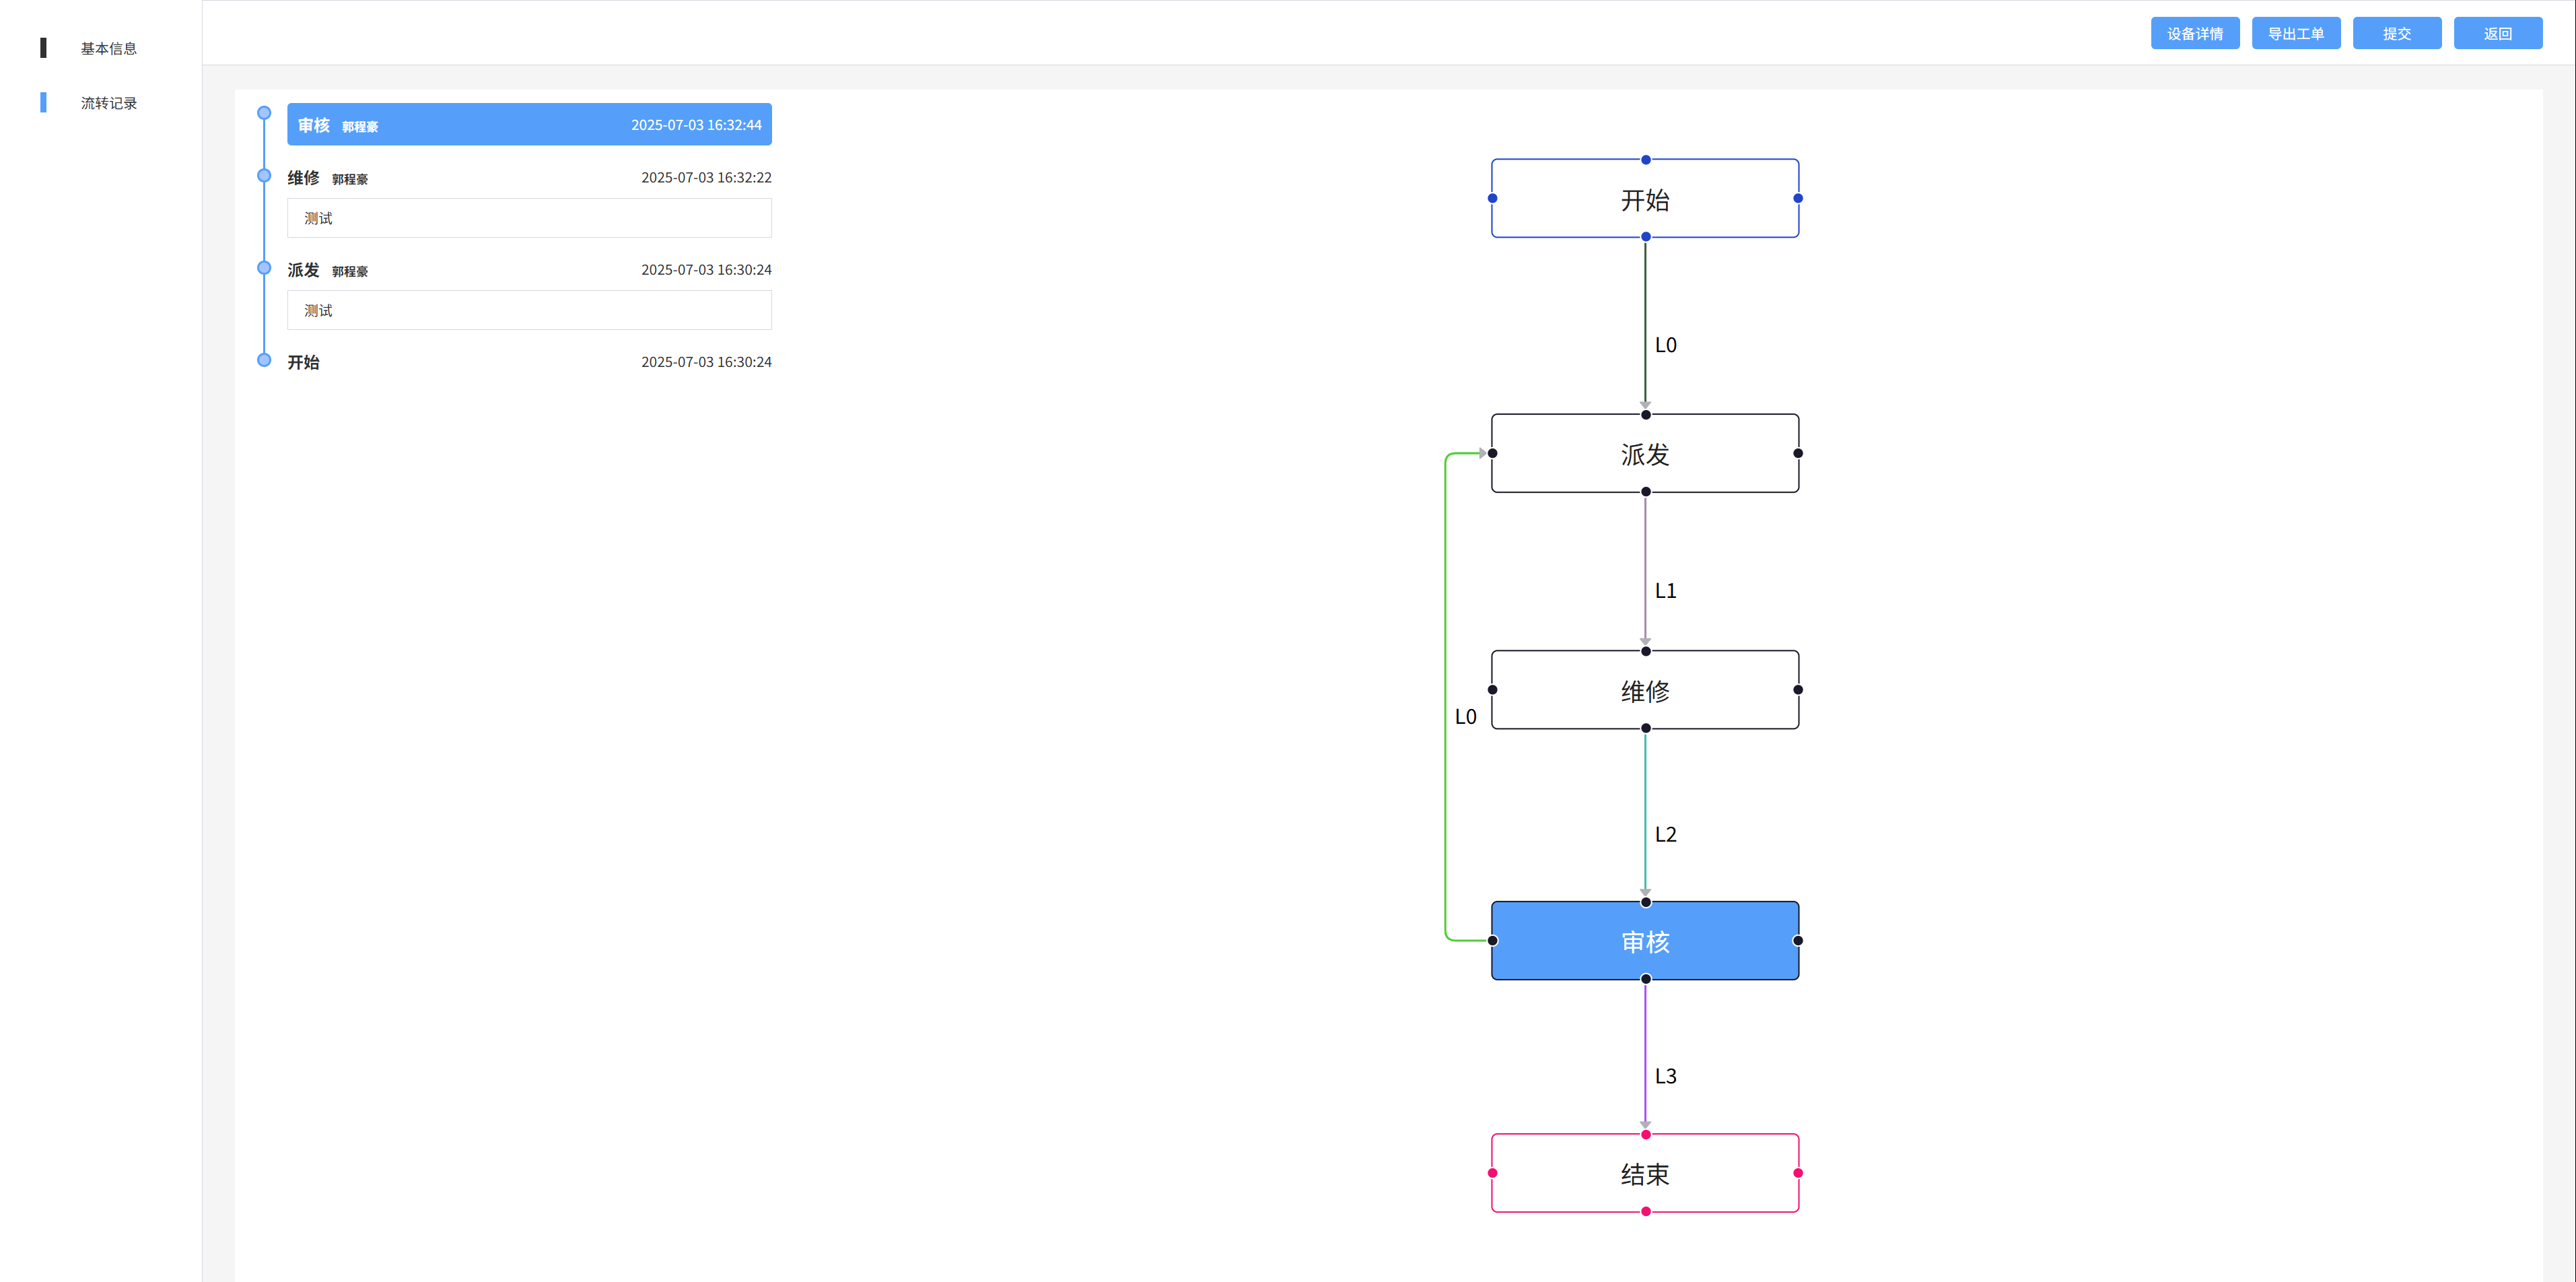
4: Work order management - in progress / completed list / canceled list
Displays work order information that is in progress/completed/canceled
- In progress: A ticket that I have processed and is not currently in my hands
- Completed: Work orders that I have processed, completed, or terminated
- Canceled: The ticket that I terminated
1. Search
The search method is the same as the to-do search
2. Detail
The done details and to-do details are not editable
5: Fault code management - fault code list
- Only published fault codes can be used
- The built-in fault code range is 1000 - 4999, and it cannot be edited or deleted
- Custom fault code range 5001 - 9999, all fault codes added by the new button are custom fault codes
1. List of fault codes
Select the [Fault Code List] menu to display the currently available fault code information
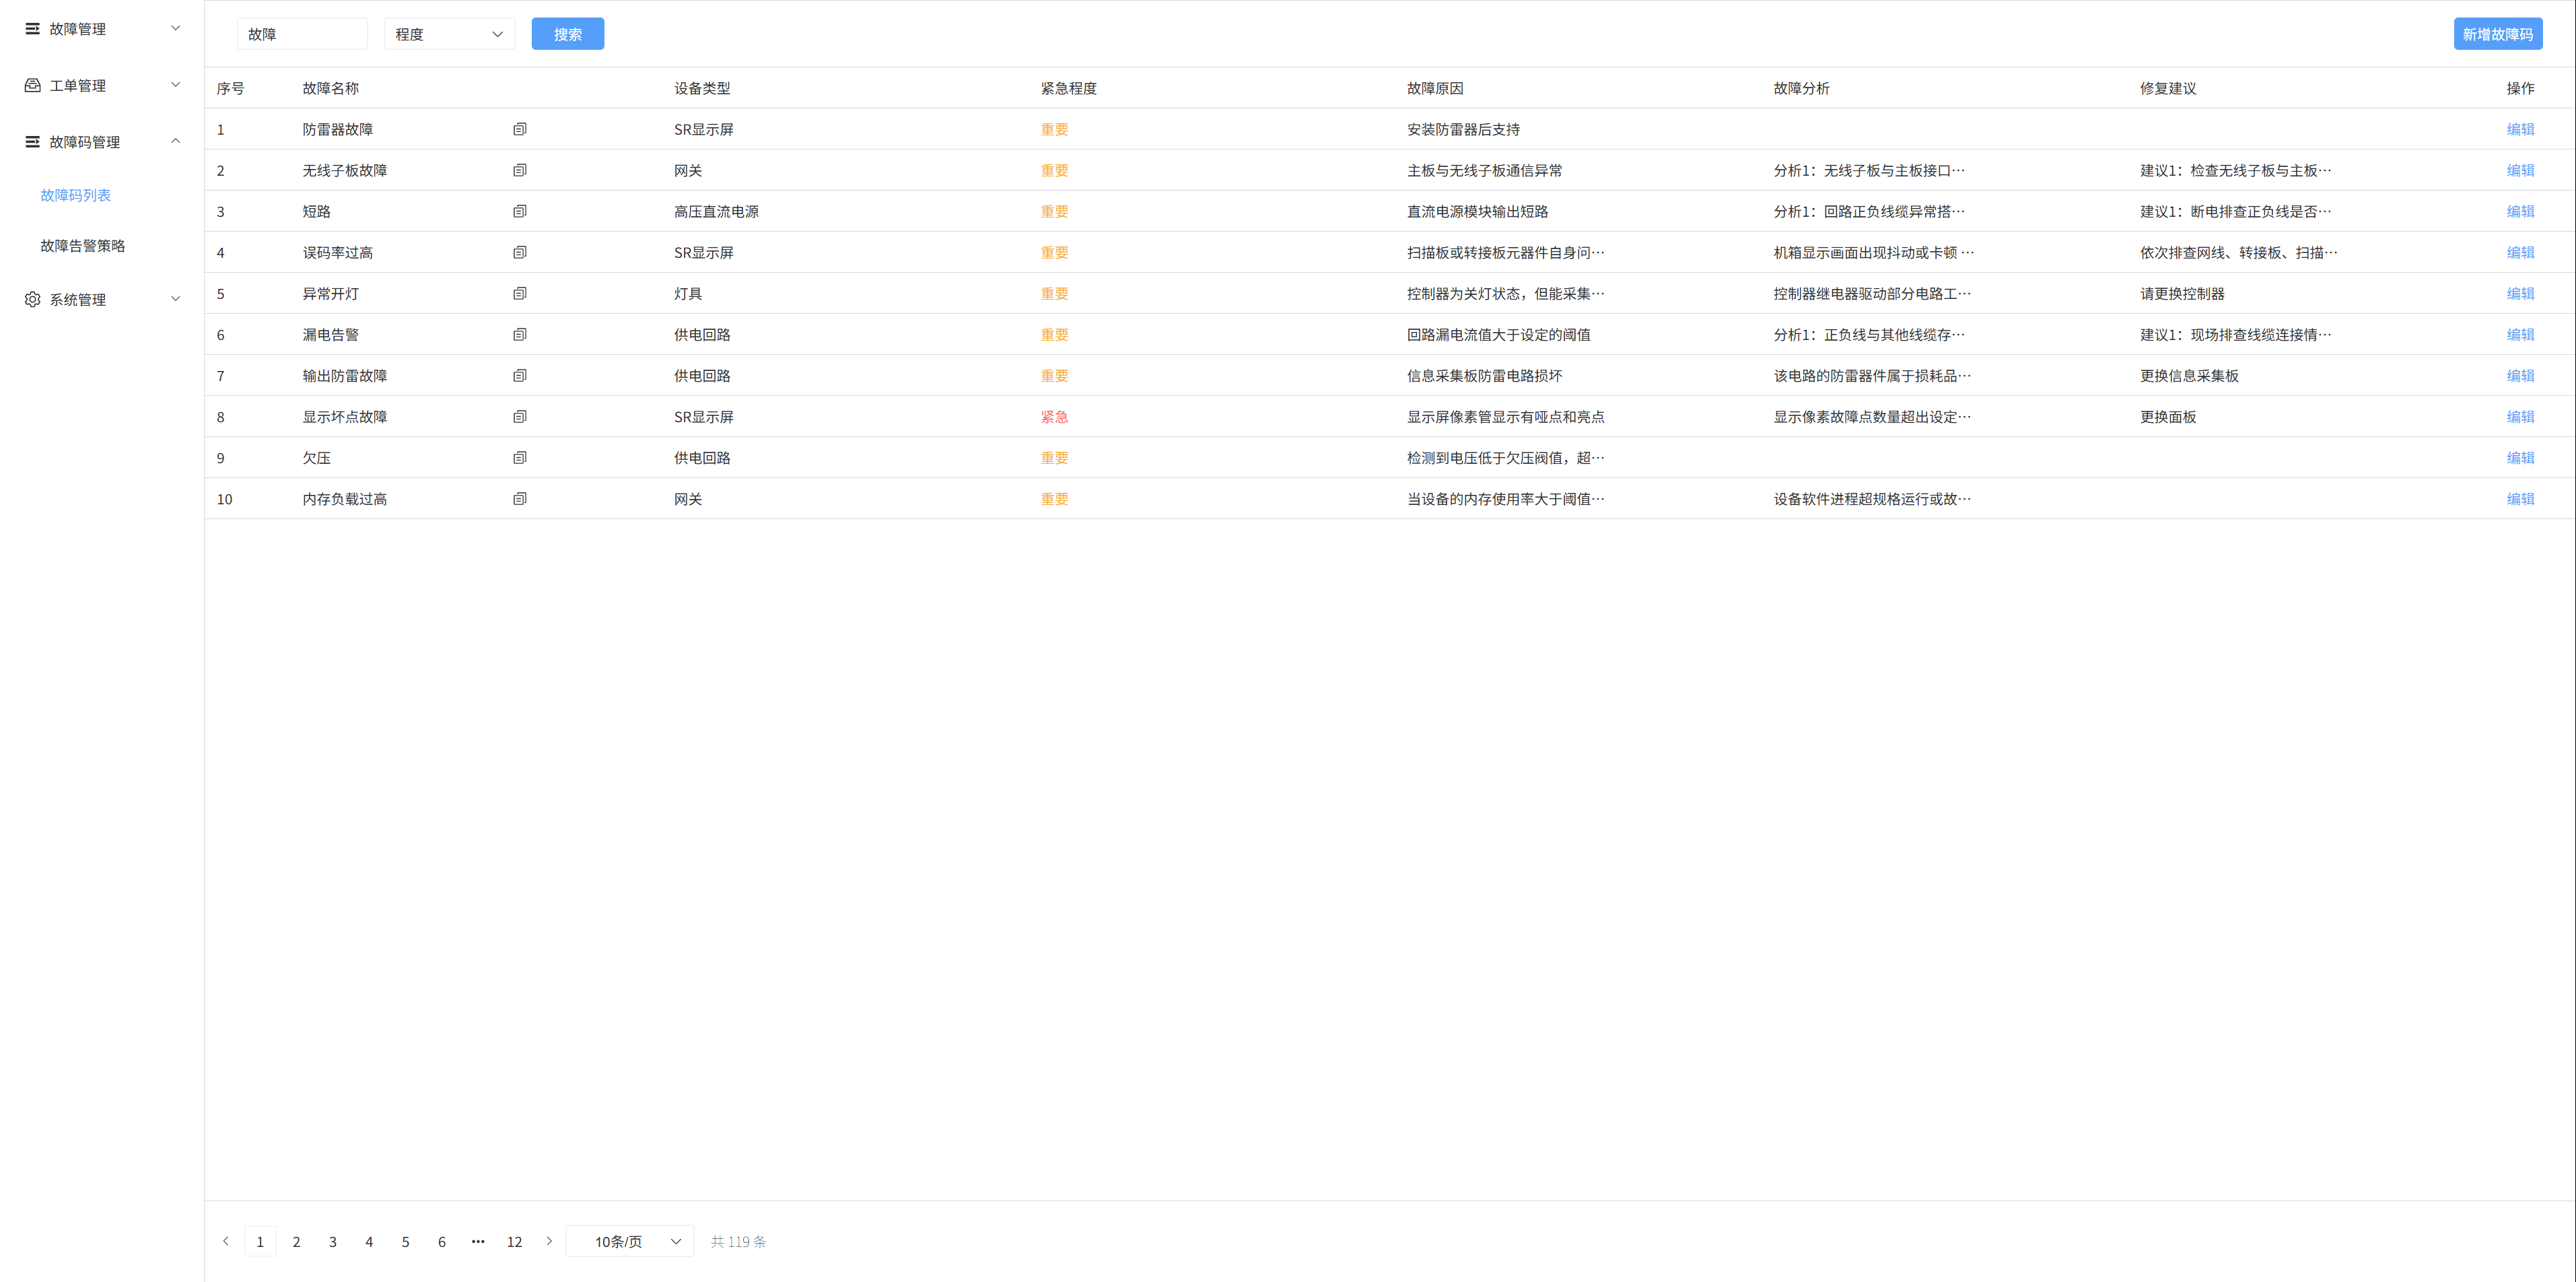
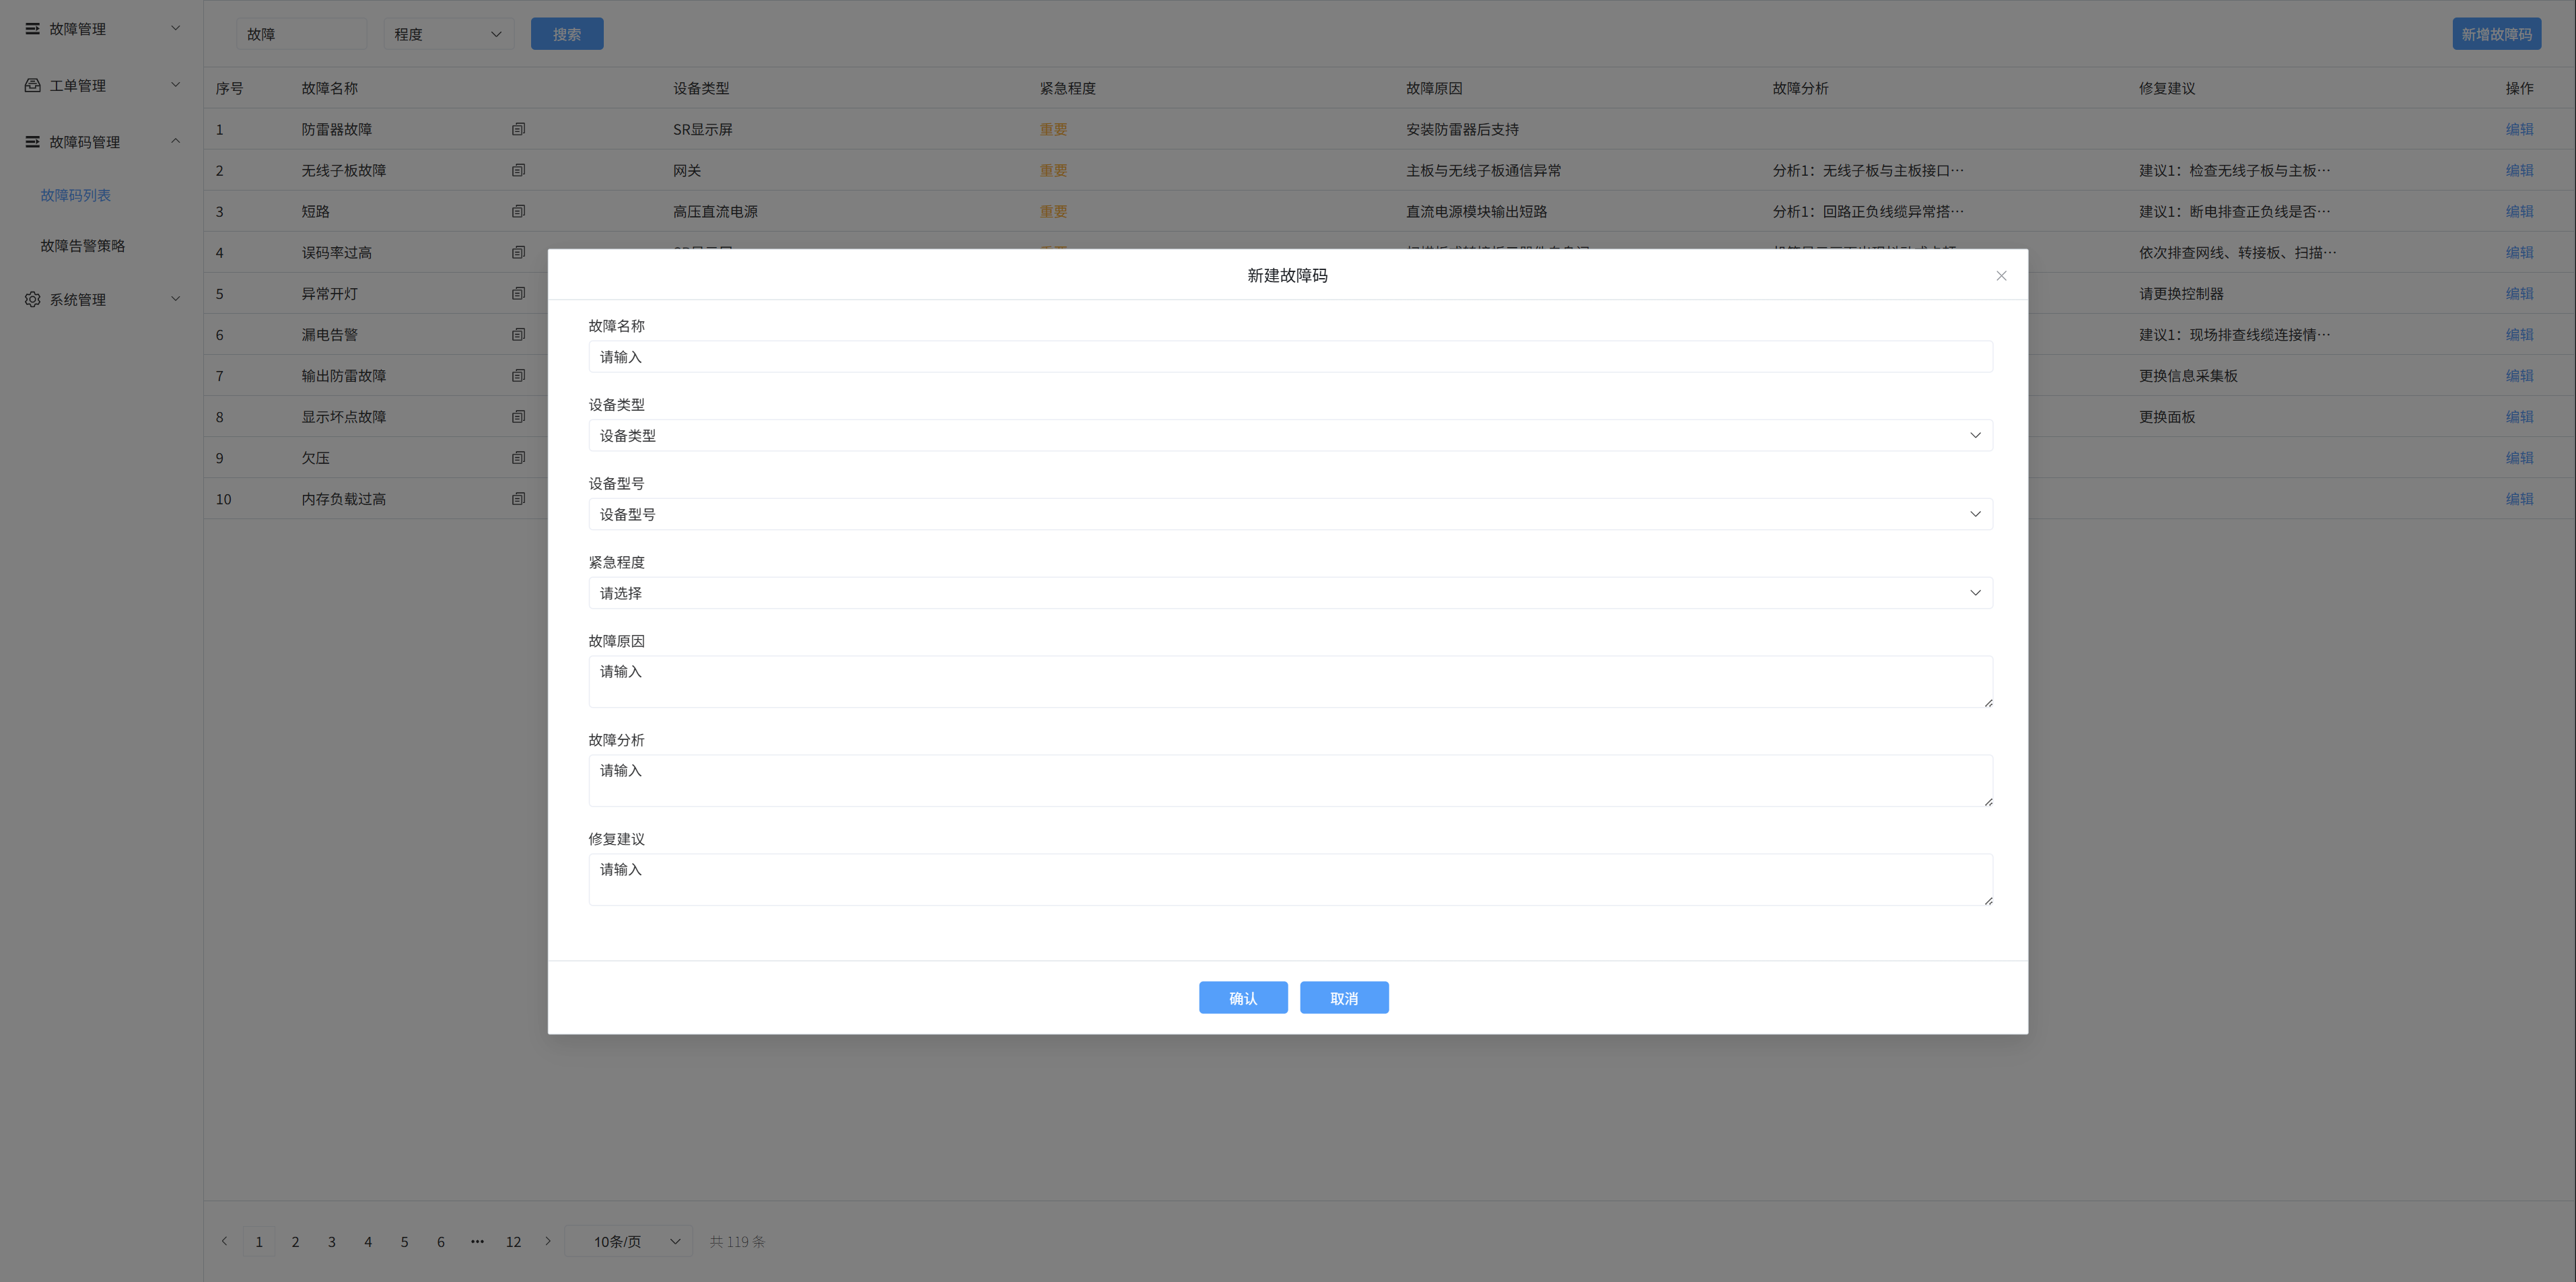
2. Added fault codes
Select the [Fault Code List] menu, click the [Add Fault Code] button on the right, a pop-up window will appear, enter the fault name, device type, device model, urgency, fault cause, fault analysis, and repair suggestions in the pop-up box, and then click OK to create a new fault code
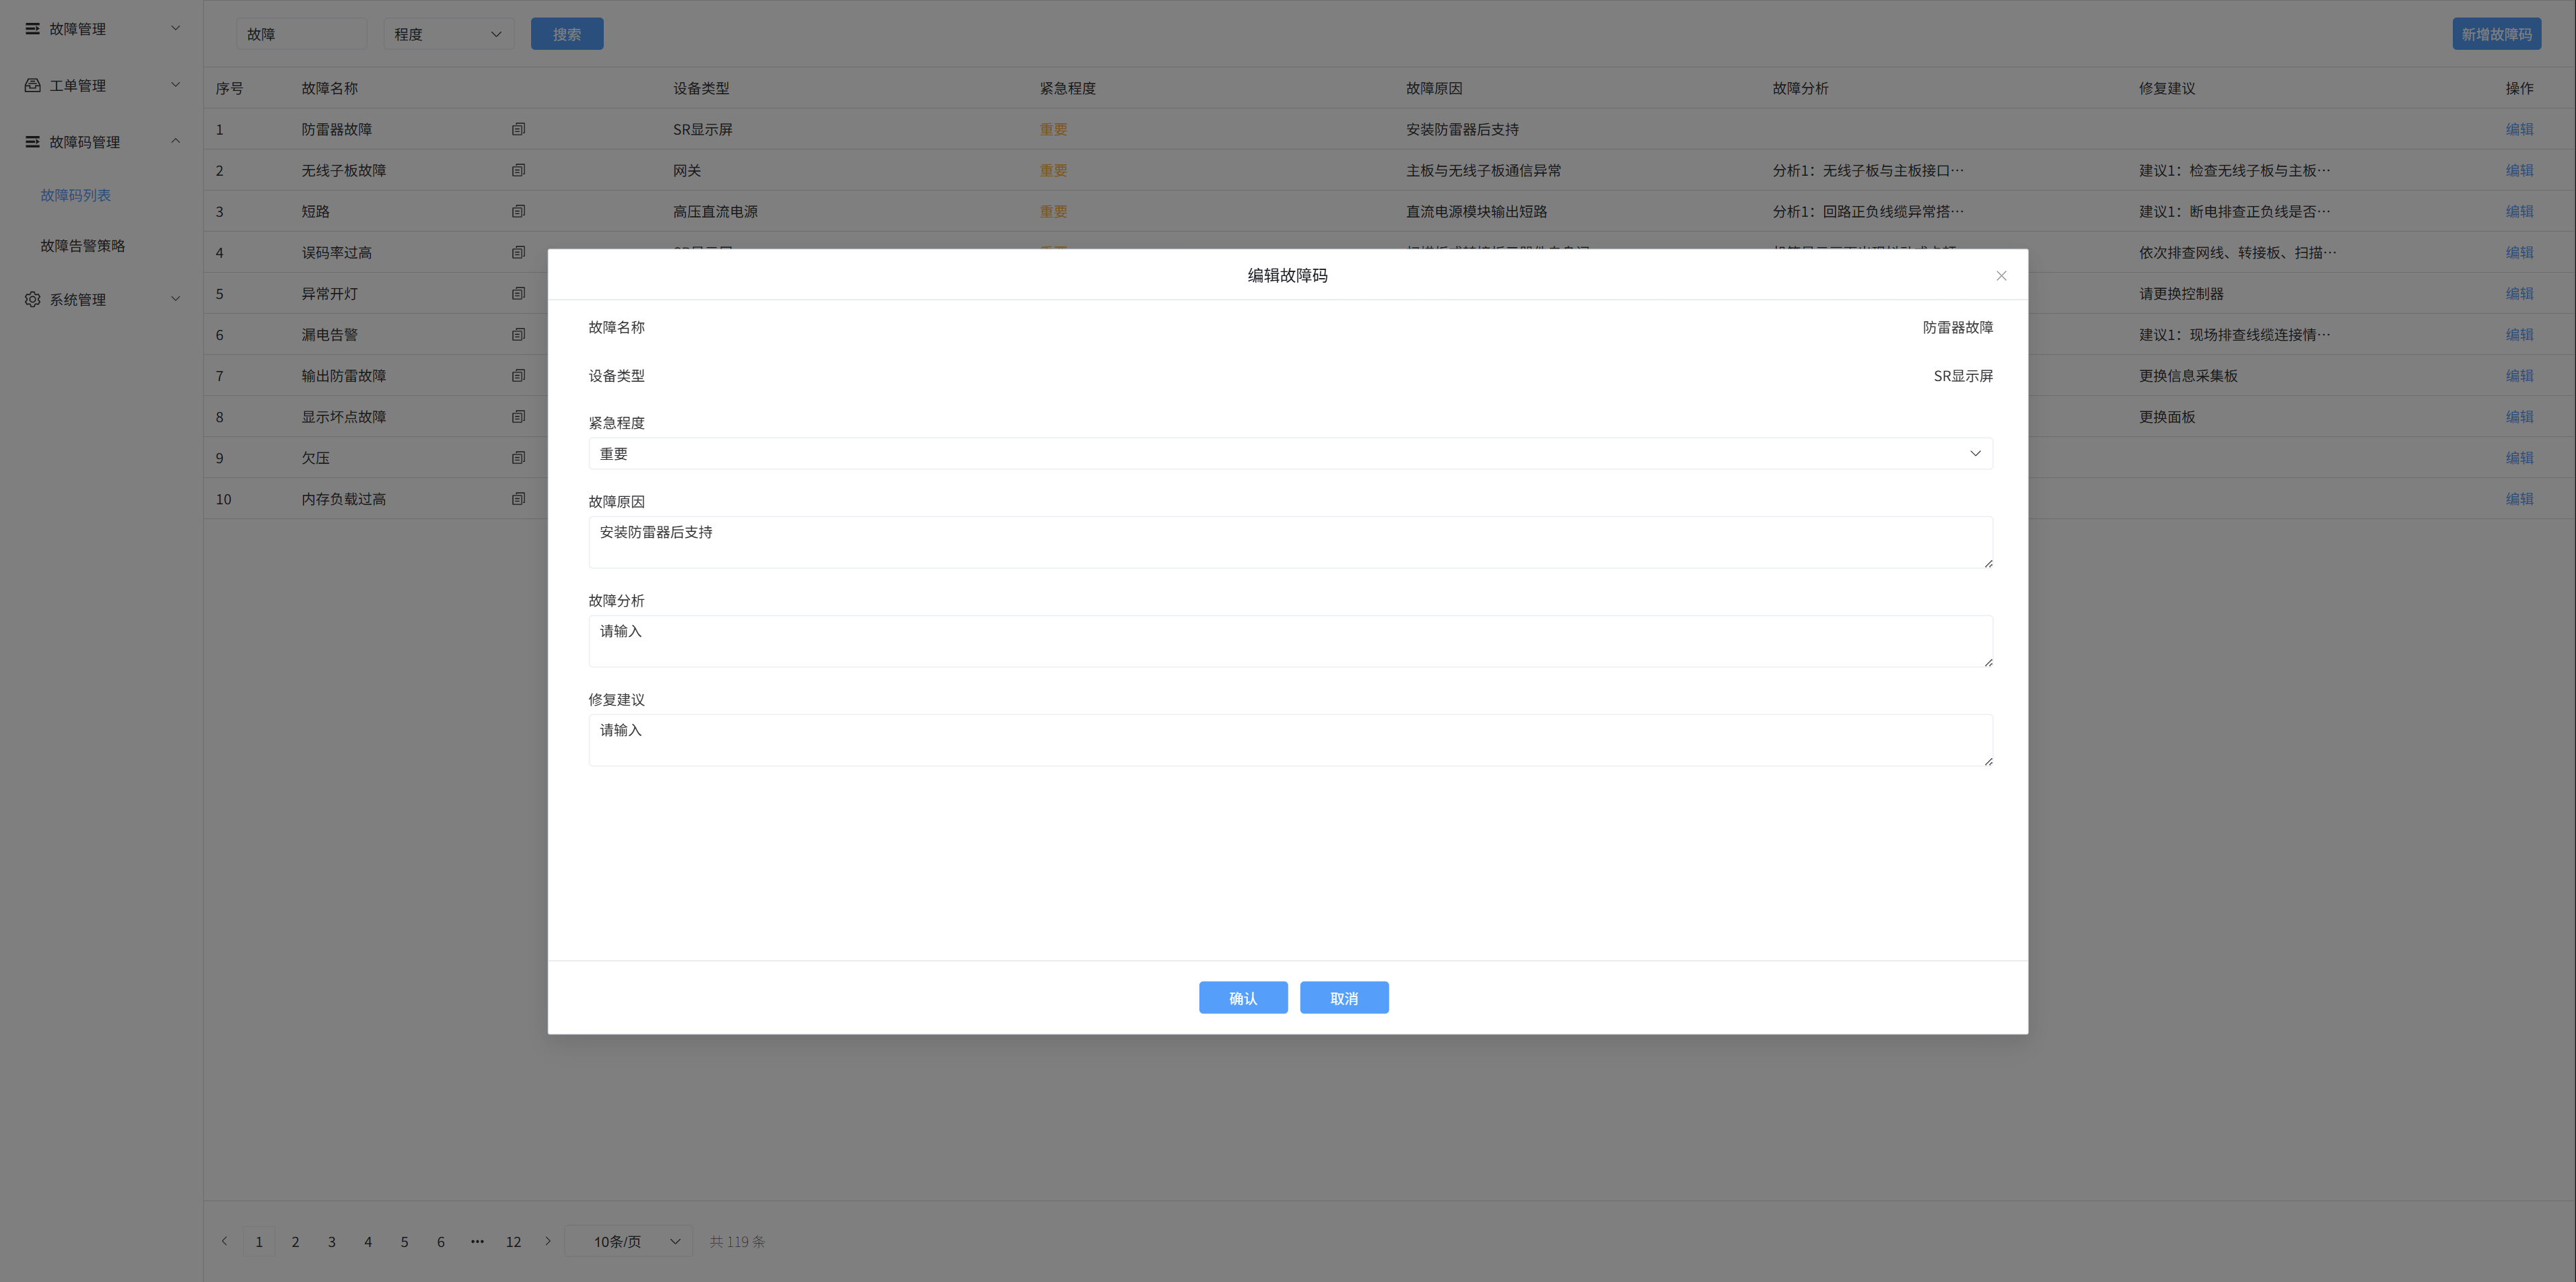
3. Edit the fault code
Click the [Edit] button to modify the urgency of the fault code, the cause of the fault, the fault analysis, and the repair suggestion
6. Fault code management - fault alarm strategy
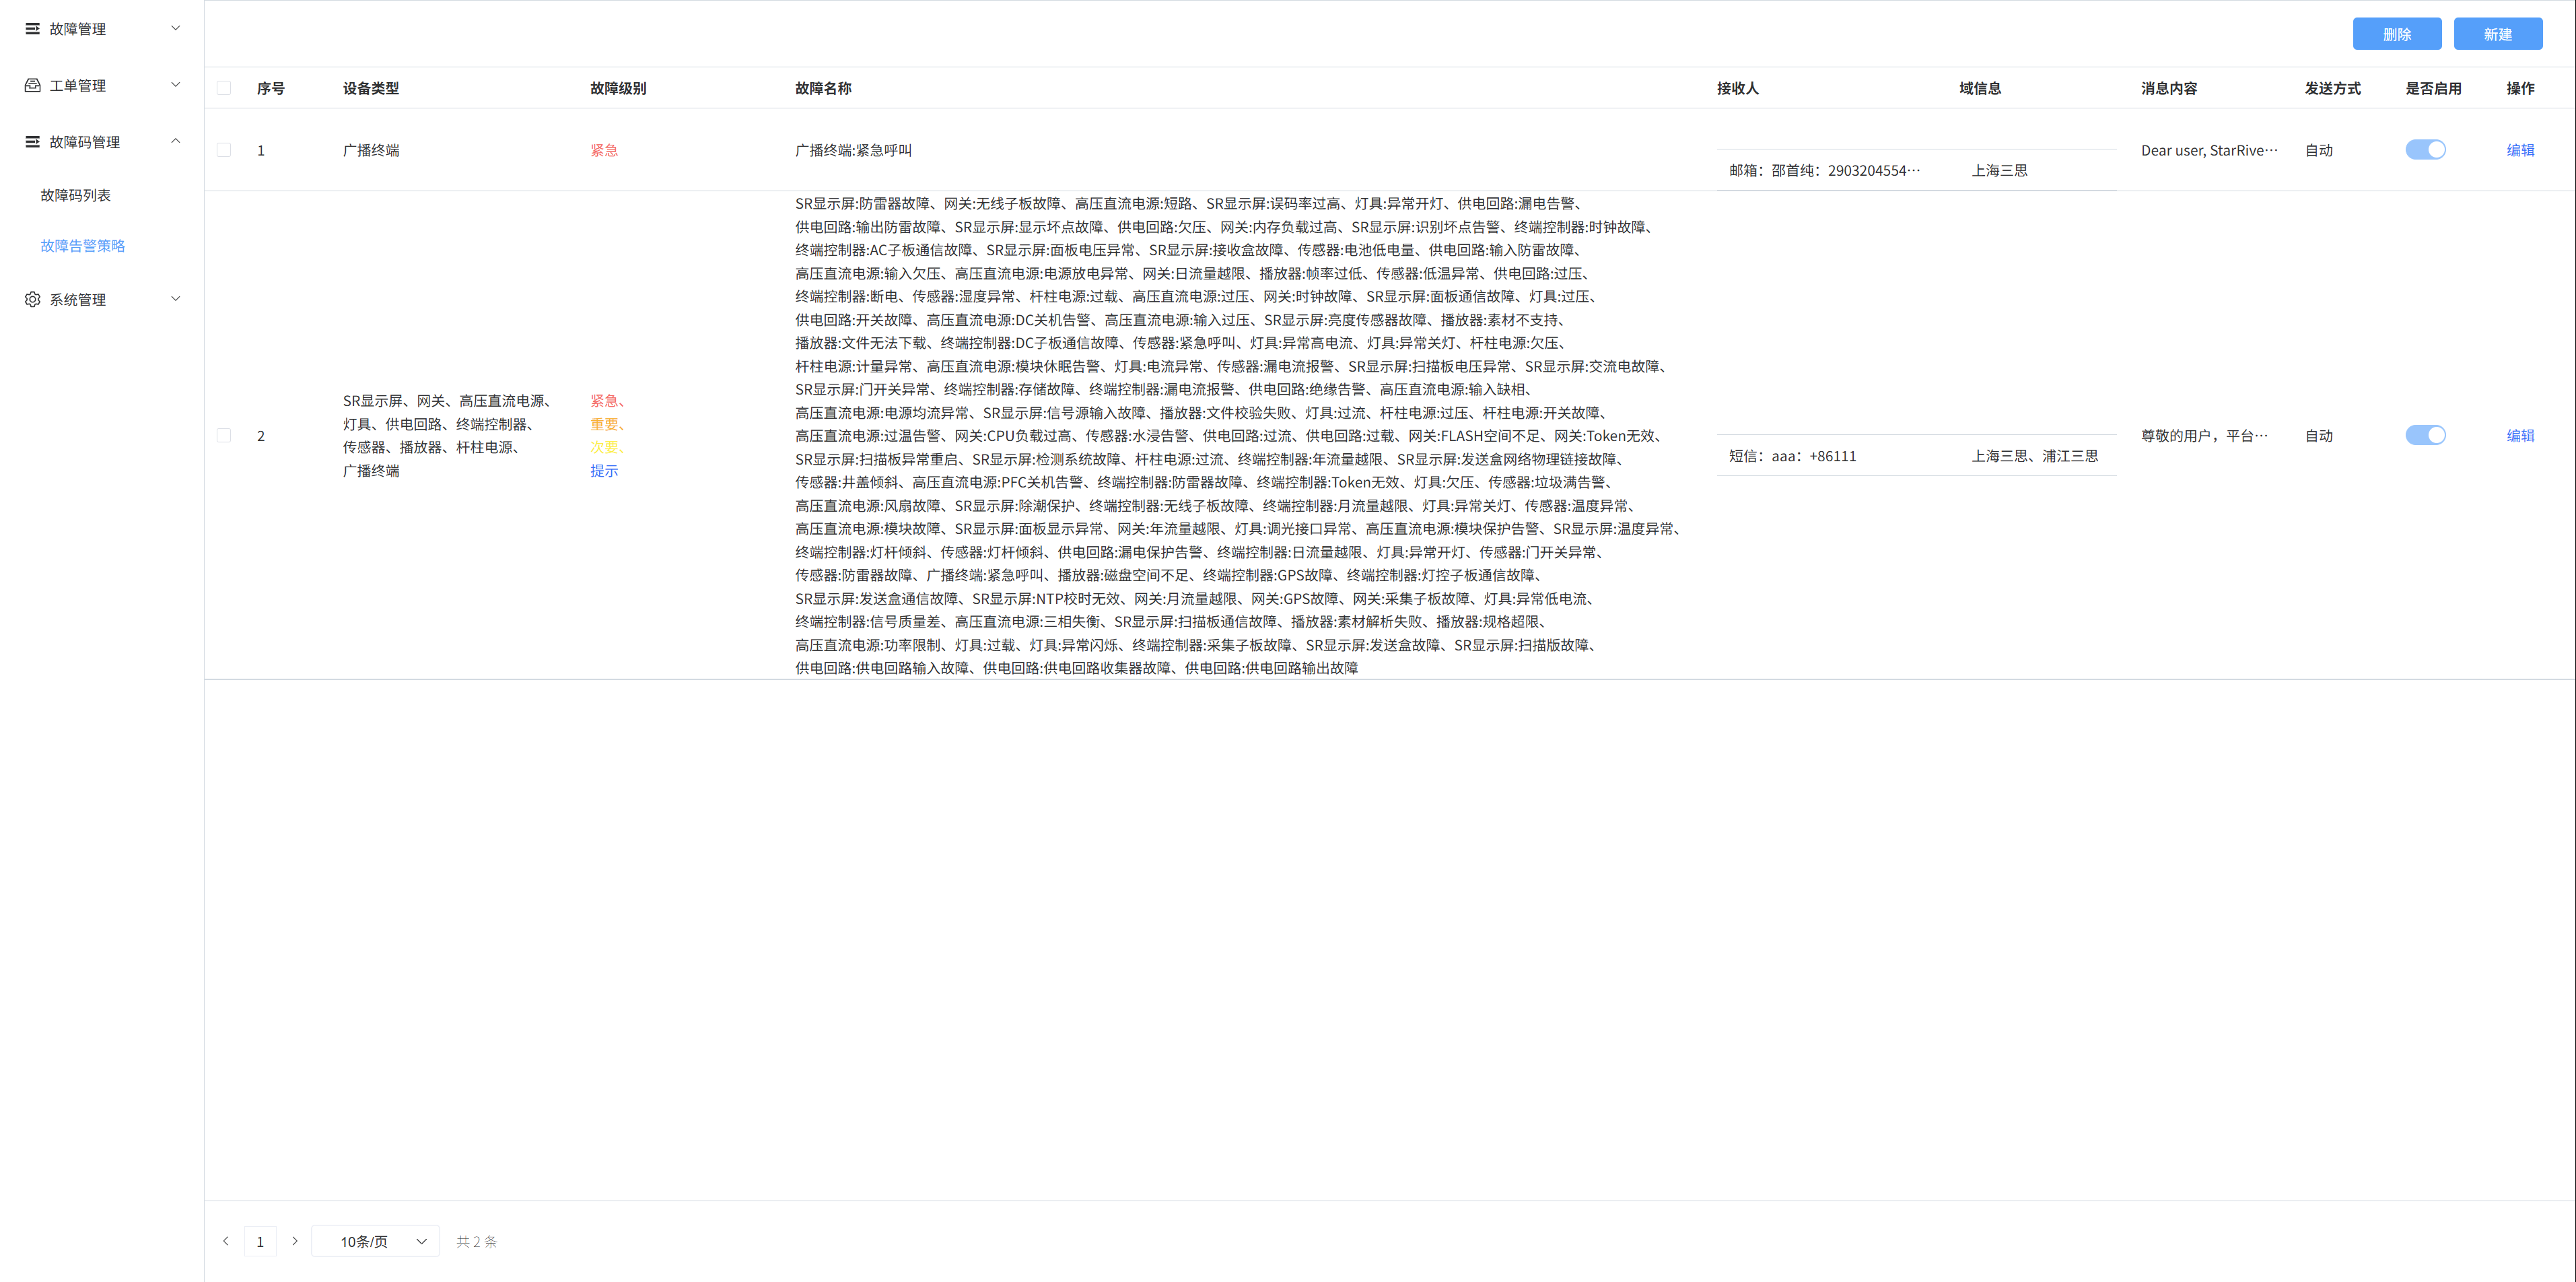
1. List of fault alarm policies
Choose the Fault Alarm Policy menu to display the current fault alarm policy information
2. Create a fault alarm policy
Select the [Fault Alarm Policy] menu, click the [New] button on the right, a pop-up window will appear, select the device type, fault level, fault name, recipient information, message content, sending method, and whether to enable it, and then click OK to create a new fault alarm policy
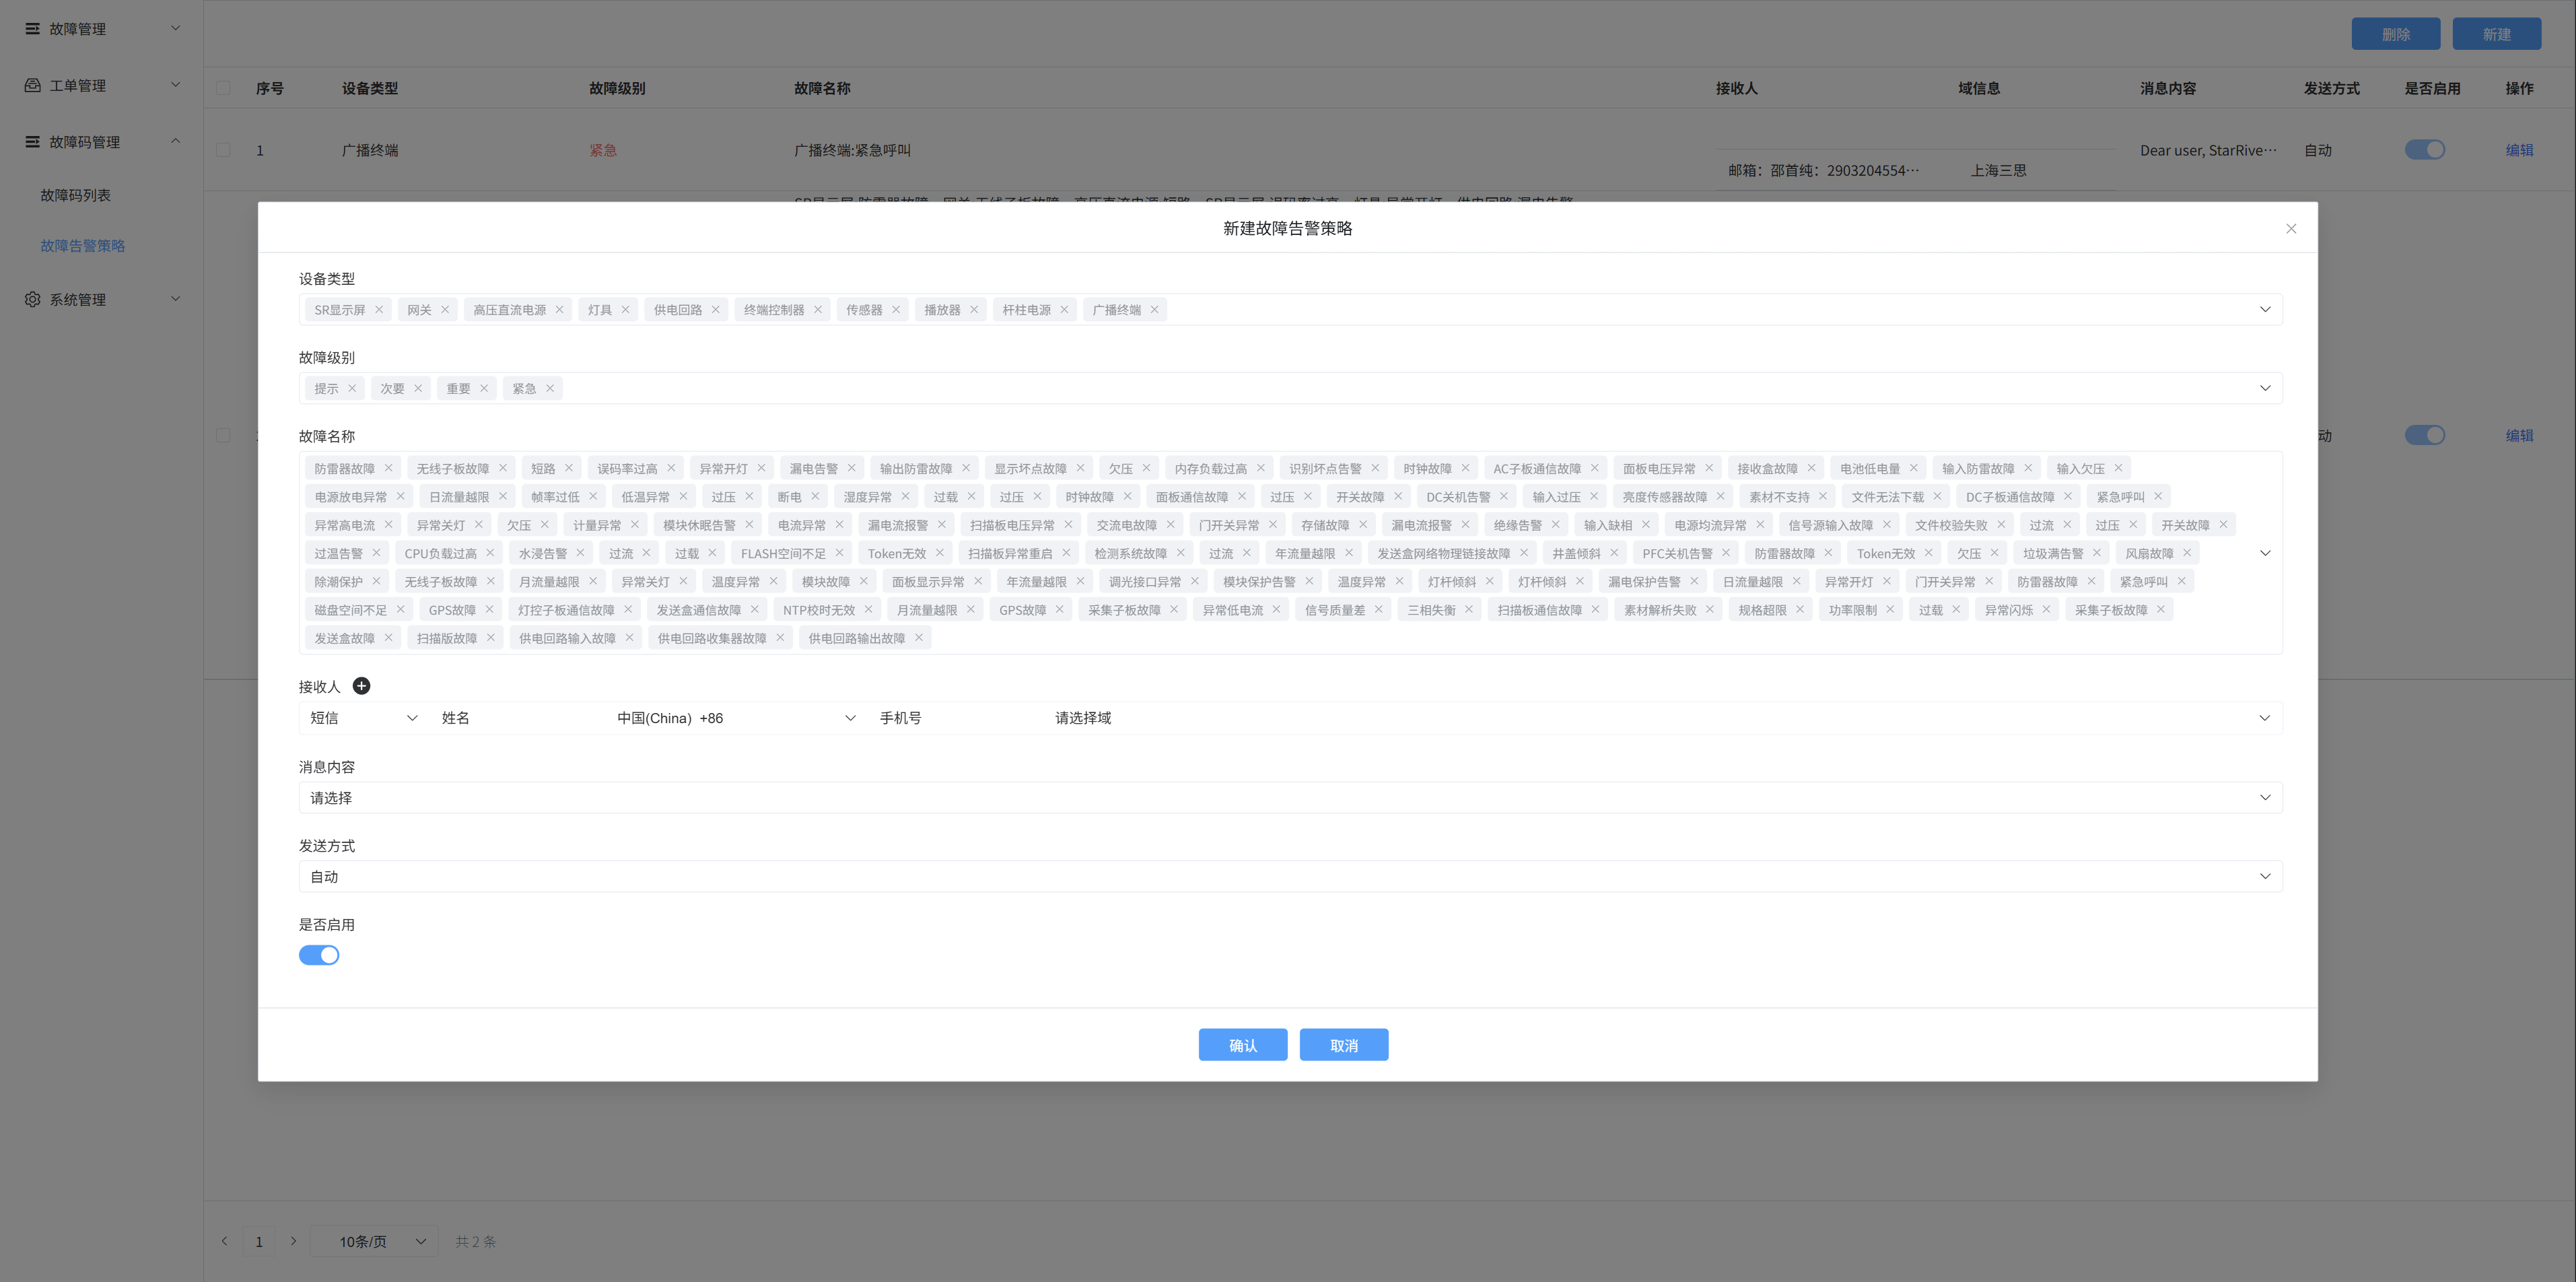
3. Edit the fault alarm policy
Click the Edit button to modify the device type, fault level, fault name, recipient information, message content, sending method, and whether to enable it
Seven: System management
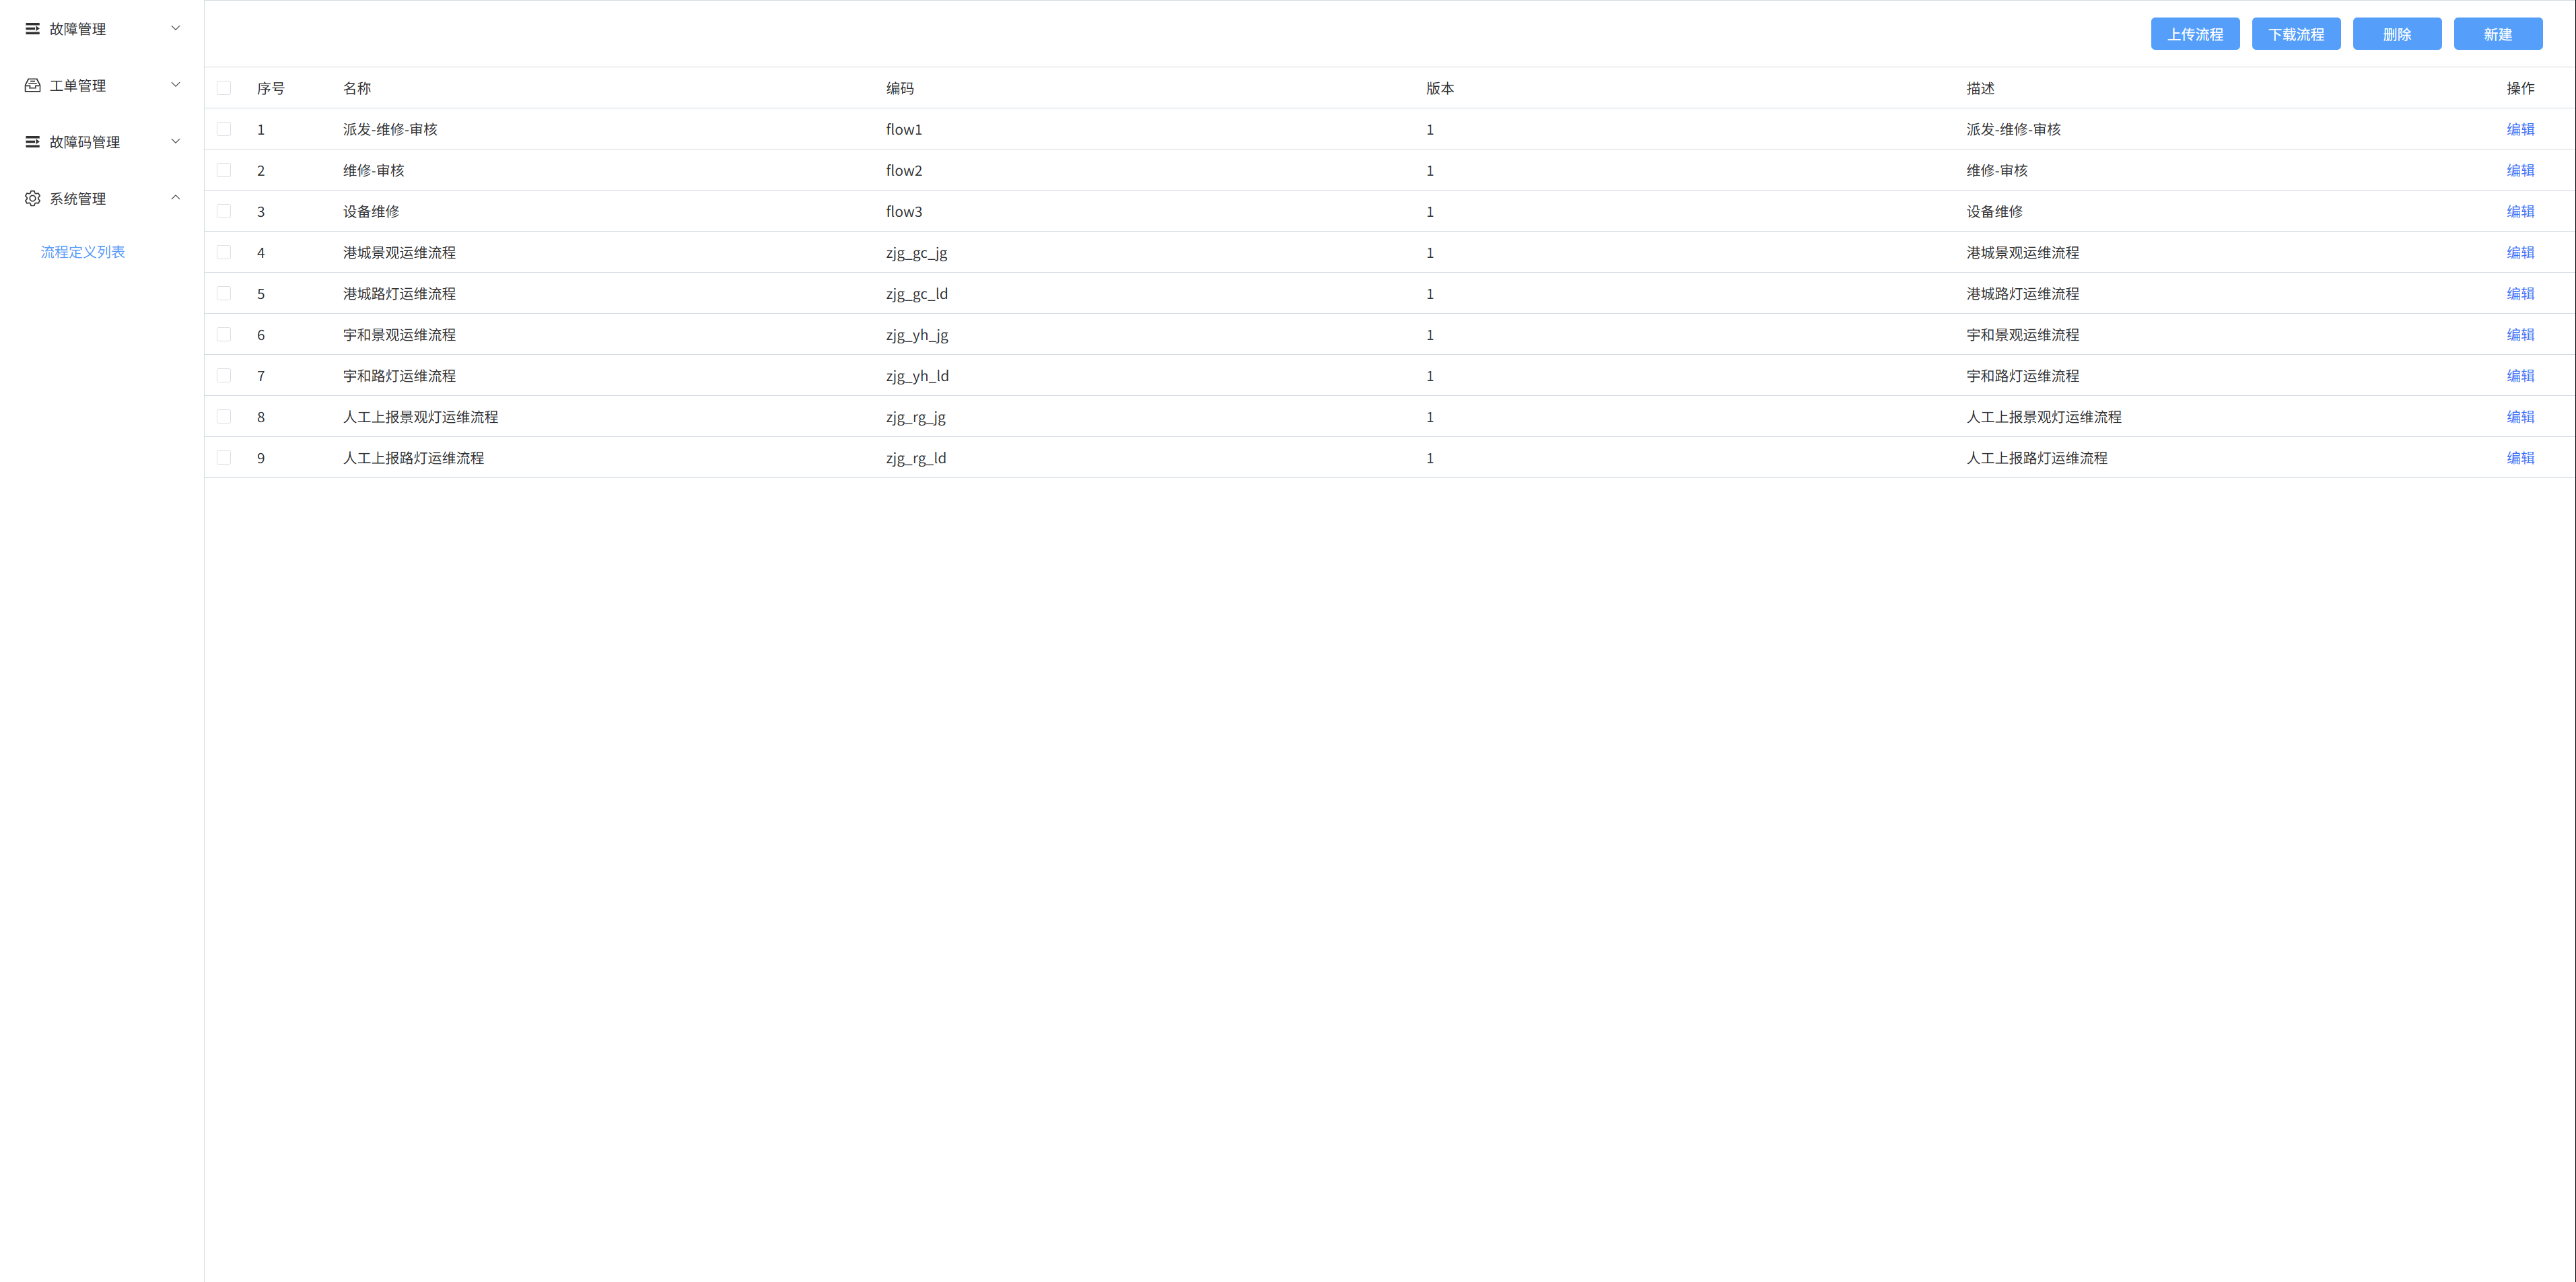
1. A list of process definitions
The information in the process list is for existing processes
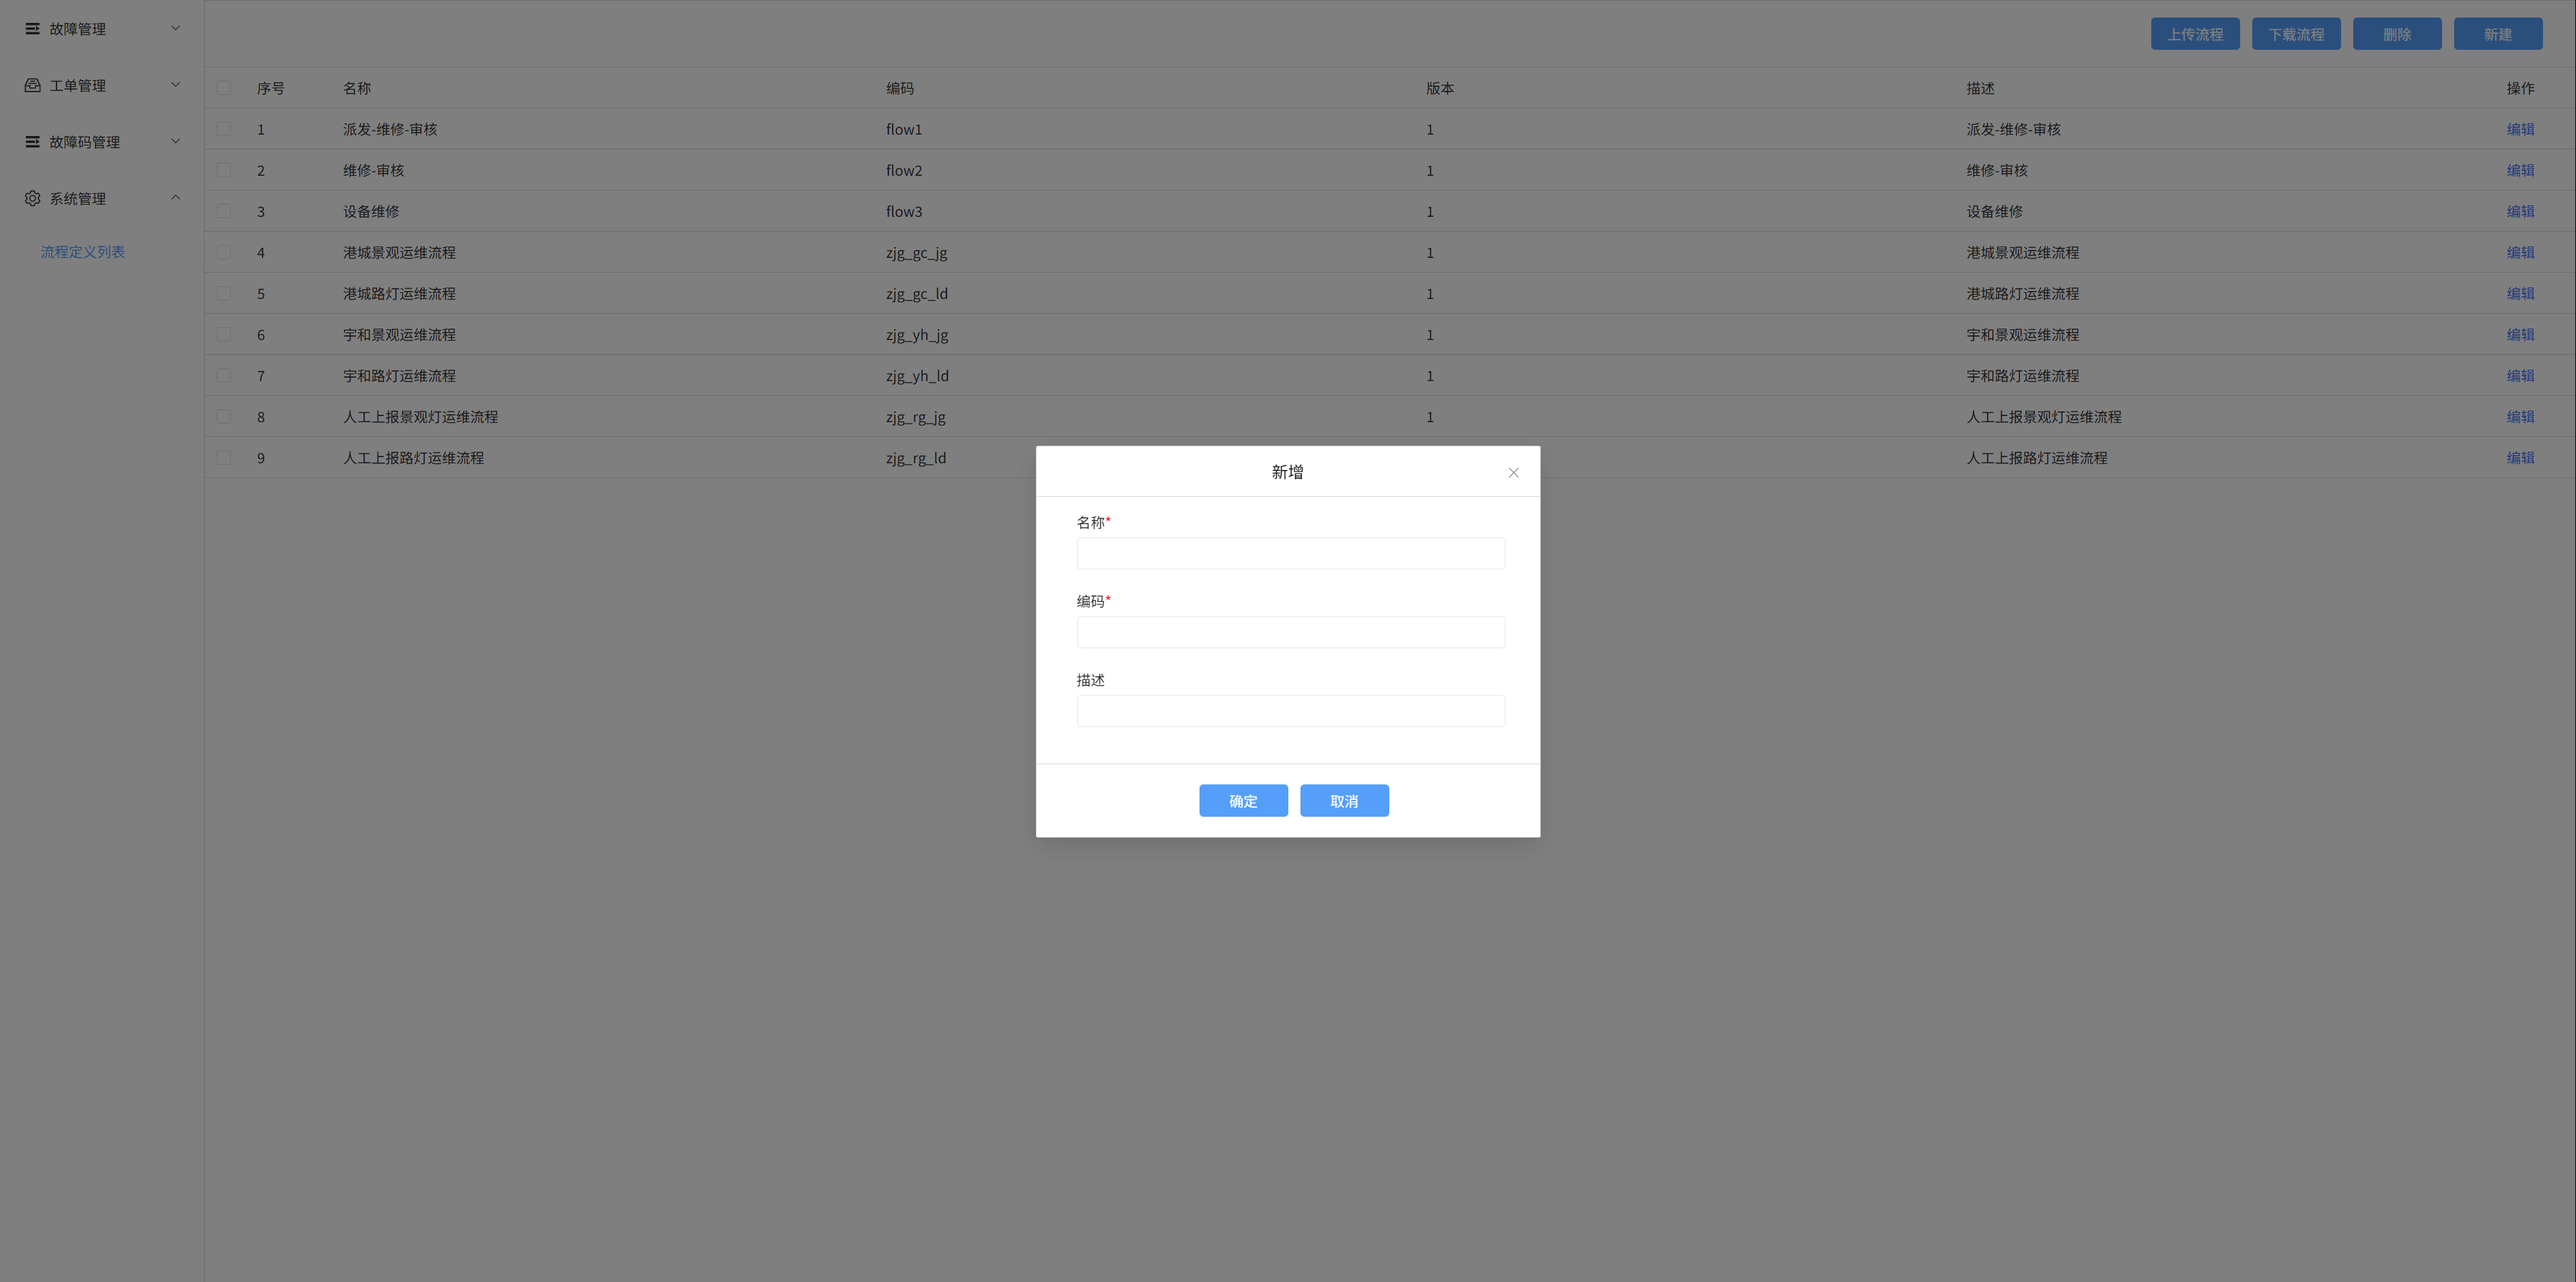
2. Create a new process
Select the [Process Definition List] menu, click the [New] button on the right, a pop-up window will appear, enter a name, code, and description in the pop-up box, and then click OK to create a new process
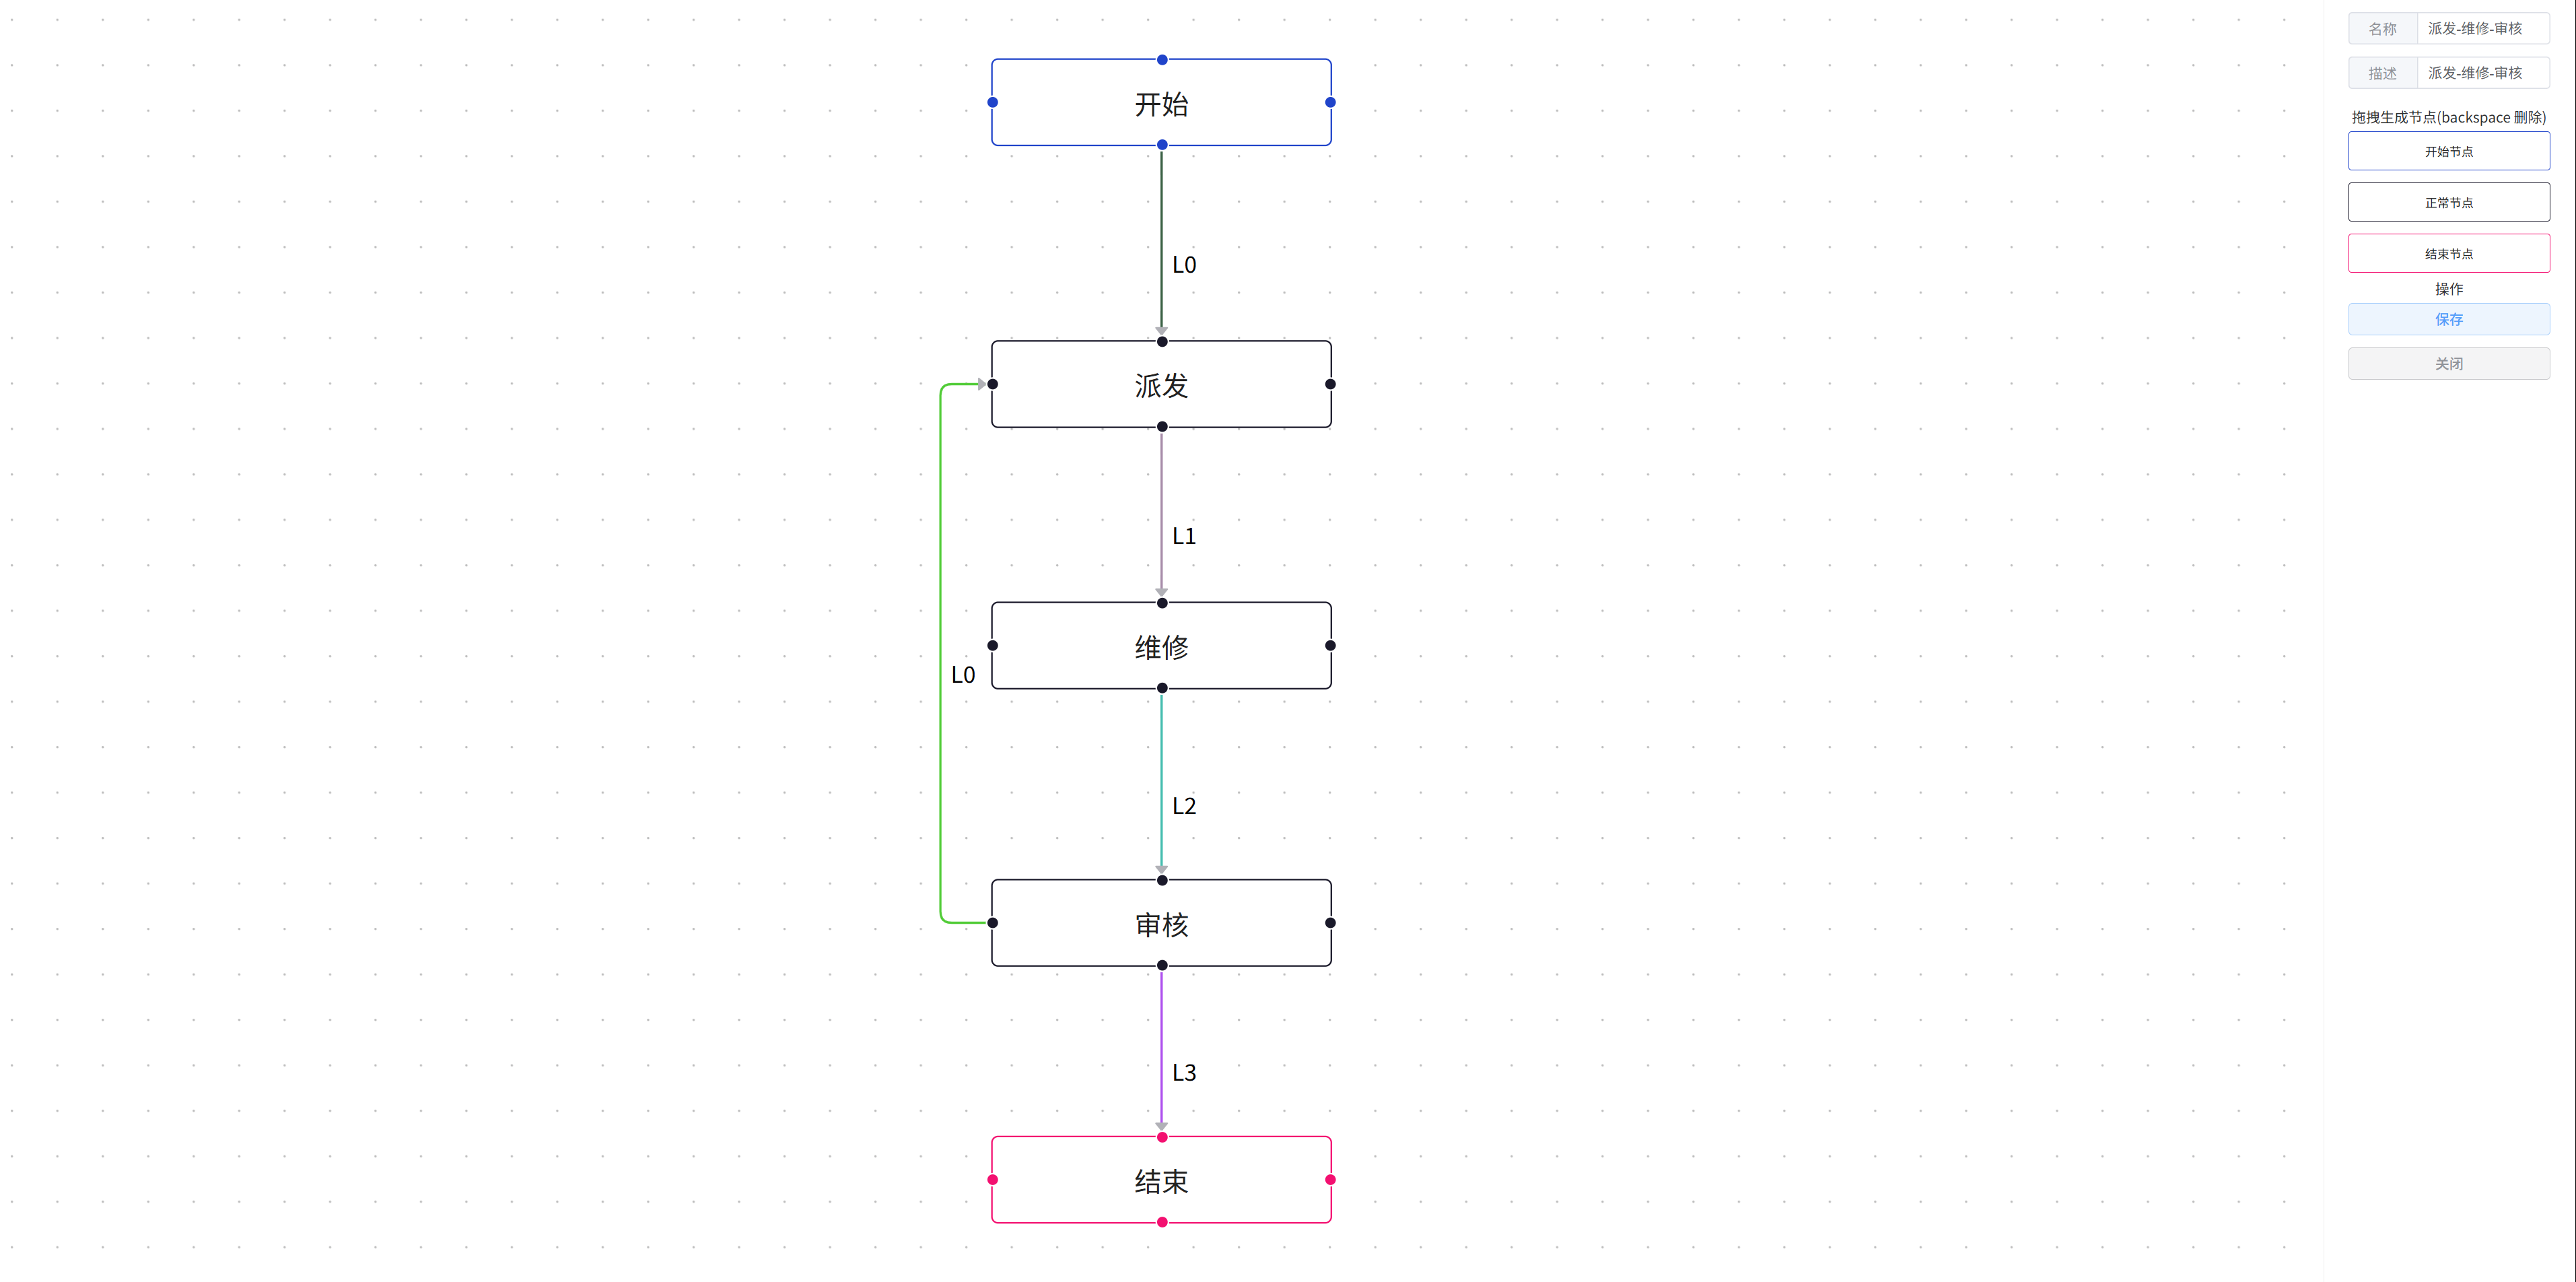
3. Edit the process
Click the [Edit] button on the right to modify the process nodes and information
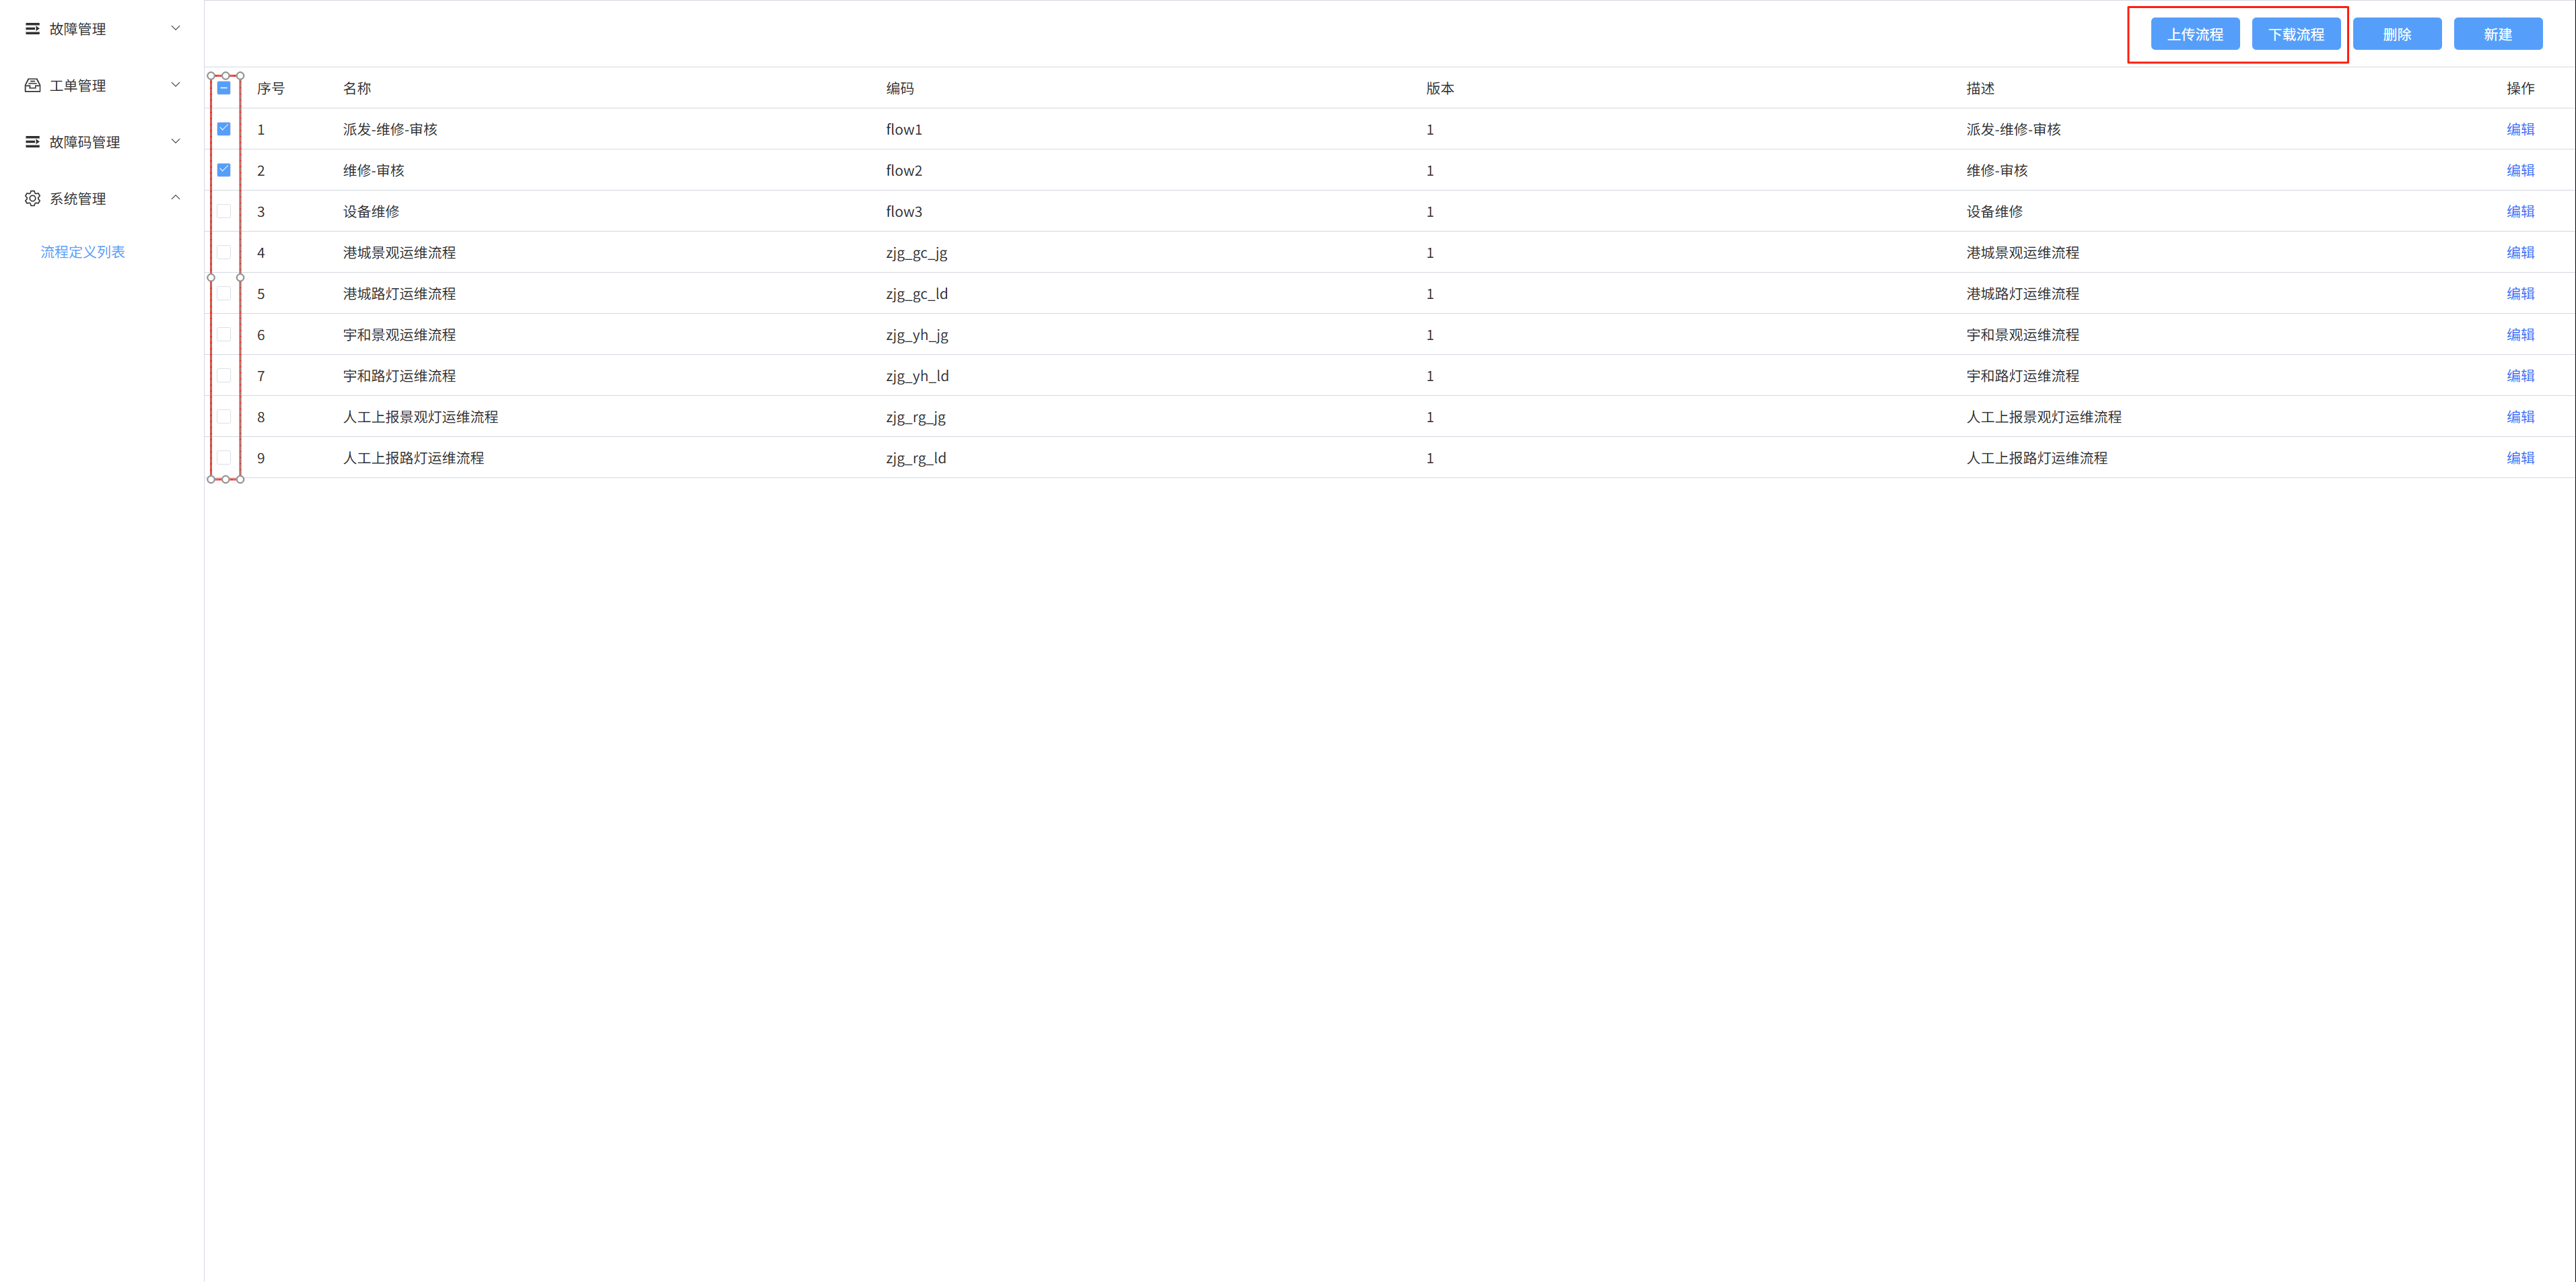
3. Upload/download process
Select the check box on the left and click the Upload/Download Process button to upload/download the process file
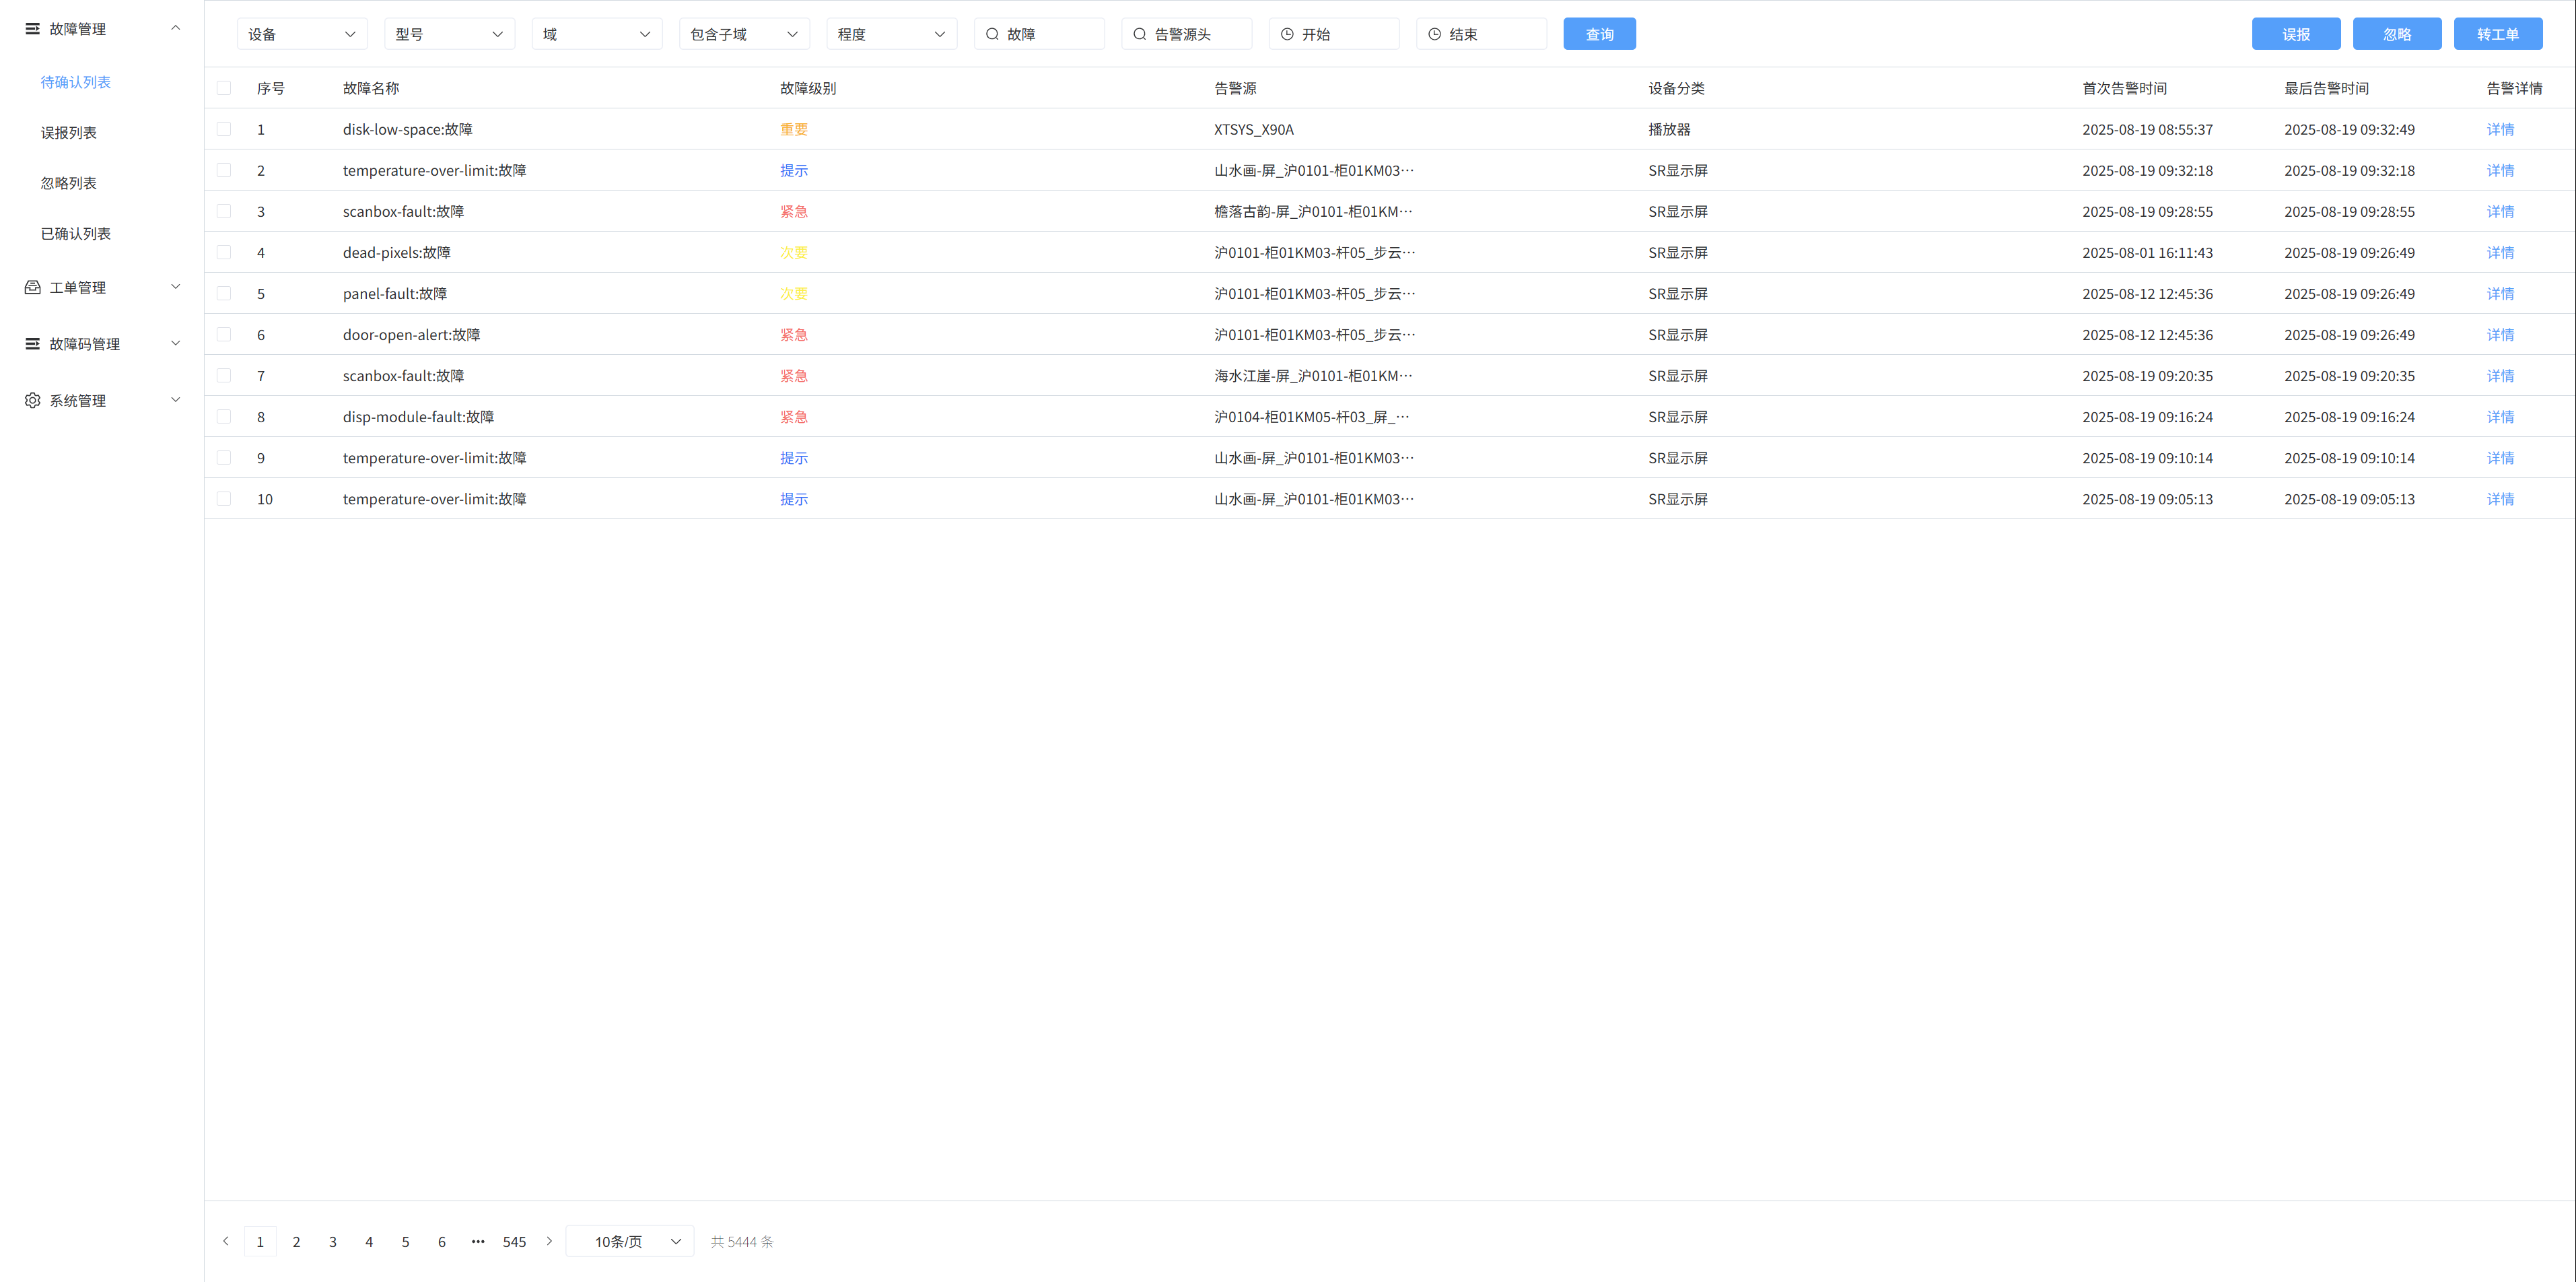
8:Fault Management - Pending List
1. List to be confirmed
The list of pending confirmations shows the faults that need to be addressed
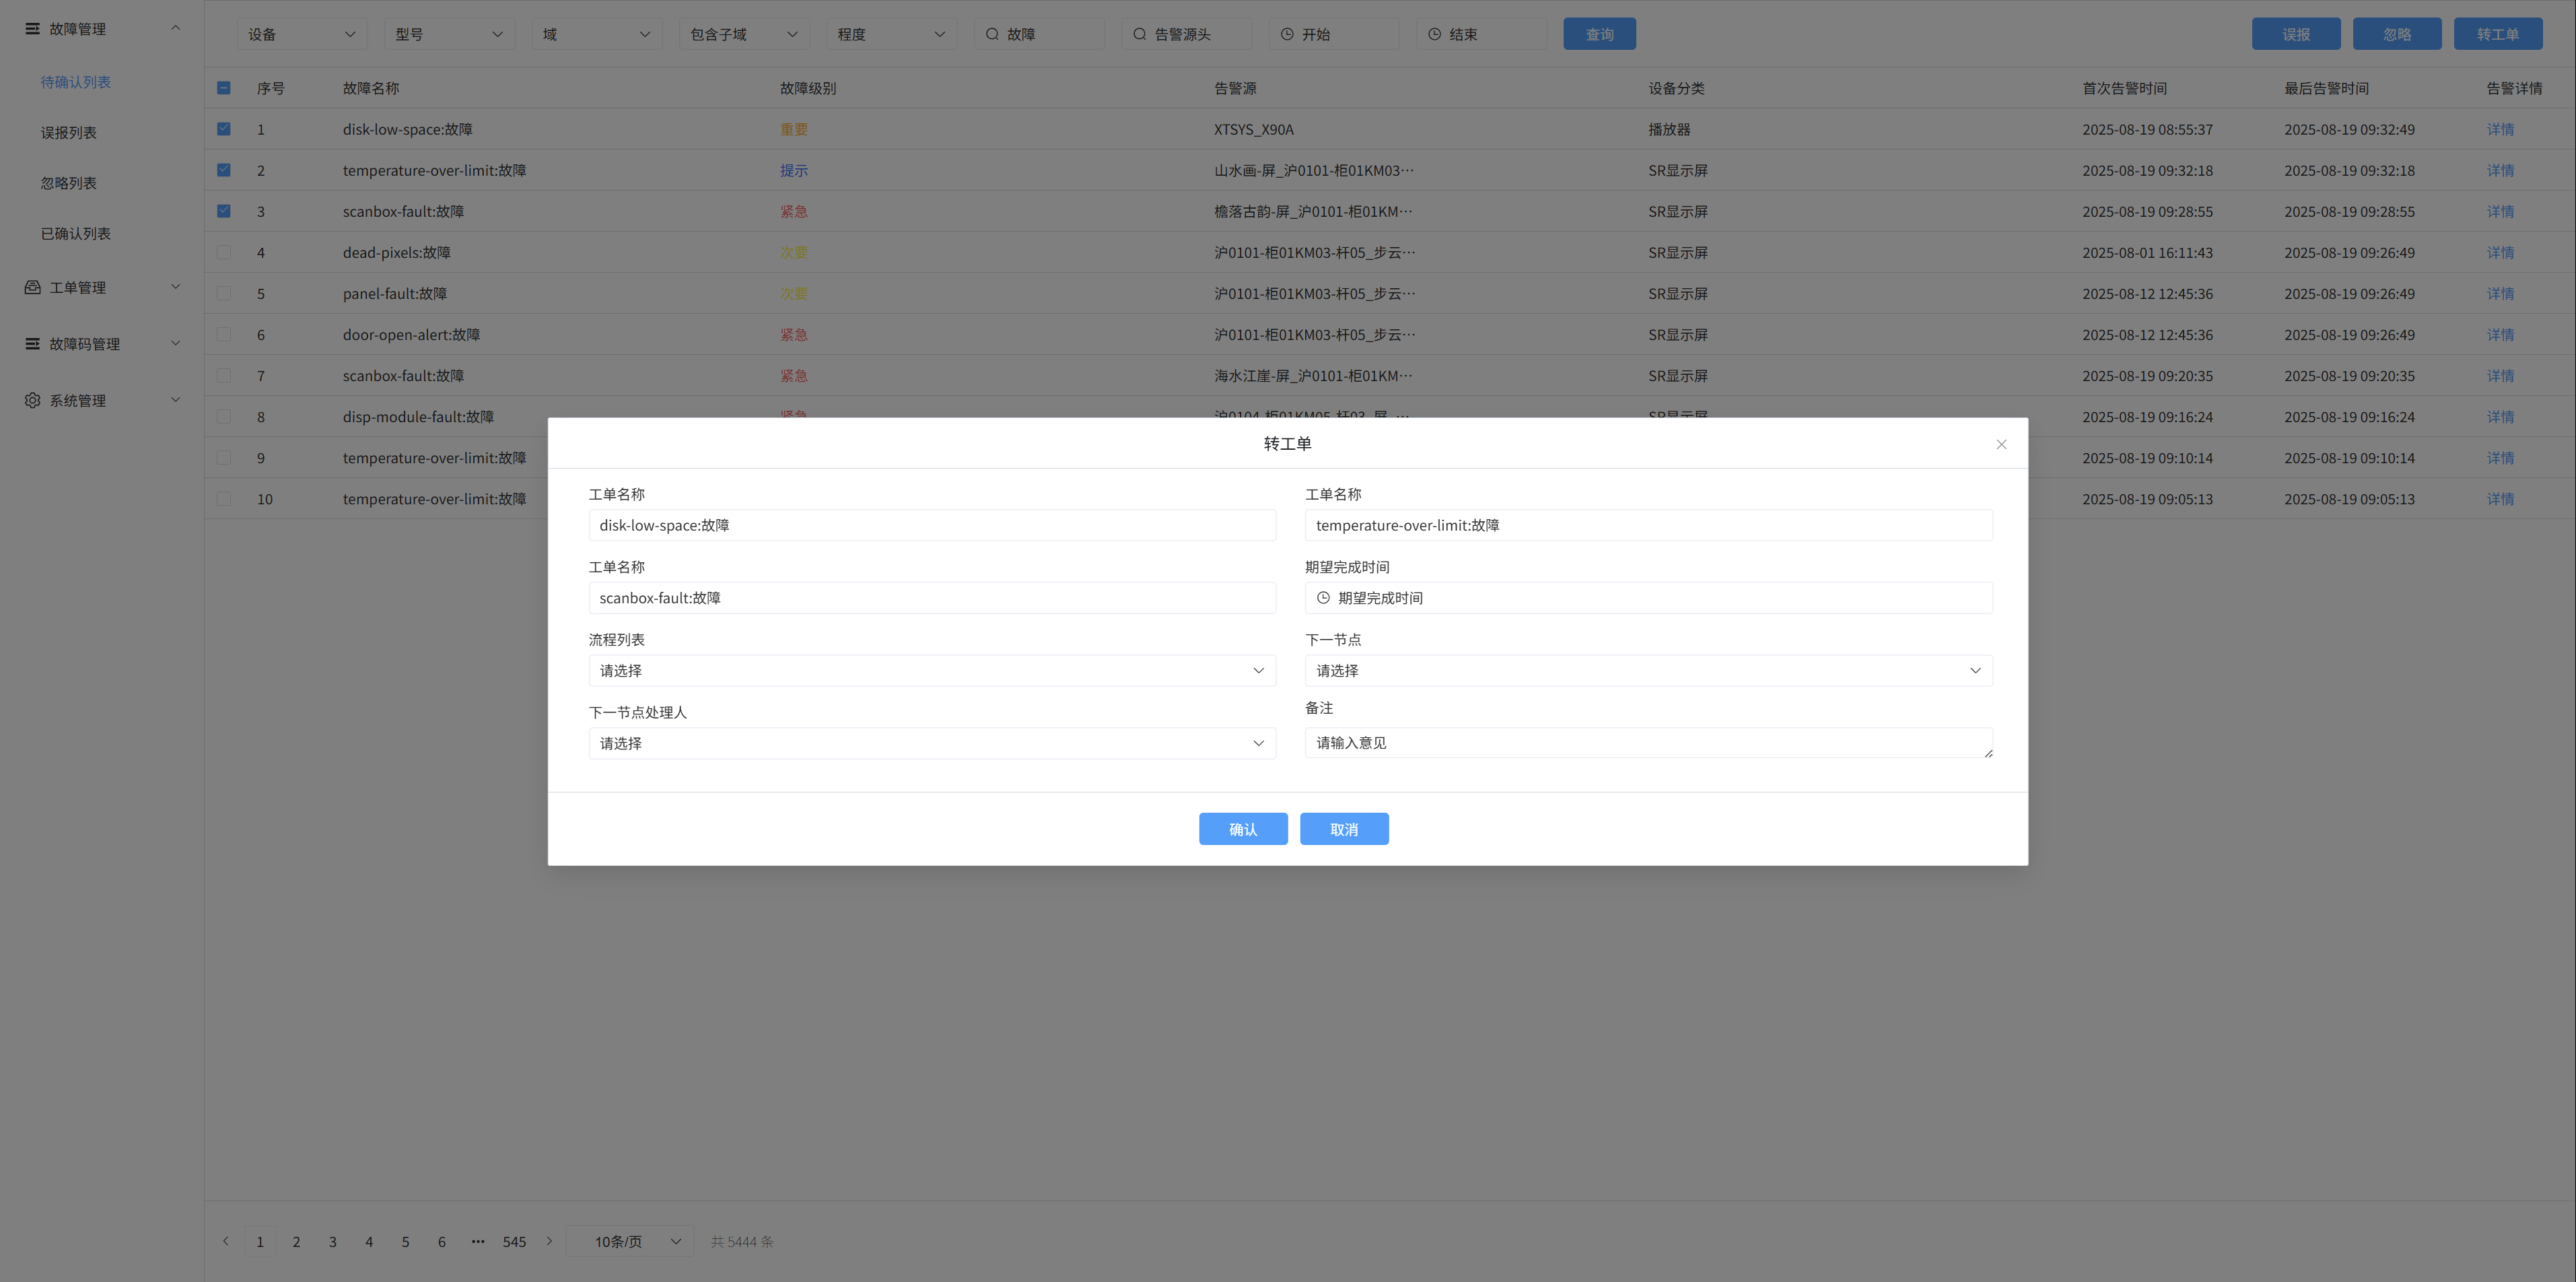
2. Create a new work order
In the list to be confirmed, click the list checkbox on the left, and then click the [Transfer Ticket] button, a pop-up window will appear, enter the ticket name, expected completion time, process list, next node, next node processor, and remarks, and then click Confirm to create a new ticket
3. Fault search
Fuzzy search is carried out according to fault name, device, model, status, domain, urgency, and alarm source
Search based on fault start time and end time
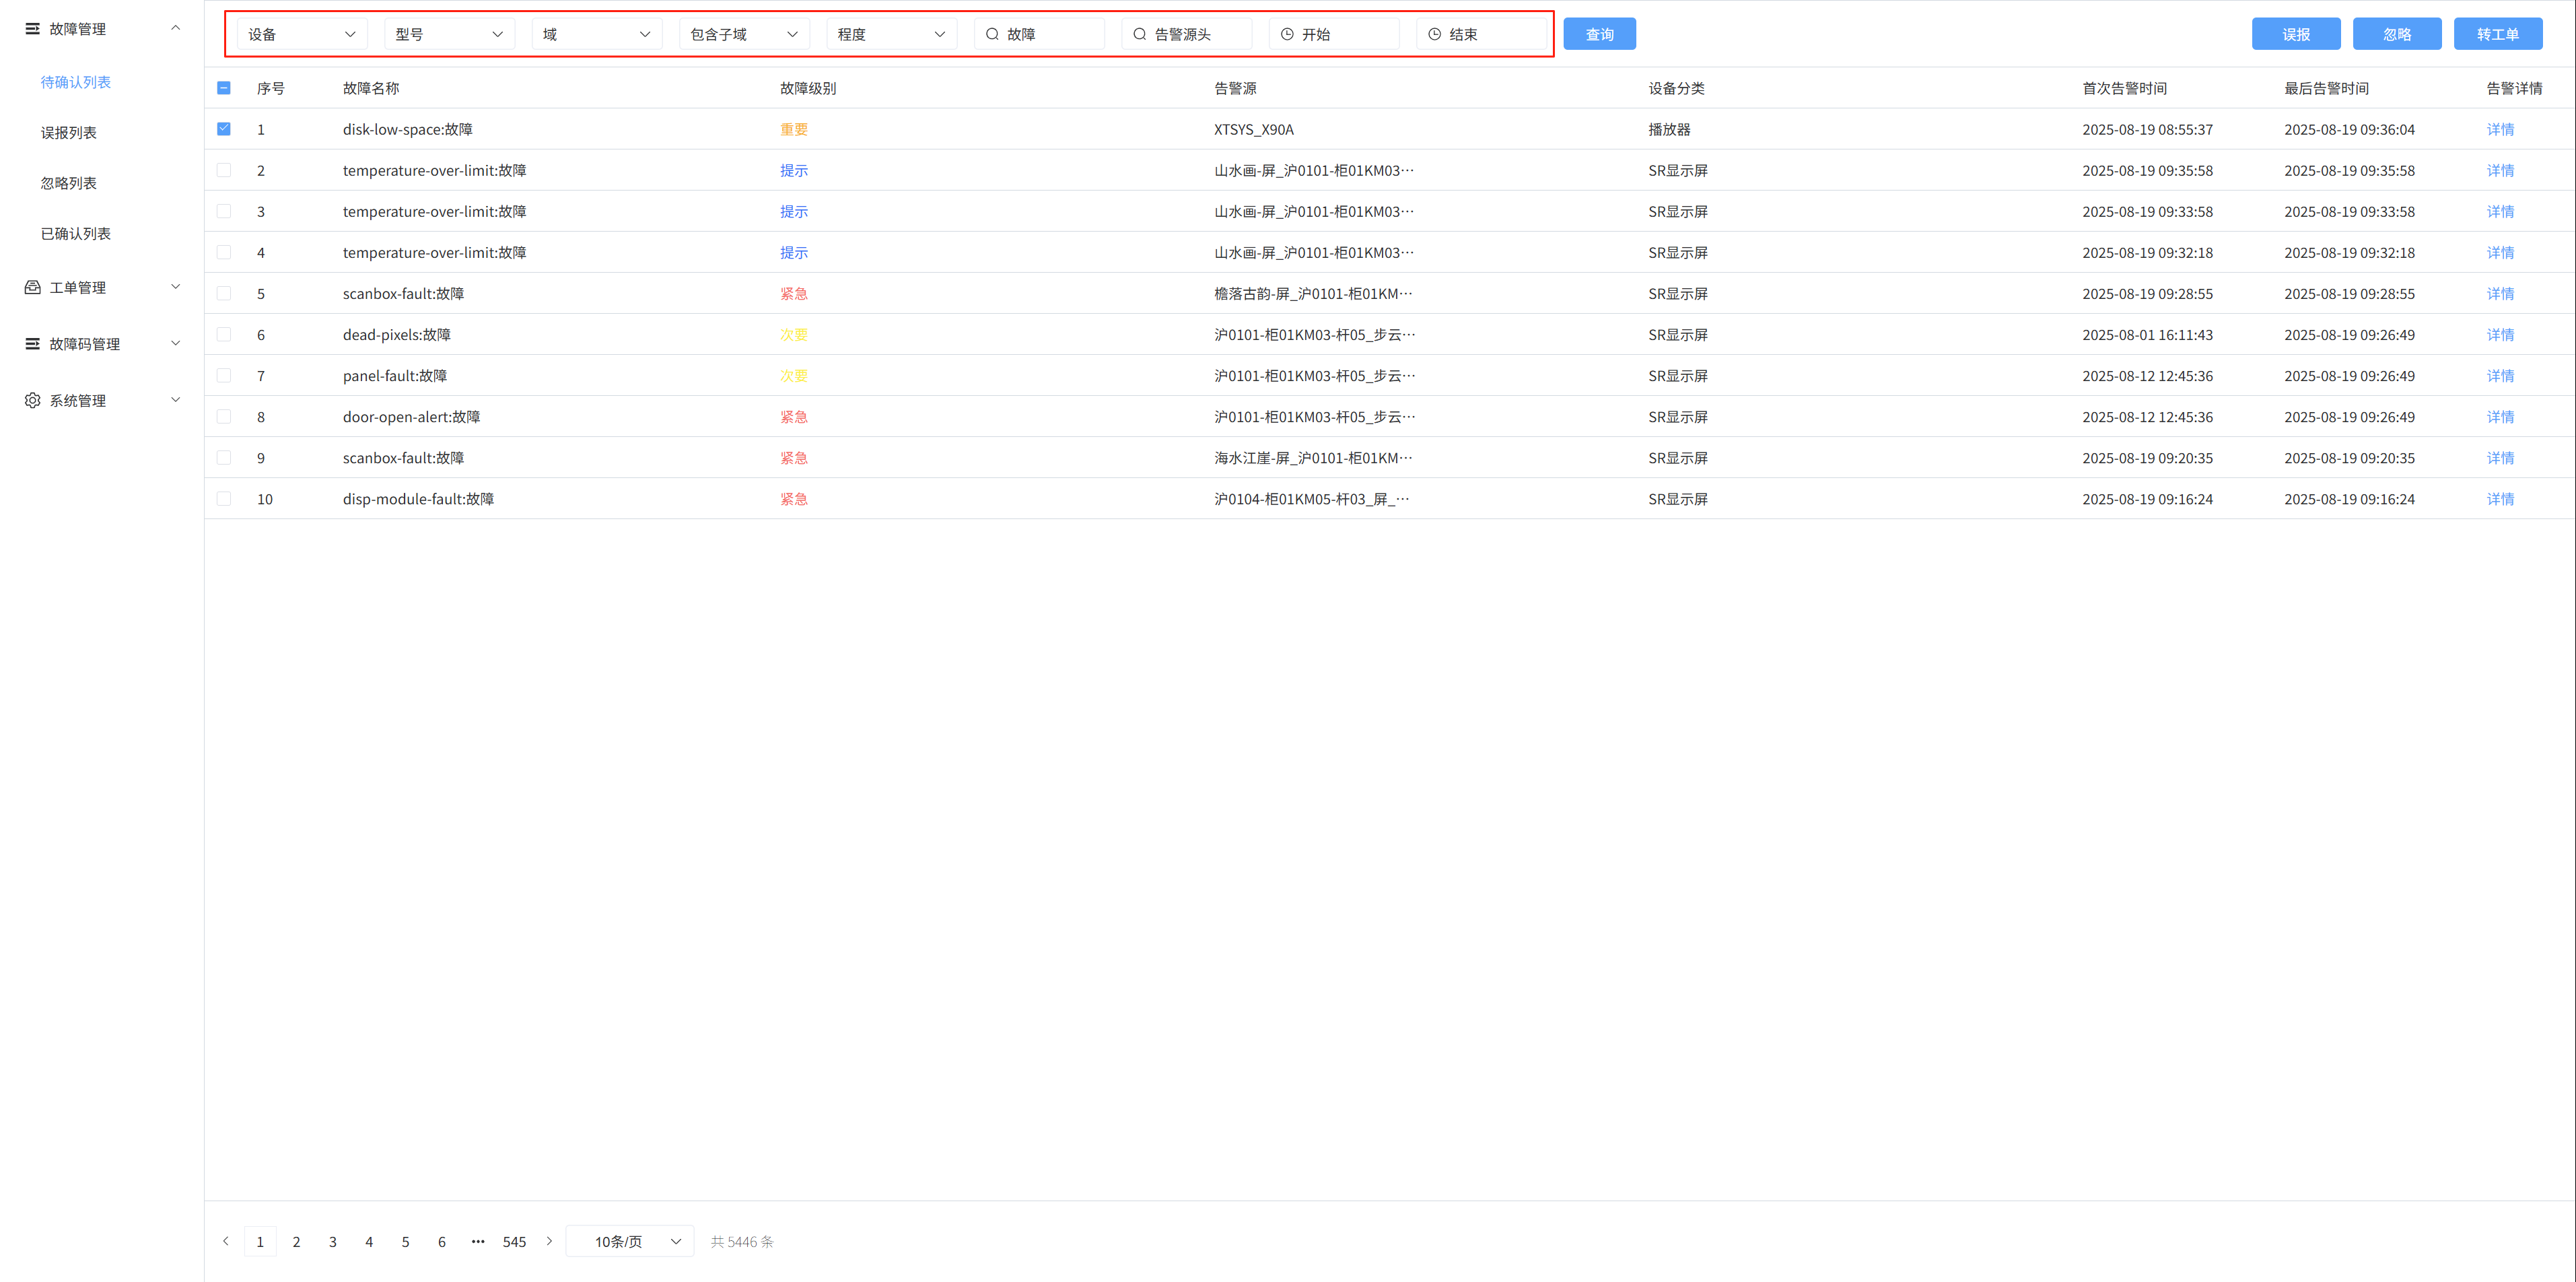
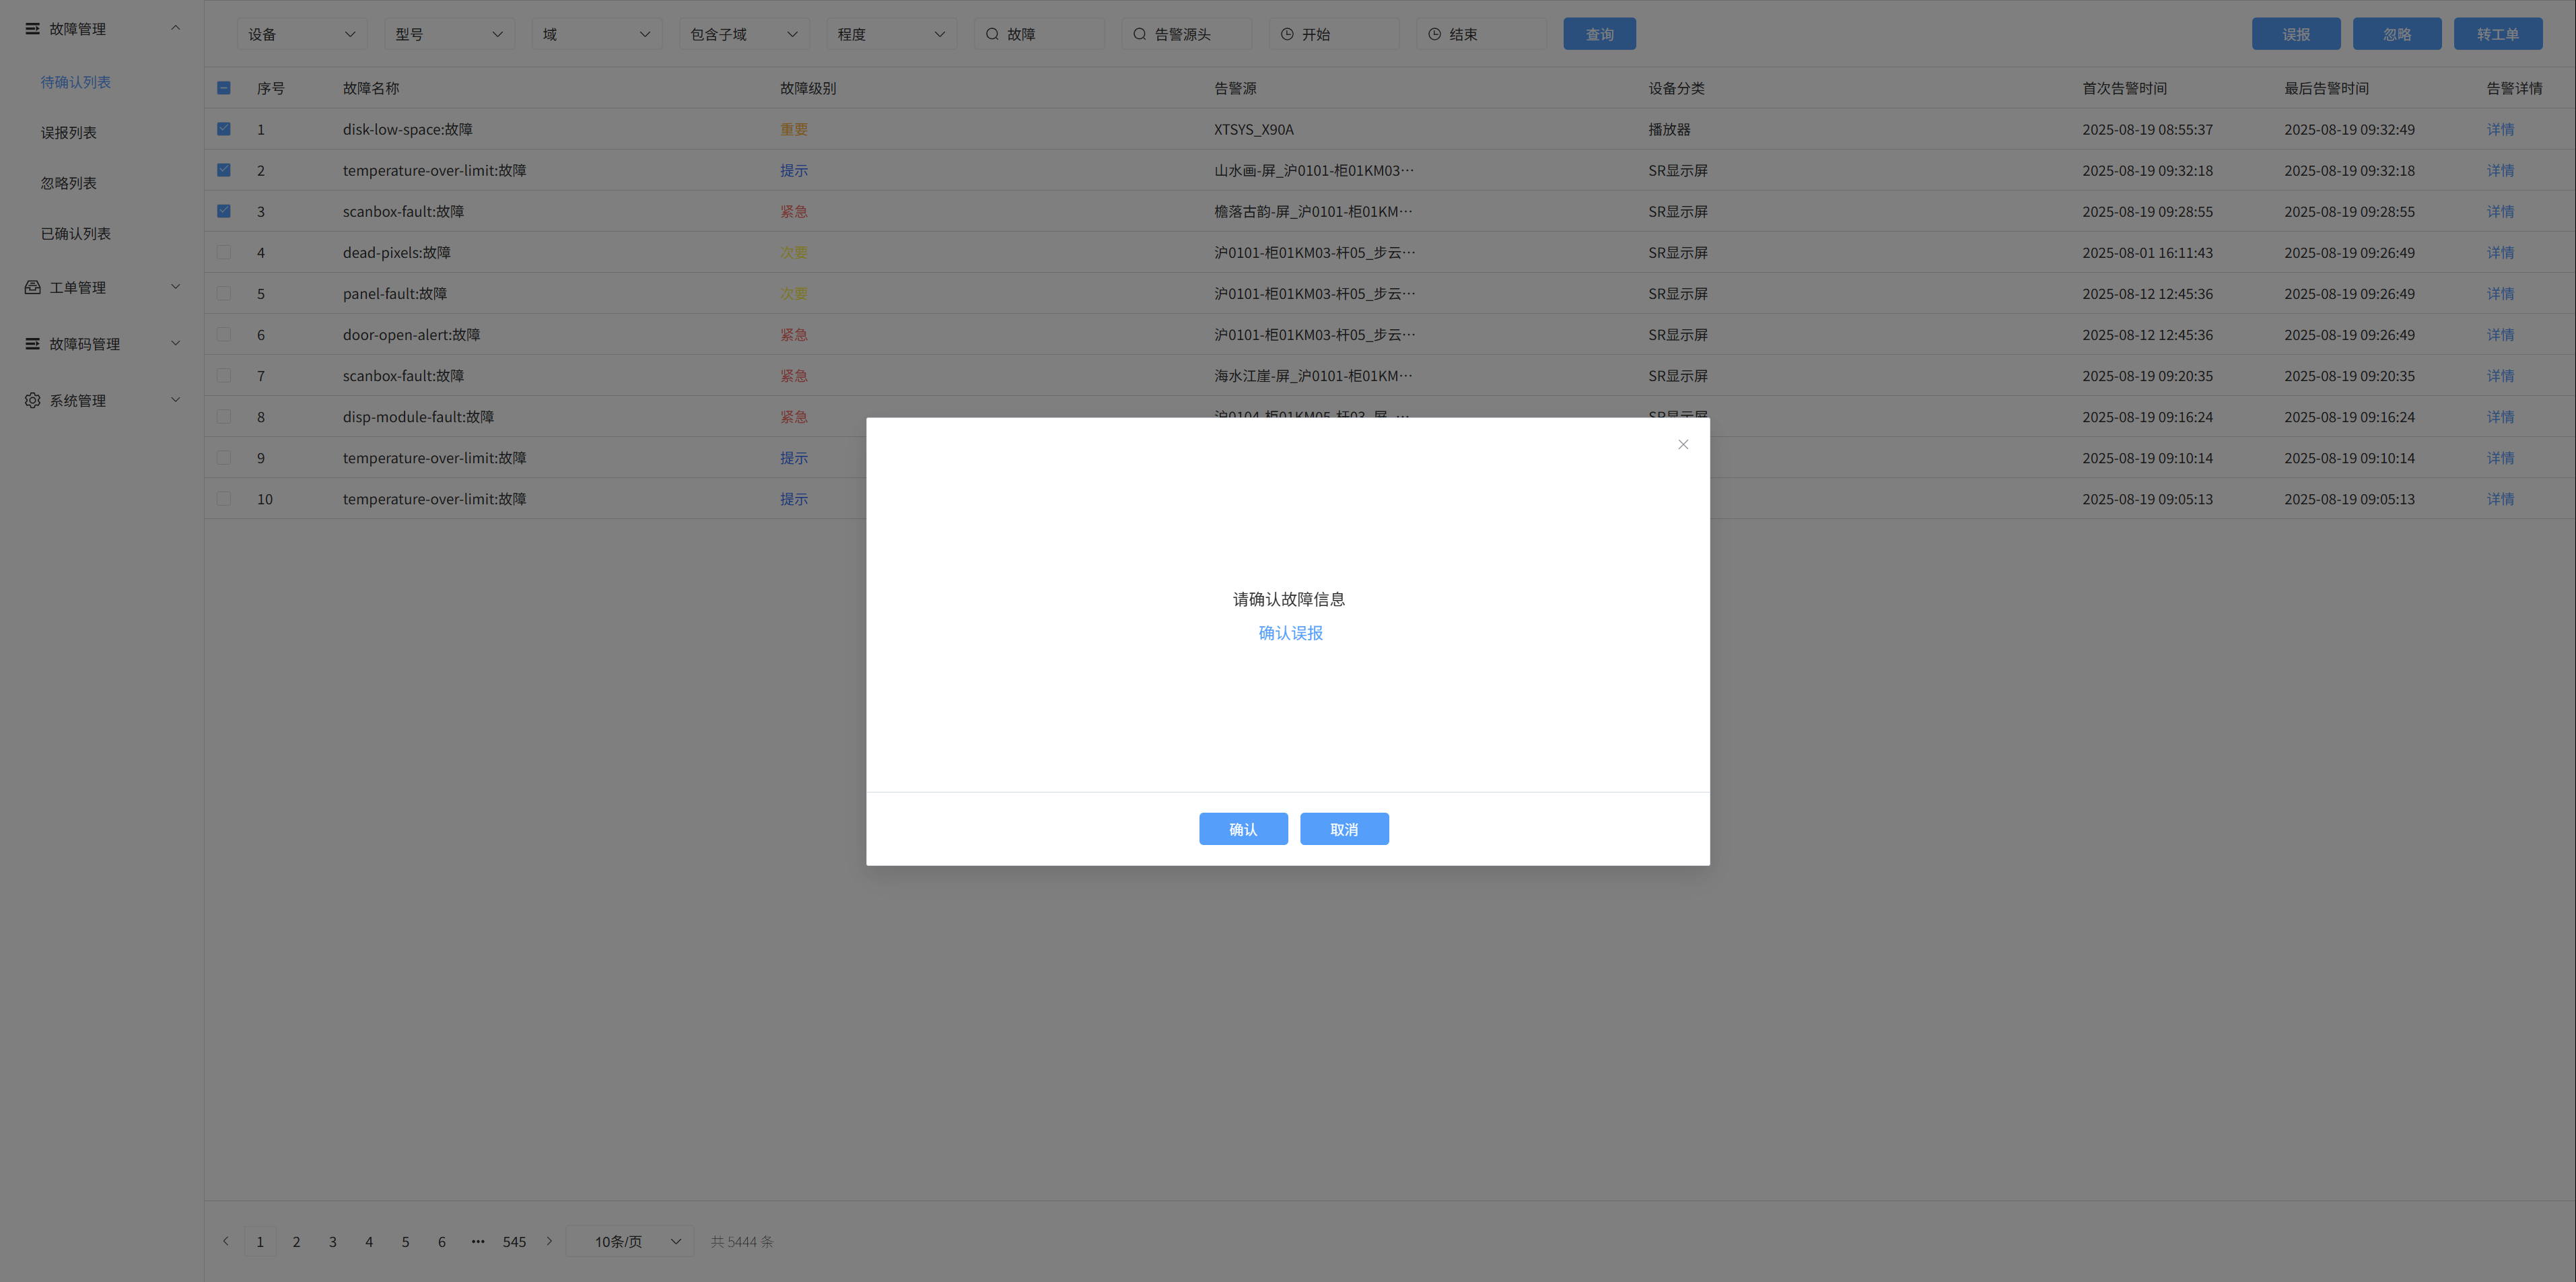
4. Cancel the breakdown
Check the box on the left, and then click the [False Positive/Ignore] button, a pop-up window will appear, and then click Confirm to handle the fault
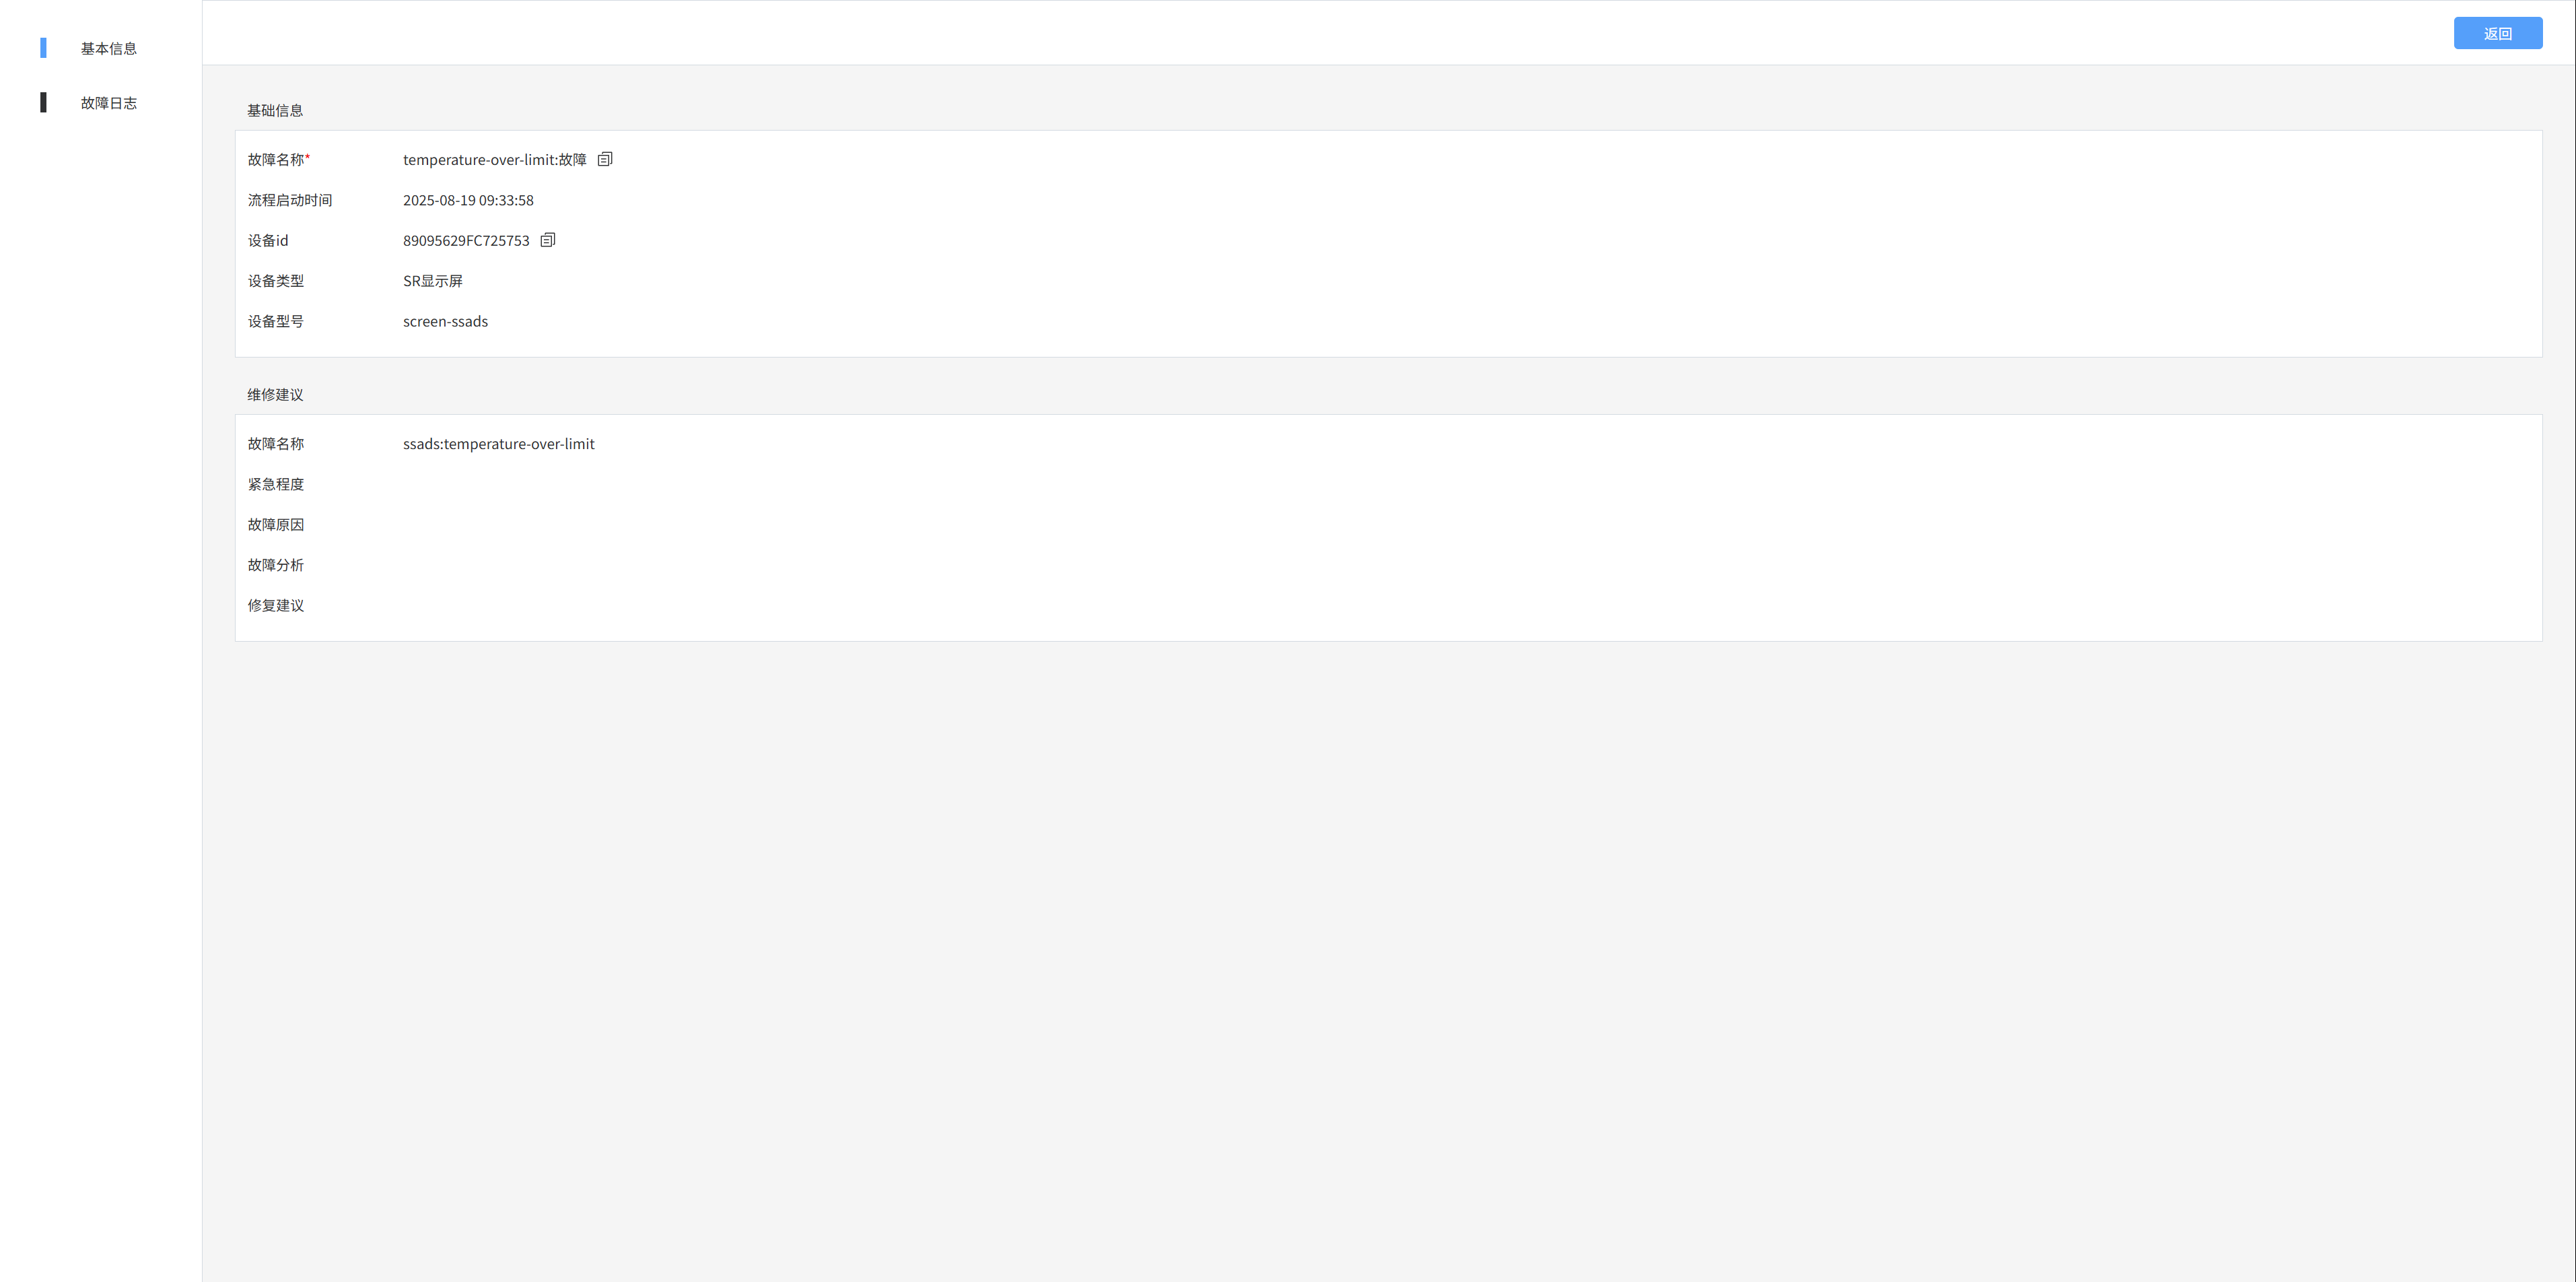
5. Alarm details
Click Details to enter the alarm details page
9: Fault management - false positive list/ignored list/confirmed list
Displays false positives/ignored/confirmed fault information
- False positives: Fault information for false positives that I have handled
- Ignore: Ignored fault information that I have handled
- Confirmed: Information about the fault that I have confirmed